Elevate your videos instantly by adding a lower third—an overlay that delivers key information without distracting from the main footage. With a few clicks, you can give your production a polished, professional look that feels like high‑end editing, all without breaking the bank.
New to video editing? Don’t let the learning curve intimidate you. Intuitive tools like Wondershare Filmora let you create stunning lower thirds in minutes, even if you’re a beginner.
Previously, crafting animated lower thirds required costly software such as Sony Vegas or Final Cut Pro. Filmora’s library of ready‑made, motion‑enabled templates removes that barrier, making the process smoother and faster.
In this guide
- What is a Lower Third?
- Why Add a Lower Third
- 6 Quick Tips to Add a Lower Third
- Step‑by‑Step: Creating a Lower Third in Filmora
- Start Using Lower Thirds Today
1. What is a Lower Third?
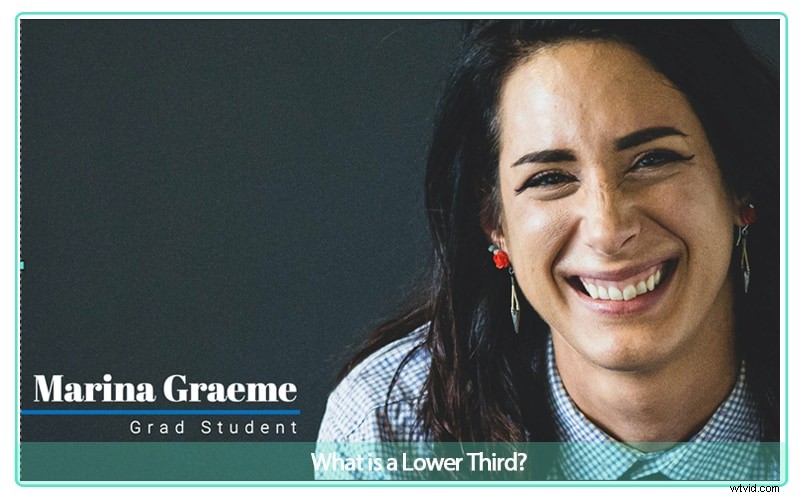
A lower third is a text or graphic overlay placed near the bottom of a frame to convey concise information—such as a speaker’s name, title, or location—without interrupting the visual flow.
Used in news broadcasts, documentaries, and corporate videos, lower thirds deliver context while keeping the viewer’s focus on the action.
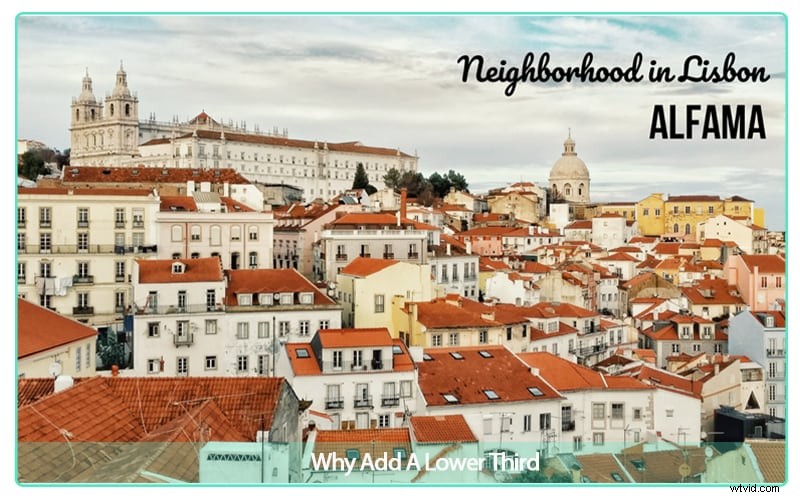
2. Why Add a Lower Third?
Beyond aesthetics, lower thirds serve several practical purposes:
- Identify Speakers: Quickly informs the audience who is speaking.
- Provide Context: Adds location, date, or other relevant details.
- Enhance Professionalism: A well‑designed overlay signals polish and credibility.
Although the name suggests placement in the lower third of the frame, you can position the overlay in any “title‑safe” area to avoid cropping on different devices.
To keep your audience engaged, aim for 3–6 seconds of visibility and ensure the overlay remains within the title‑safe zone so it isn’t trimmed when the video is displayed on various screens.
3. 6 Quick Tips to Add a Lower Third
While the concept is simple, execution matters. Follow these expert guidelines to make your lower thirds effective.
Tip 1: Use a Readable Font
Select a clean, legible typeface that remains readable at a glance. Avoid overly decorative fonts that clutter the message.
Tip 2: Keep It Concise
Limit the text to one or two lines. If you need more detail, consider a title slide or a short subtitle.
Tip 3: Brand Consistency
Incorporate your brand colors and logo to reinforce recognition. Consistent branding builds trust with viewers.
Tip 4: Stick to One Style
Choose a template that matches your project’s tone and save it to your favorites. Consistency across videos avoids visual dissonance.
Tip 5: Simplicity Wins
Less is more—avoid extra graphics or effects that can distract from the core information.
Tip 6: Use the Overlay for Emphasis
When a point in the footage needs clarification, a lower third can highlight the message more effectively than cutting to additional footage.
Filmora offers 43 motion‑enabled lower‑third templates, all of which can be customized for text, color, and timing.
4. Step‑by‑Step: Creating a Lower Third in Filmora
Follow these steps assuming you already know how to start a project and place media on the timeline.
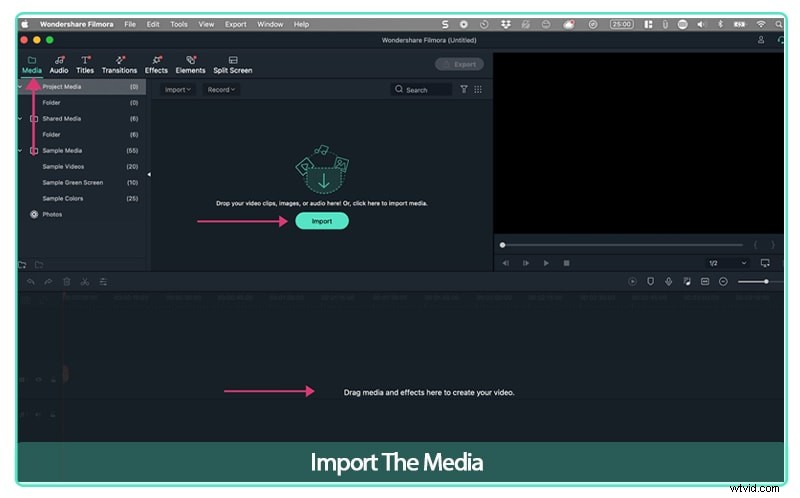
Step 1: Import Your Media
Create a new project, import your video clips, and drag them onto the timeline.
Step 2: Open the Title Menu
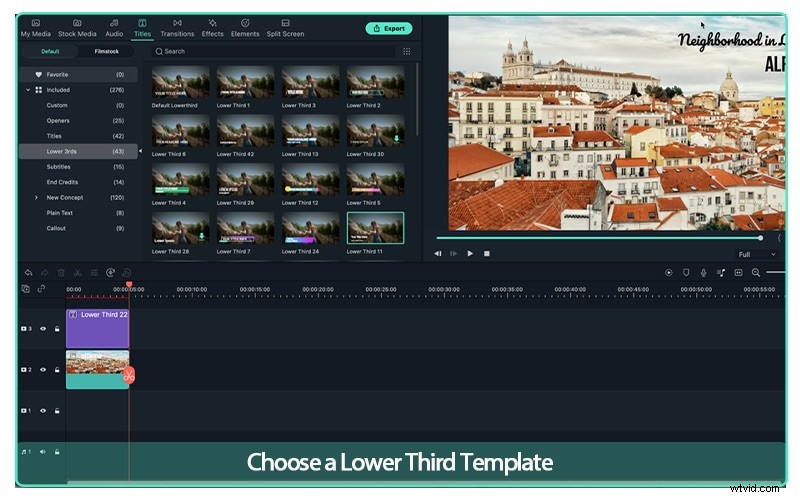
From the top navigation, click Titles. A sidebar will display several categories, including “Lower Thirds.”
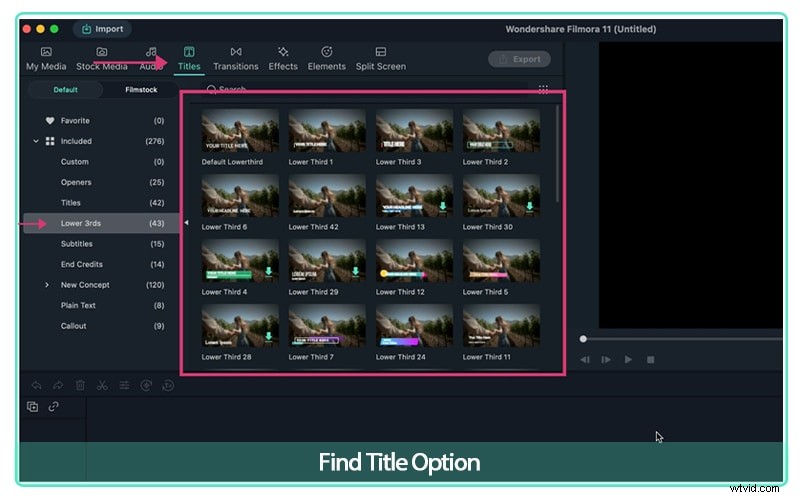
Step 3: Select and Add a Template
Choose a template that complements your brand and the video’s tone. Drag the chosen overlay onto the timeline, positioned above the clip where you want it to appear.
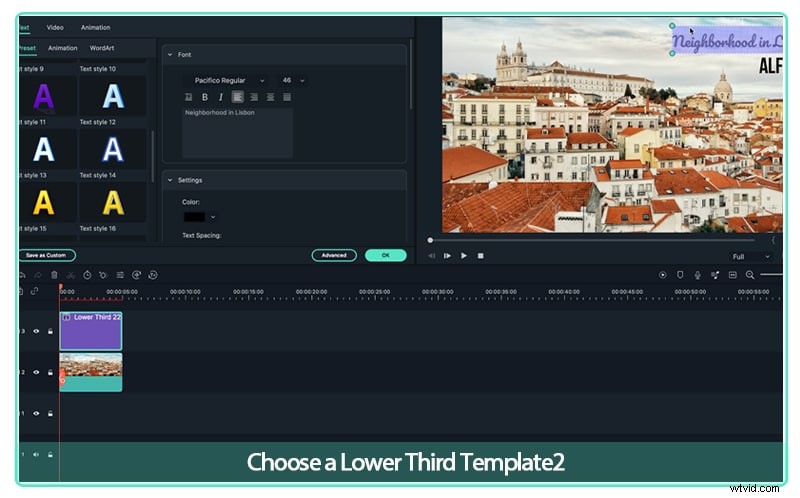
Double‑click the overlay to edit the text. Adjust the font, size, color, and animation speed to match your style.
Remember, a lower third is usually shown only once for a given speaker. Re‑use the same overlay when the same person appears again.
5. Start Using Lower Thirds Today
Whether you’re a novice editor or a seasoned producer, integrating lower thirds can instantly elevate your videos’ credibility and visual appeal.
Try Filmora’s library of templates, experiment with the tips above, and publish your polished footage in no time.
- Filmora’s intuitive interface makes professional‑level editing accessible to everyone.
- Download Filmora today and transform your videos into polished, engaging content.