Follow these steps to export a high-resolution, best-quality QuickTime Movie out of Final Cut Pro X.
If you’re looking to create a high-res master QuickTime file of your film or video project, then FCPX is optimized for just that. Of course, with a variety of high-res export options available, it can be daunting — if not downright confusing — to determine which export settings will yield the best results.
Well, we’re here to help. Here’s the fast, easy way to export a hi-res QuickTime movie out of FCPX.
1. Select the Project You Want to Export
You’ve worked tirelessly to complete your edit, and now it’s time to export. First, open up your project library view with the shortcut COMMAND + 0. Then, select the project you would like to export.
2. Open the Export Window
You’ve got some options here. Here are three of the easiest ways to start your export.
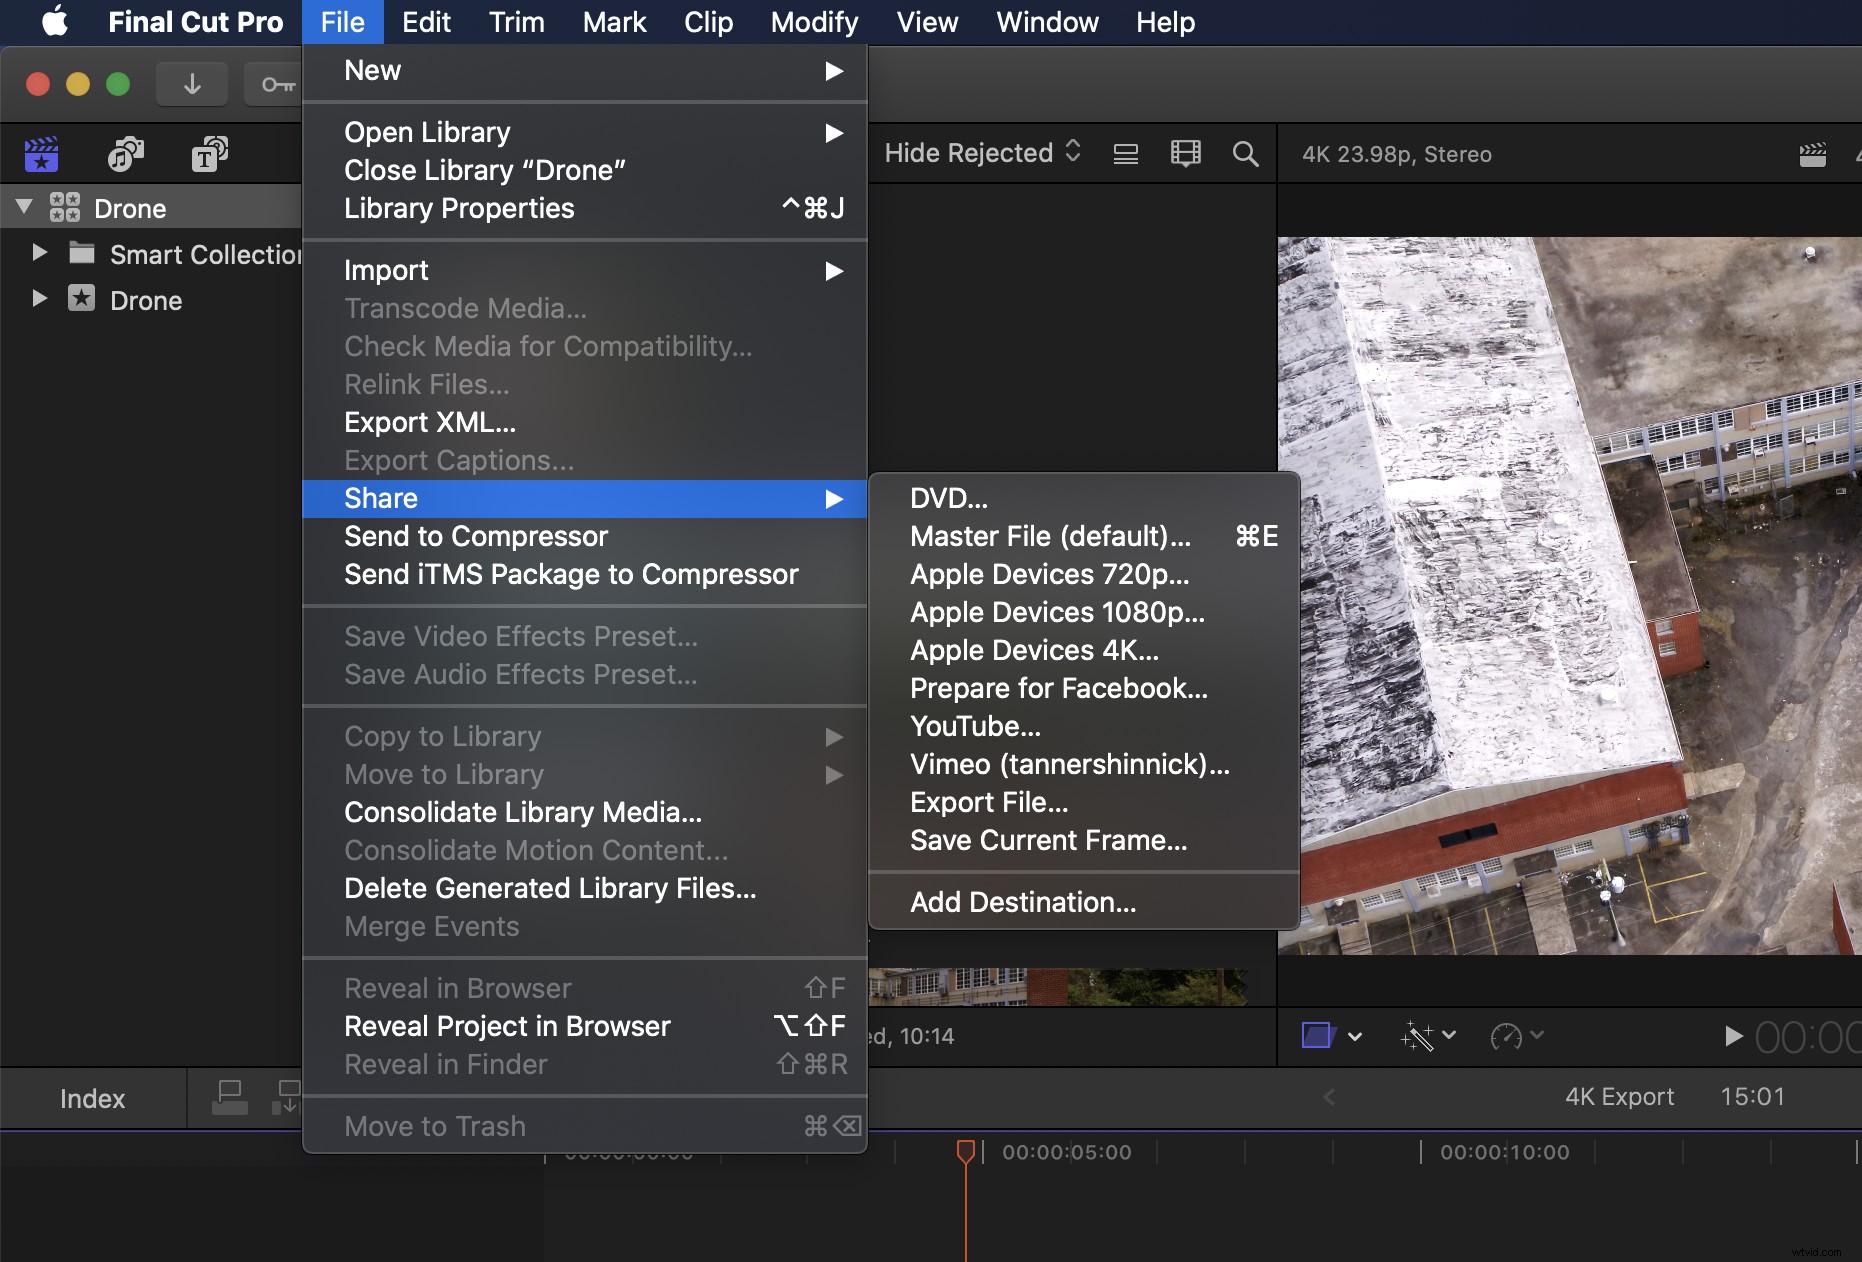
The first option — use the shortcut COMMAND + E to open up the Export window. The second option — choose File > Share > Master File (Default) in the menu bar.
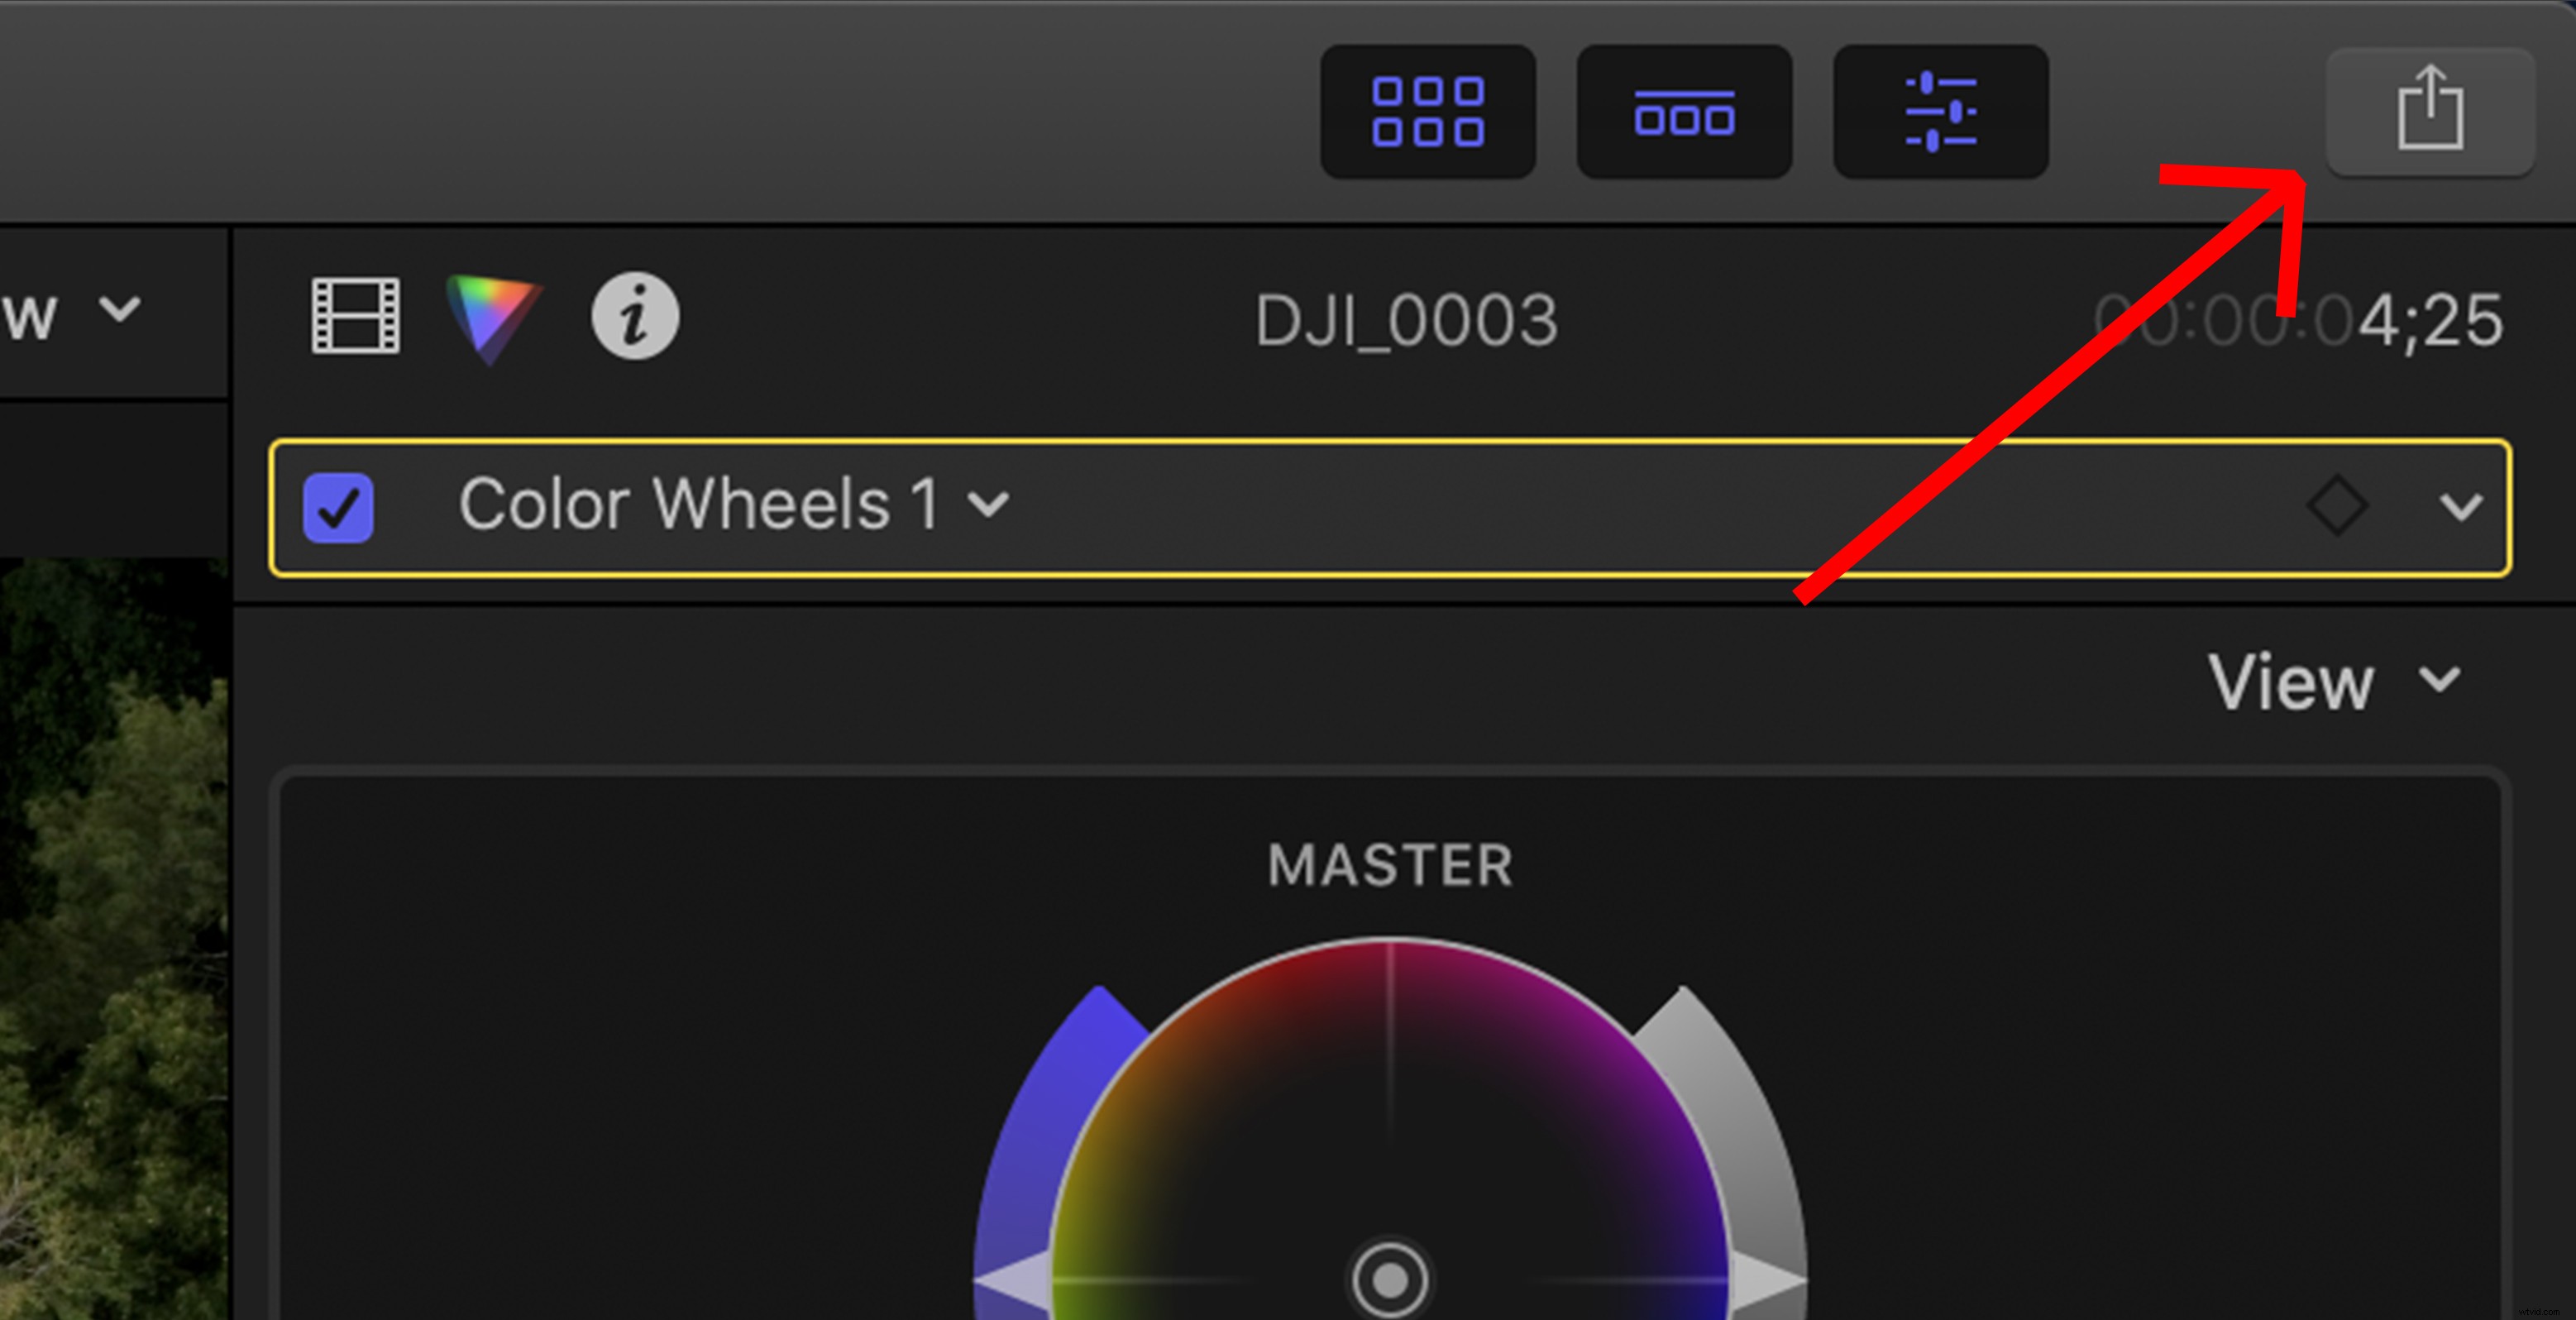
The third approach — my personal favorite, shown below — simply click the export icon at the top right of the program, and choose your export method. For all of the options we just looked at, we’ll select Master File.
3. Choose Export Settings
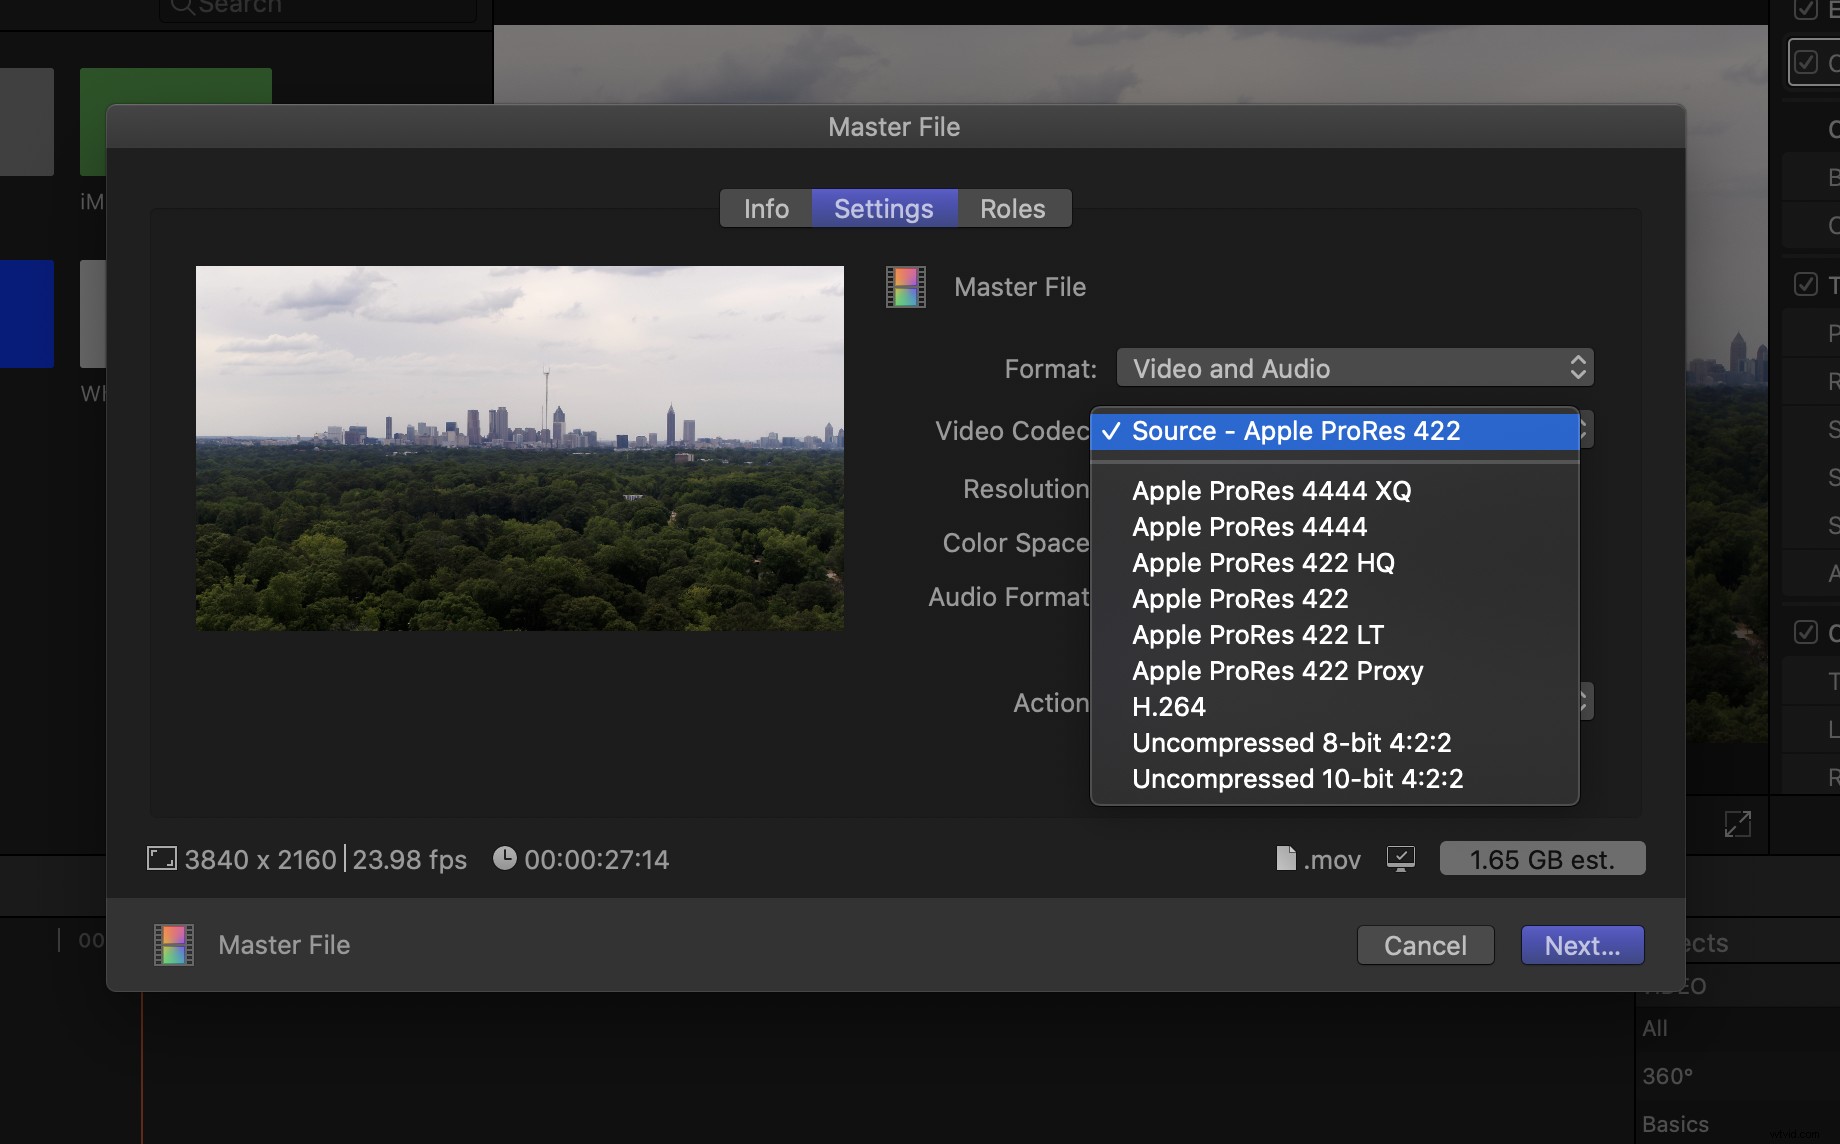
In the dialogue box, you can choose to export using your Current Settings or select another codec. Since our project and footage was shot in ProRes 422, we’ll remain within this codec.
You can export all the way up to ProRes 4444 XQ if desired, but the file size will be large. If file size is of concern, then high-res H.264 QuickTime is a solid, built-in option.
Next, choose what you would like FCPX to do with the file after export. Although we’re not in Compressor today, you can put the file in a Compressor batch where it can be encoded into a much wider variety of formats and codecs (you must have purchased and installed Compressor for this to work).
If you’re simply looking for a high-res QuickTime video, the built-in options in FCPX are perfect.
4. Select File Destination
To select your file destination, click Next and choose where you would like the file to be saved — Desktop, external drive, etc. Find your destination, click Save, and let the export begin!
Once the export is complete, you’ll get a pop-up. Click Show to view your export. You’re good to go!
A Note on Compressor
FCPX has really opened up its abilities with encoding options within the native program. Most of the solutions to your exporting codec needs are built right in.
However, if your exporting needs are a little more complex (batch exports, HDR, etc.), then it may be worth investing in a copy of Compressor to open up those abilities. Compressor gives you more options to really fine tune your export and codecs utilized.
Tips for Learning How to Edit in FCPX
Now that you have a foundation for the basics of exporting your video, learn even more editing tricks in this tutorial by Shutterstock Tutorials. Whether it’s color grading, timeline organization, or just basic functionality, learning more about the software you use is always a smart move.
Exporting from Premiere or Resolve
Remember, you can export high-quality files from most NLEs. If you’re working in Premiere or Resolve, be sure to check out our other articles — and videos like the one above — for tips on exporting a high-res file with those programs.