Let’s dive into one of the fundamentals of Final Cut Pro X — how to add and modify video transitions in the FCPX timeline.
Over the years, Final Cut Pro X has established itself as an editing powerhouse, and one of the things it does best is transitions. Whether they’re smooth and subtle or glaring and glitchy, transitions are a powerful way to make an impression on viewers. Here’s a few ways to apply them to your footage in FCPX.
What Are FCPX Transitions?
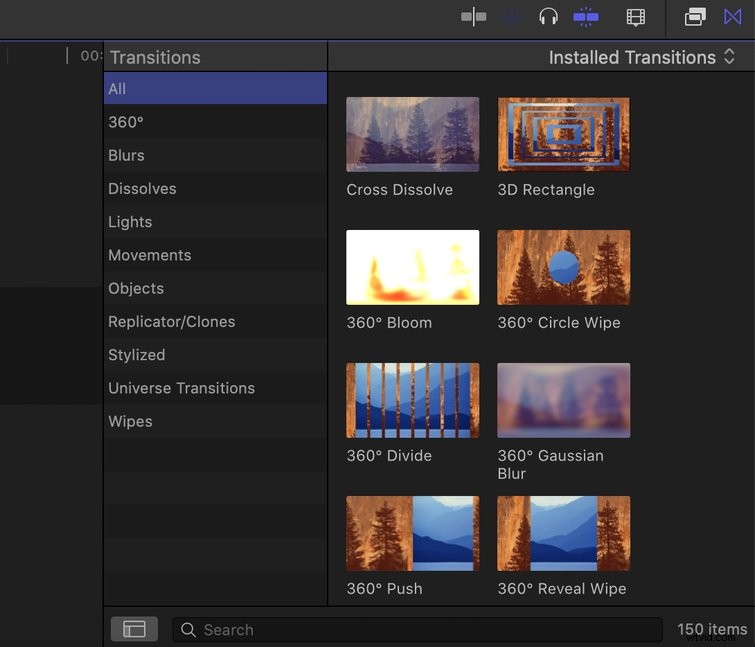
Simply put, transitions give you the ability to smoothly edit two clips together — and FCPX gives you 150 native, built-in ways to do them. (If 150 isn’t enough, here’s a free pack with a few more!)
Let’s take a look at how to apply transitions in FCPX. We’ll use the cross dissolve — probably the best known and most widely utilized transition in film and video — as an example.
Apply Transitions with a Shortcut

- Click on the cut between two video clips.
- The clips must be touching in order for the transition to be applied directly between the media. The magnetic timeline is the perfect tool to ensure this remains constant.
- The shortcut Command + T will apply the default transition. (Cross dissolve is Final Cut Pro X’s default transition, by the way.)
Apply Transitions from the Browser
- From the media toolbar, click the Transitions icon. It’s a shaded box with an X.
- Select any transition from the browser and simply drag it onto the timeline.
- Place the transition between two video clips.
- Head to the Inspector window to fine-tune as needed.
Apply a Transition from the Menu Bar (Cross Dissolve Only)
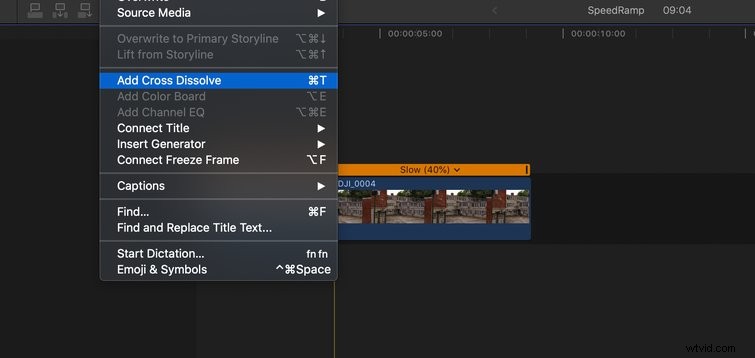
You can also apply cross dissolve from the Menu bar. Here’s how to do it.
- Click on the cut between two clips.
- From the Menu bar, choose Edit > Add Cross Dissolve.
Okay, you’ve got your transition in the timeline. So, now what? Well, Final Cut Pro X gives you several ways to change the duration of any video transition, whether you work best with the keyboard or mouse.
Activate Duration Box

Use any of the following methods to activate the Duration box.
- Right-click the transition in the timeline, and choose Change Duration.
- Select the transition in the timeline, and use the shortcut Control + D. (Just remember “control the duration.”)
- Select the transition in the timeline, then double-click the Timecode box to change it to the Duration box.
- Now, type in the new duration, which is counted by frames. For example, if you have a 24fps project and you want the transition to last for one second, you would type 24. Hit enter to make the change.
Change the Duration Manually
If you wish to change the duration of your transition, hover over one of its endpoints and simply drag it out or drag it in. If you don’t like the placement of the transition and want to move it down the timeline, hover over the middle of the transition, click it, and then drag it to the new placement.
Blending Modes
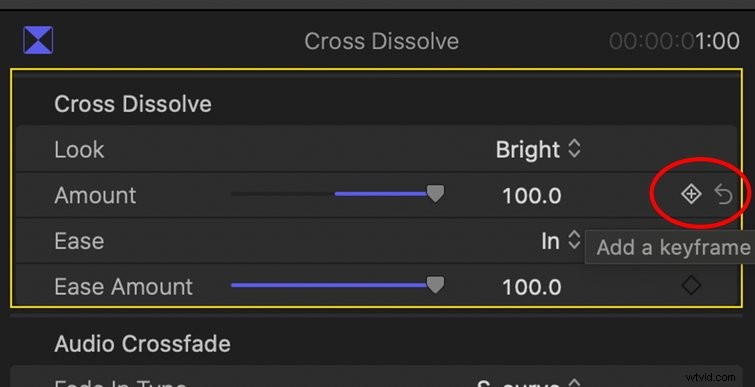
FCPX’s blending modes offer an easy way to turn this classic transition into something unique. The default blending mode is video, but there are a variety of options — Film, Subtractive, Bright, or Warm. Each of these options has its own look. To take advantage of these functions, apply the transition and pop open the Inspector panel to dig in — the Inspector can be opened (or closed) with the shortcut Command + 4. From here, you can experiment with the different blending modes to find just the right look.
If you really want more control over your cross dissolve and its amount, you can utilize keyframes right in the Inspector window. This is how you really dial in exactly how you want things to look.
Now, let’s transition into a few more blog posts about transitions:
- How to Zoom in Premiere Pro for Simple Transitions
- The 7 Best Premiere Pro Free Transition Template Packs for Video Editors
- Make Your Cuts Shine with Royalty-Free Transition Music
- Video Tutorial: How to Create a Seamless Foreground Transition