There are so many situations in our life when we wish to go back in past and change things for better scope; sadly, life does not provide that option in real. But there is an option to rewind or reverse things in the world of video editing as here one can easily make time fly backward and view things for fun. Before you start using the skills and tools for editing videos to create such a beautiful effect, it is good to go through few important terms.
The information above provides just basic information about Final Cut Pro X software tool of Apple platform. It serves like a professional editing tool for videos with its incredible features but if you are a beginner to this video editing platform then it is better to use Wondershare Filmora for Mac. You will be glad to know that Wondershare Filmora contains all quality features for video editing needs with its easy to operate user interface. You can download the trial version of this software tool from official website.


You May Also Like: How to Reverse videos in Adobe Premiere Pro >>
Difference between Rewind and Reverse:
Reverse:
The word reverse as the name reflects, means that we can play a video from its end towards the initial position. Yes, it is possible to reverse the order of video frames in order to arrange them in such a way that last frame appears first following the reverse sequence so that first frame goes to the last position in the clip.
Rewind:
On the other side rewind is also an interesting feature for video editing where users simply duplicate the clip in form of a segment or make adjustments over range selection and then rewind that particular segment at a speed many times faster than the original speed of clip. After this they play segment of original clip in normal speed towards forward direction.
Although it is possible to get the rewind effect in videos with simple reverse option but still Apple platform supports both of these as standalone options.
How to reverse a clip in Final Cut Pro
You might have heard about Retiming effect in videos where we either speed up our clip or slow it down by certain time factor so that a desired effect can be achieved. There are two types of retiming effects: Variable speed type and constant speed format. FCP is capable enough to merge the reverse option with retiming effects so that something innovative can be developed even with simple editing efforts.
Step 1:
First of all go to timeline and then select the desired clip from your collection that you want to reverse. It is also possible to apply this effect on a group of clips as per need.
Step 2:
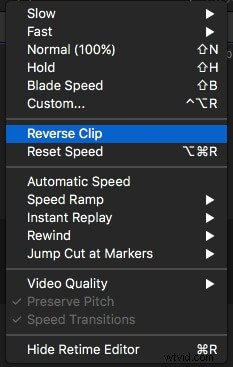
Now you need to go to the pop up menu where an option for reverse the clip is available in form of an arrow pointing towards left direction.
Hit that reverse option.
Step 3:
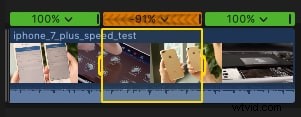
In case if you want to customize speed of reversed clip then use retiming handle and drag it to right or left as per need of decreasing or increasing the clip speed.

Step 4:
Now hit the play option to view video with reverse effect.
How to Rewind Videos using Final Cut Pro
On Apple platform you can also Rewind videos clips as per need. This option is mostly utilized for action sequences as well as for sports.
Step 1:
Go to timeline and select clips that you want to rewind.
Step 2:
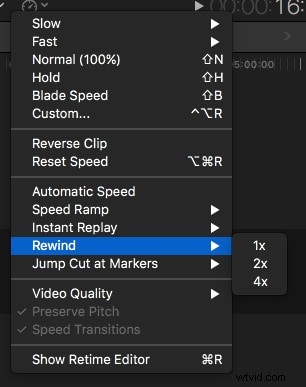
Now from pop-up menu select rewind option and choose desired speed limit for this action.
Step 3:
Drag the retiming handler to adjust the speed as per need.
Step 4:
Play the clip to view editing effects.
An Easier Way to Reverse A Video in Filmora
Filmora Video Editor is a free video editing program for reversing videos that is simple to use. It lets users publish their movies to the internet, as well as produce new ones and modify old ones. The procedures for reversing films in Filmora are simple and straightforward, so you may follow them without difficulty.
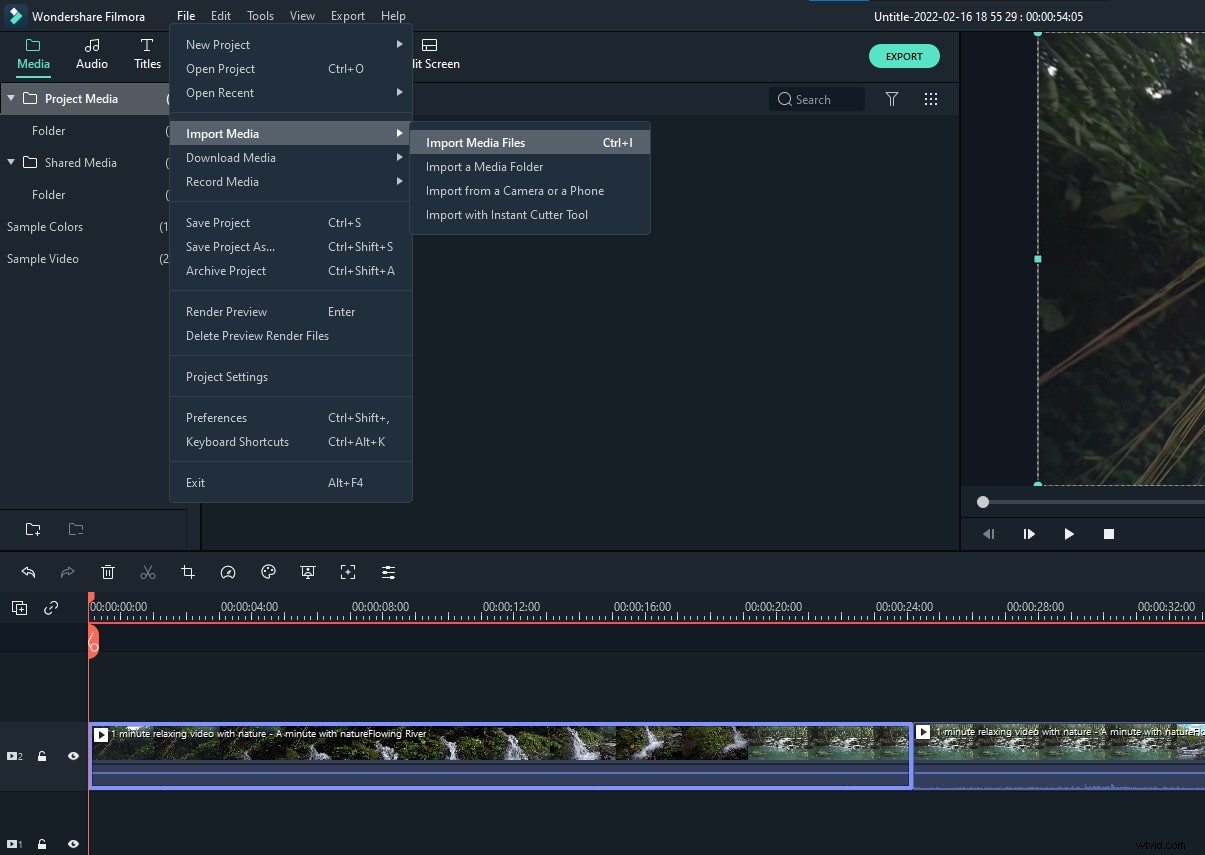
Step 1: To upload a video, first click "Import." You may also simply drag and drop media files into the Media Library, and they will display on the preview/program monitor. You may see your videos in waveform display and Vectorscope format after you've added them to the timeline. You may also watch a live filmstrip preview to see what's going on in the video.
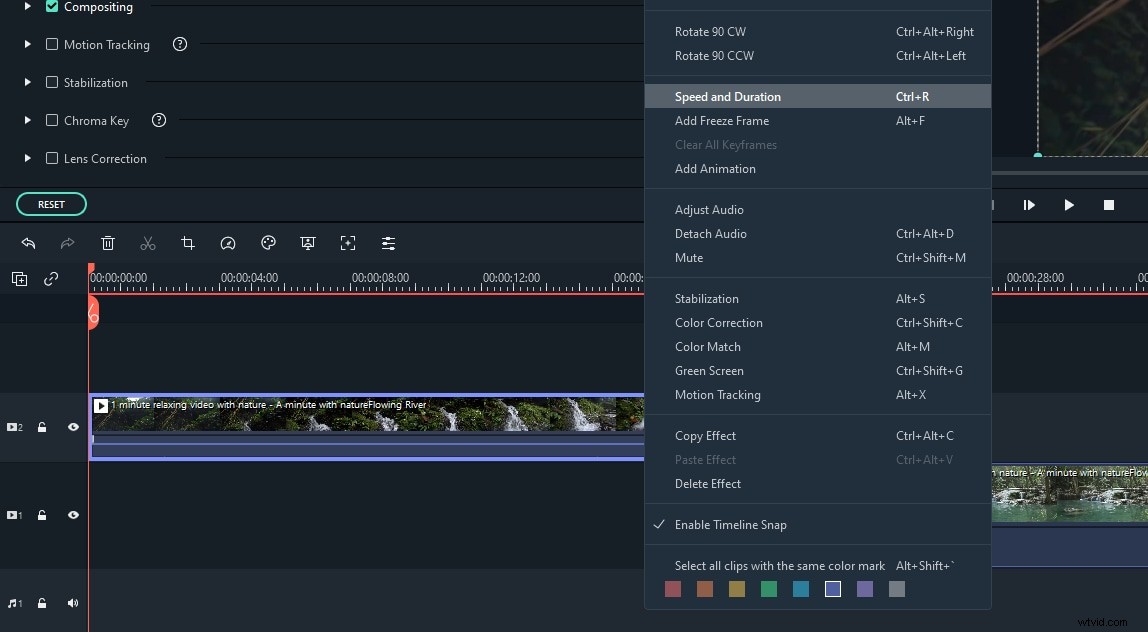
Step 2: Place the video on the video track by dragging and dropping it. You may select Speed and Duration by right-clicking it on the track. Then, on the Custom Speed panel, enable the Reverse Speed option. You may also select Reverse by clicking the Speed symbol in the toolbar.

Step 3: Click “Export” to save your file.