The truth is that a ripple edit can be a particularly useful tool in video as well as in audio editing. However, it’s one of the things that you want to be very careful with unless you want to make a complete mess out of your video or audio. Quite commonly, when you have a few different items stacked in a track, you would want to maintain the spacing which is kept between each and items. This is going to be very hard if you go ahead and delete one of the items which are located right in the middle of the track without having enabled ripple editing.
This is going to leave an enormous gap at the place where the track that you deleted used to be. A ripple edit tool is going to allow you to maintain the spacing even though you’ve deleted the track. Basically, if you delete something from the middle of the track, all of the items which are conveniently placed on the right side are going to automatically move to the left in order to fill in for the gap and maintain the particular and necessary timing relationship between the tracks.
So, in simple terms, that’s what a ripple edit tool is going to do for you – it also works the other way around. You can add certain tracks which wouldn’t mess up the timeline of the entire sequence. It’s convenient and appropriate, and a must have if you are into editing professionally. All seems pretty fair and advantageous but how to actually apply ripple editing on a certain project. If that’s what’s been bothering you, rest assured that you’ve stumbled upon the right place.
How to Use the Ripple Edit
Step 1 Download a useful video editor with ripple editing feature
The first thing that you would need is comprehensive software. For this matter, we recommend using something rather simplistic which wouldn’t be overly burdensome. Wondershare Filmora manages to fill this spot quite conveniently, and the reasons are various. Let’s go through a few quick benefits of this particular tool.
- It’s very prominent yet at the same time particularly easy to use video editor. It allows you to ripple edit video clips without having to be a professional.
- It features a wide range of tools like trim, rotate, cut, and reverse in any single position and many of the kind.
- Furthermore, it has an advanced tuning tool for colors which is specifically designated to properly enhance the quality of your video by thoroughly adjusting saturation, balance, contrast as well as the hue of your video.
- You can make your video entirely polished with different texts, elements, and transitions.
- You can also freely share your work on a variety of social platforms or upload it to your mobile device, DVD or whatnot.
Step 2 Drag and drop your video clips into the timeline
Now that you’ve downloaded the necessary tool, you need to drag and drop the video clip in the specific timeline which is designated in Wondershare’s Filmora. Import the clips that you want to edit – you will see there is nothing complicated to it.
Step 3 Turn on the Auto Ripple option
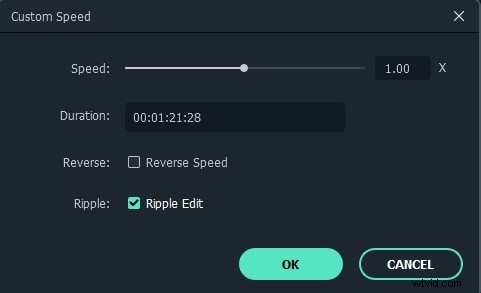
Once you are through with the upload, right click on the clip in the timeline. Select Speed and Duration. A pop up window will appear. Tick Ripple Edit. You can trim, crop, rotate the clips or cut them out – you have a complete freedom on what to do here.
Step 4
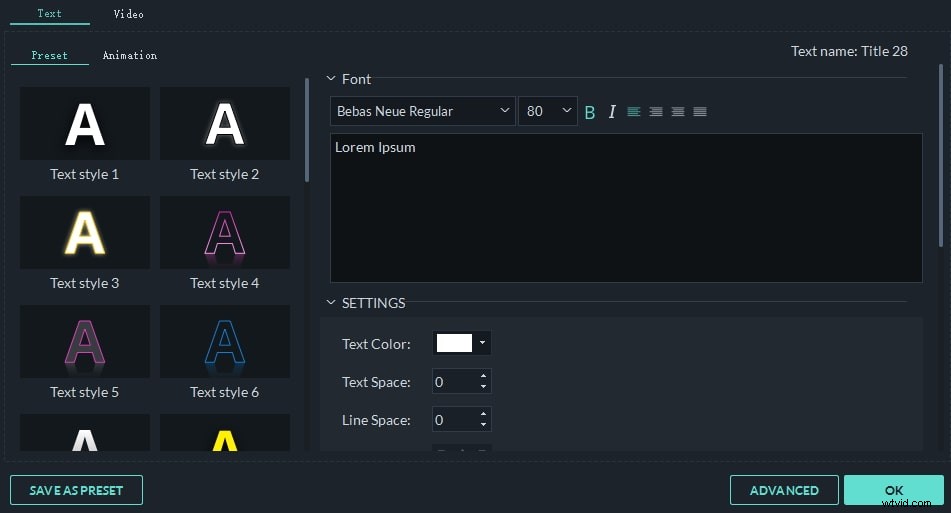
You might want to add some text effects and overlays on your clips, then, click Titles or Effects at the top and apply the elements on any position of the video you like. You are allowed to edit the text effects and save them as preset for your next use.
If you want to insert another clip or photo in the video, or change the position of two clips, or you want to adjust the duration of the work you have already finished, don’t be worried, Filmora keeps everything stay in sync.