You might have seen so many television programs that make use of picture in picture effects that helps to present a small picture or video inside the major video track. Many of you might be interested in performing such creative task yourselves; if you are also thinking about this trick then the article below can be useful for you. This detail guide will provide you complete information about using Vegas Pro for creating classic picture in picture effect step by step.
- Part 1: The history of picture in picture (PIP) effects
- Part 2: How to make a picture in picture (PIP) video with Sony Vegas Pro
If you are new to Vegas Pro software platform that it may appear little complicated to you due to its advanced interface; also this software is not available for free trial. You have to make huge payment of $599 to gain access on Vegas Pro. If you are working on PIP projects as beginner then it is good to start with Wondershare Filmora that can work on Mac as well as Windows with easy to use interface. The best thing to know is its free trial version that can be downloaded from official website of Wondershare Filmora. You can create PIP projects within few minutes using Wondershare tool as its fast control features assists users in easy editing and you will be able to import any video file format to this software easily.
Video tutorial on how to create a PIP video with Wondershare Filmora:
Part 1: The history of picture in picture (PIP) effects
In fact, PIP effect was a hit on television industry first. The fist PIP effects was made on the 1976 Summer Olympics TV air. In 1983, Philips made high end TV sets to make PIP technology popular around the world. PIP is also used in DVD. By now, it is widely used on video editing industry.
Part 2: How to make a picture in picture (PIP) video with Sony Vegas Pro
You can make pip video in Sony (Magix) Vegas Pro easily if you follow these expert suggested steps:
Step 1: Import your video file
First of all you need to open your Vegas Pro software on your computer, then import at least two video clips on its timeline. The video that you want to make appearing on smaller portion of final project must be placed above the main video.

Step 2: Use only one Audio track
Most of the time these videos make use of same audio track but even if not then prefer to use audio track of only one video and your preference will go on main video file. It will help you in easy sound adjustments for both tracks. In order to delete audio from any one track simply right click the track information bar, then choose Delete Track.
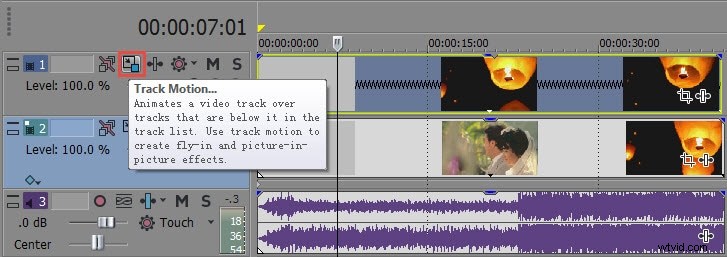
Step 3: Create PIP Effect
Now it is time to create the picture in picture effect on your project; for this you need to hit the Track Motion Button on your timeline; note that it must be selected from the track that you want to show in smaller portion of project. This track motion button usually stay next to the name of your track on timeline and can be recognised from blue box.
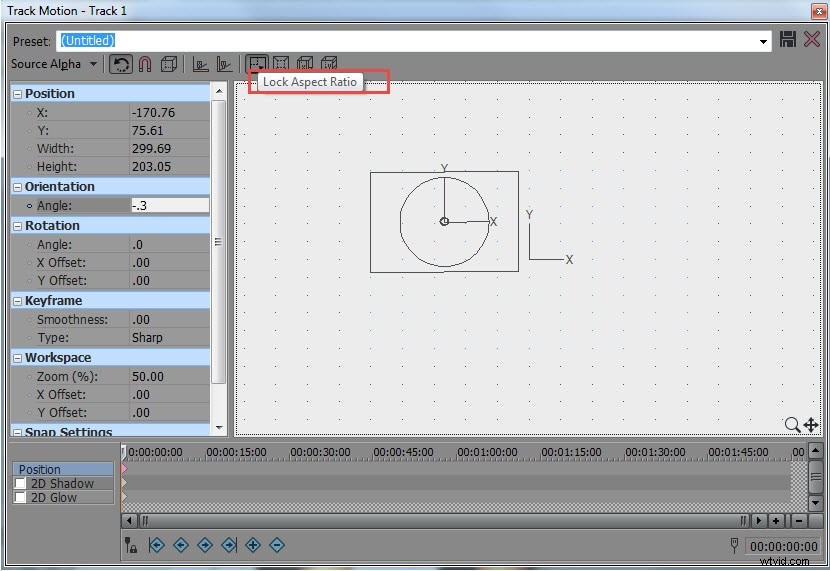
Step 4: Rotate and resize smaller video
When you hit this layered blue box then a pop up window will appear on screen that can be used to rotate, resize and for moving specific smaller video portion to any place on major project. Never forget to lock the aspect ratio while resizing your clip to avail better viewing adjustments.
You might also interested in: How to crop videos in Vegas Pro
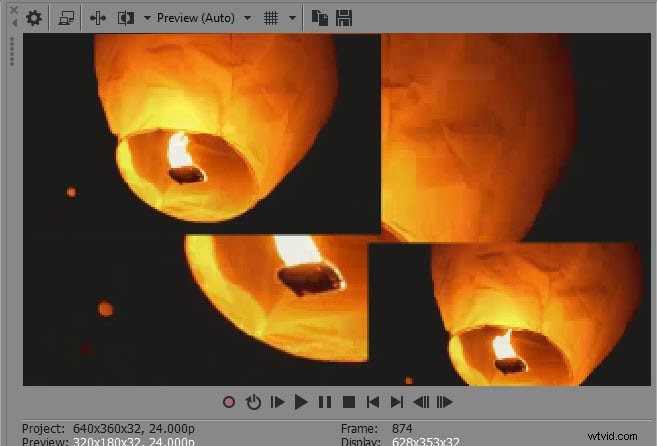
Step 5: Preview PIP video
Make use of preview window for checking effect of all adjustments but at the same time note that it is possible to insert many picture windows in one project and for this you need to make selection for multiple files as per need in step 1.
Step 6: Time to save project
Once your preview window has verified your customization and you are satisfied with results then it is time to save your project to any desired location on device. The size of file will be affected by effects and transitions added to video as well as on quality of resolution.
Video tutorial on how to make a picture in picture video in Vegas Pro