"I want to take a picture of the gameplay while recording on my Surface, how can I get it done?"
If you are using a Surface device, you may want to take screenshot on Surface for some reasons like saving the highlight while playing games, snapping a photo of a video call, etc. No matter what the reason is, you must want to take screenshot on Surface Pro during use. However, some of you may don't know how to complete the task.
Given that, this post is coming. Here we collected some easy but effective ways and will share them with you all in detail. Continue reading to find your desired method.
How to Screenshot Surface Pro 3/4 with Professional Snapshot Tool
If you want to take a high-quality screenshot on your Surface Pro, all you need is an excellent snapshot tool like EaseUS RecExperts.
This is a versatile software that lets you take screenshots or capture your screen flexibly in a few quick steps. Speaking of its screenshot feature, you will love it if you give it a try. To take a screenshot, you only need to select the area and then click the "Screenshot" icon. Moreover, the hotkey feature is also available, which means you can take screenshots of your favorite scene with one key on your keyboard. In a nutshell, whether you need to snapshot the full screen or a partial one, you can easily get it done quickly with its help.
However, the screenshot is a small part of its functions. Beyond that, RecExperts supports capturing screen, audio, or webcam in high quality like 1080P, and you can use it to screen record on Surface pro without hassle. Almost everything can be captured by using it. Last but not least, this screen recording software offers some useful editing toolkit to modify your recordings as you want.
EaseUS RecExperts
- Allow taking screenshots anytime
- Help capture streaming video, audio, gameplay
- Enable to capture screen to GIF without efforts
- Schedule recording feature to start or stop the recording automatically
- Support trimming, extracting audio, or adding Intros to recorded file
Want to screenshot on your Surface Pro? Just check the following steps:
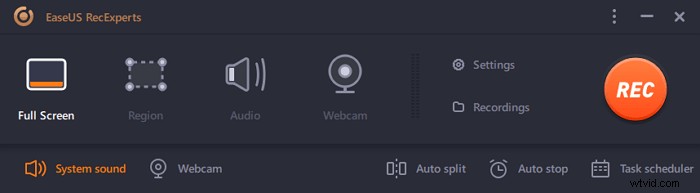
Step 1. Download and launch this program on your computer. You will see all features it offers, including Webcam recording, Audio recording, Region capturing, and other options like Settings and Full Screen recording.
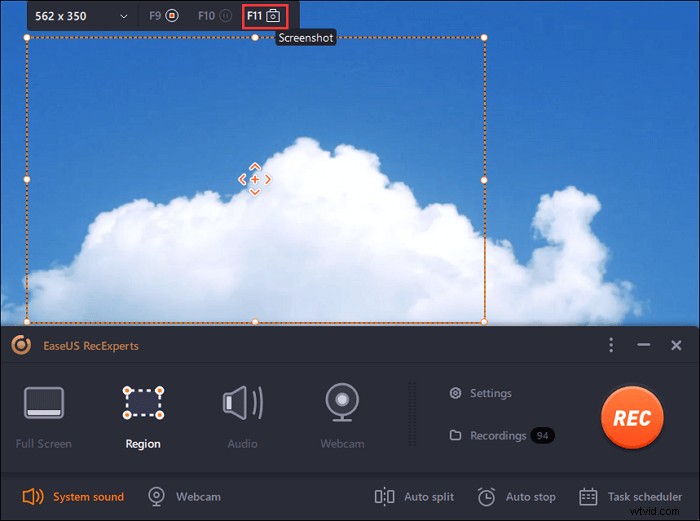
Step 2. Click "Full Screen" or "Region" according to your need. The screen will go dim, and drag your cursor covering what you want to capture.

Step 3. Now press F11 or click the "Screenshot" icon to take screenshots.
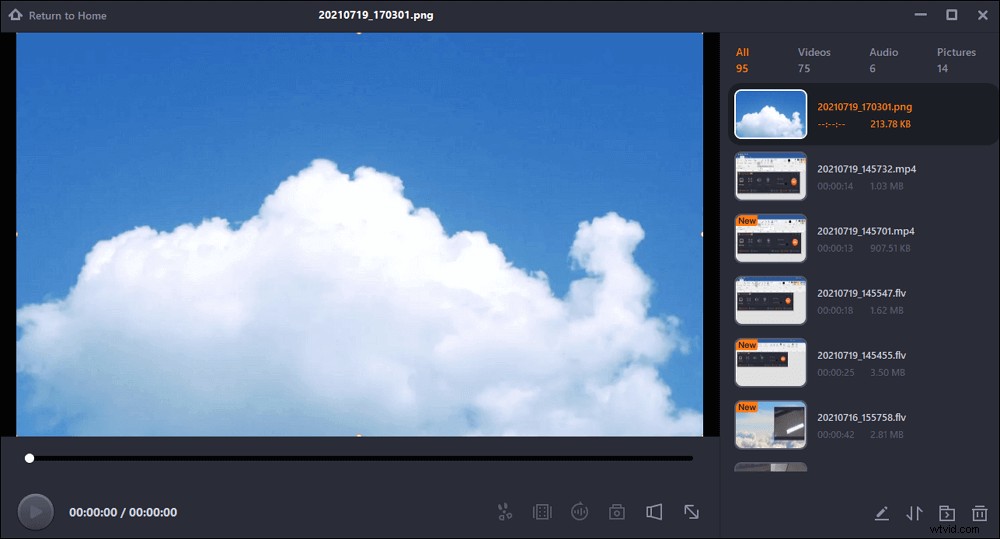
Step 4. The screenshots will be saved in the "Recordings" > "Pictures", where you can rename the screenshot with ease.
How to Take Screenshot on Surface Pro Without Keyboard
There are two easy yet efficient solutions to help you screenshot on Surface Pro without connecting a Type Cover. One is to use the hardware buttons, and the other is to count on the Surface Pen.
1. Useg button combinations
No matter what kind of Surface Pro you are using, you can always screenshot it by using the button combinations like mobile phones. That is an extremely easy and quick way to get the work done.
For Surface 3 and older versions:
Step 1. Hold down the Windows logo on the front of the device, then press the volume down button simultaneously.
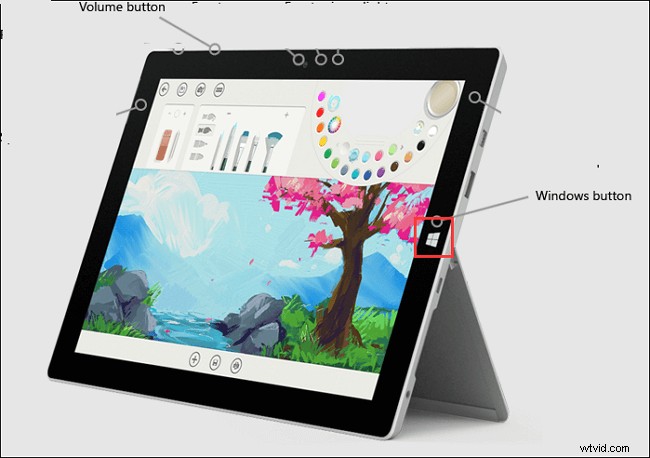
Step 2. The screen will dim briefly as the screen is captured and save to the Screenshots folder of the Picture library under "This PC".
On Surface Pro 4 and Surface Book:
Step 1. Press and hold the Power button.
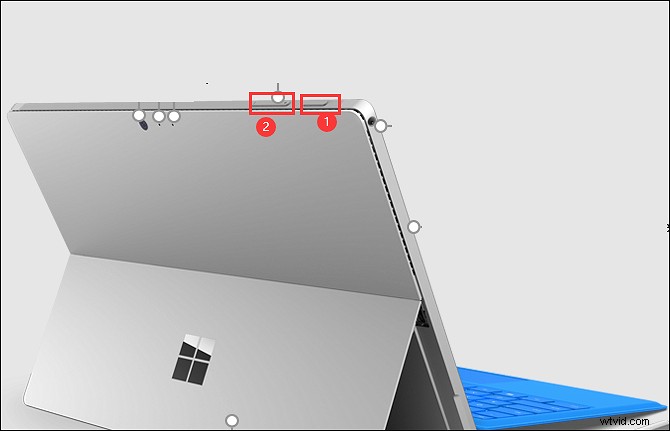
Step 2. Next, press the Volume Up at the same time. Then the screen will flash, and the screenshot would be saved on your device.
Similarly, this method can be used on the Surface Book whether the keyboard is attached or not.
2. Use the Surface Pen
Another solution for screenshot Surface Pro is to rely on the Surface Pen, as there is a new feature called Screen Sketch. This function will help capture the device's screen and pop up with tools for drawing and others.
Step 1. Double-click the eraser button on the top of the Surface Pen.
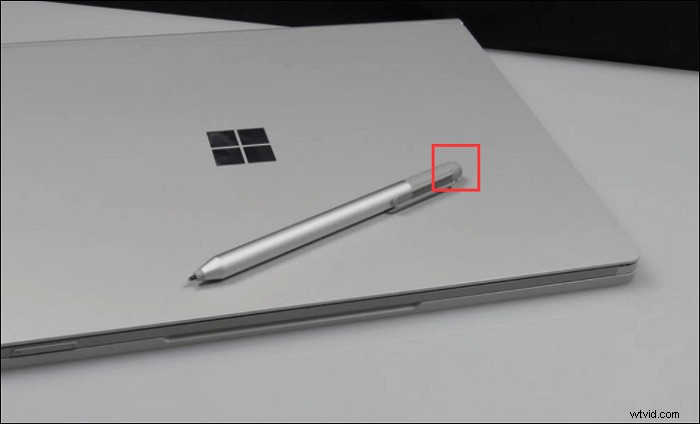
Step 2. You will see the screenshot on the top right of your screen. And here you can choose to edit, crop, or save the screenshots.
How to Screenshot on Surface Pro with Keyboard
If there is a Surface Type Cover attached to your Surface Pro, you can take it the same way you screenshot on PC Windows 10 using the keyboard. In the following, we will demonstrate how to deal with your Type Cover.
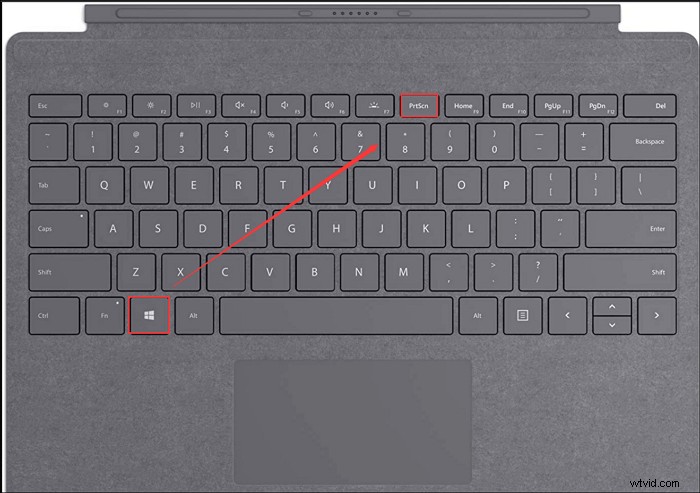
1. Capture full screen via PrtScn key
To take a screenshot of the full screen, you can hit the PrtScn or PrintScreen key on your keyboard. Remember that it will not save the images on your Surface but will add it to your clipboard.
Also, you can press the Windows key and PrtScn at the same time, and the screenshot will be saved to the Screenshots folder under This PC.
2. Take a snapshot of the current Window on Surface Pro
Step 1. Open up the window that you want to screenshot.
Step 2. Press Alt + PrtScn/PrintScreen, then it will take a screenshot of the current window. And the screenshot will also be added to the clipboard like before.
Final Words
From this article, you can learn several methods to screenshot your Surface devices. Button combinations, shortcuts, and professional snapshot tools are all available now, and which one do you prefer?
If you are those people who want to take snapshots of Surface Pro in seconds, try EaseUS RecExperts now! It will not only enables you to do screencasting but allows you to capture live streams, gameplays, online courses, etc. For this all-in-one software, you cannot miss it!