High-resolution modes seem to be all the rage at the moment. They work by shifting the camera sensor a tiny amount between a series of shots and then merging the images to create one larger image. Olympus introduced it a while ago, but the Olympus OM-D E-M1X has the option to use it when hand-holding the camera or with it on a tripod.
There are two separate modes and using either imposes a few limitations on the available features.
- Read our Olympus OM-D E-M1X Review
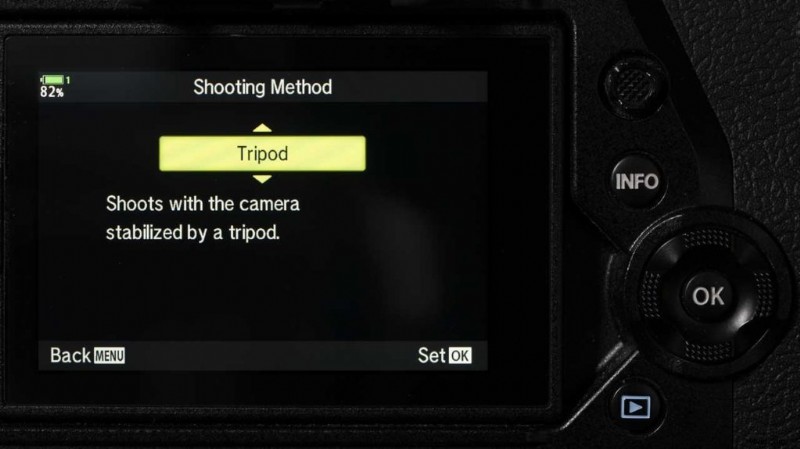
Tripod High Res Shot Mode
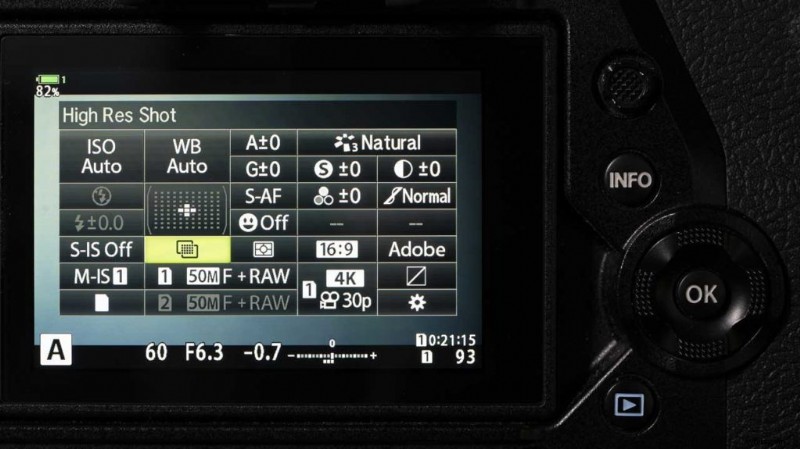
As the name implies, this mode should be used when the camera is on a tripod. However, the benefit is that raw images are saved at 80Mp (10400 x 7792).
The flash sync speed is limited to 1/50sec and the maximum sensitivity setting is ISO 1600.
- Read how to use Olympus Focus Stacking Mode
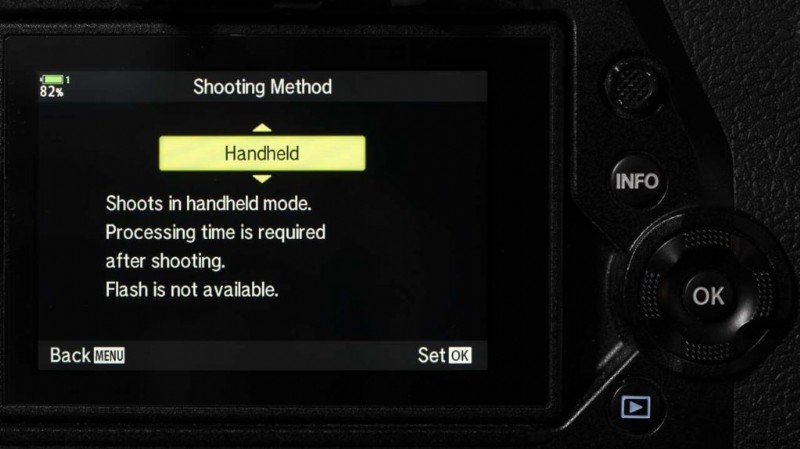
Handheld High Res Shot Mode
The images are taken in quick succession, but the camera takes a bit longer to process and record the composite. The merged raw file is saved at 50Mp (8200 x 6132).
The flash cannot be used and is disabled, however, the maximum sensitivity setting is ISO 6400.
- Read how to use Olympus Live ND Shooting Mode
How to Set-up Olympus High Res Shot Mode
There are a couple of ways the activate High Res Shot mode on the Olympus OM-D E-M1X, but there are some setting selections that need to be made via the main menu first. Here are the steps:
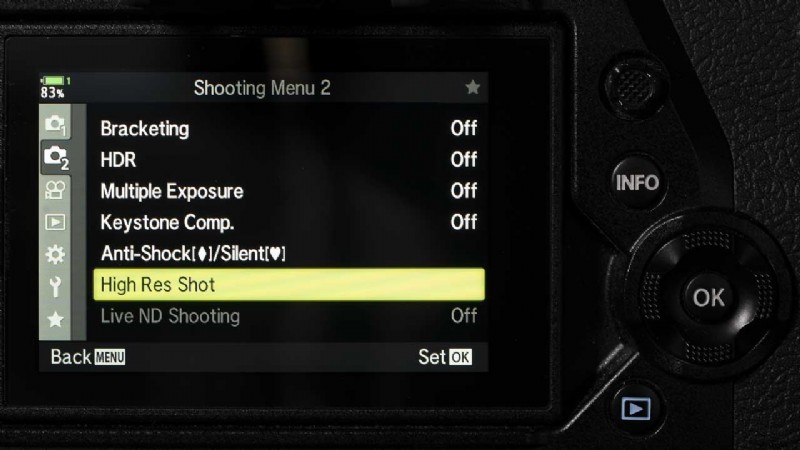
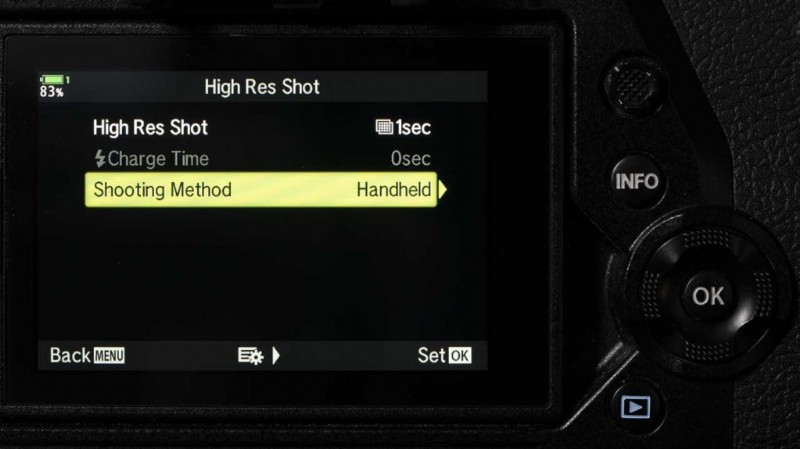
- Press the menu button and navigate to Shooting Menu 2.Then highlight High Res Shot near the bottom of the screen.
- Press the right navigation button.
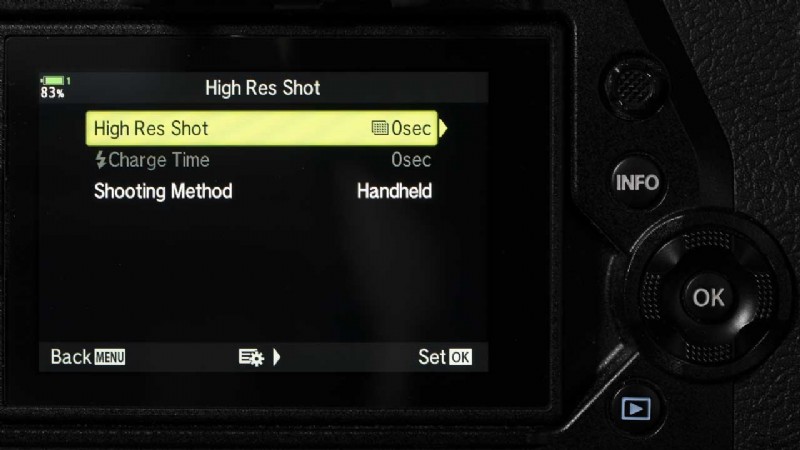
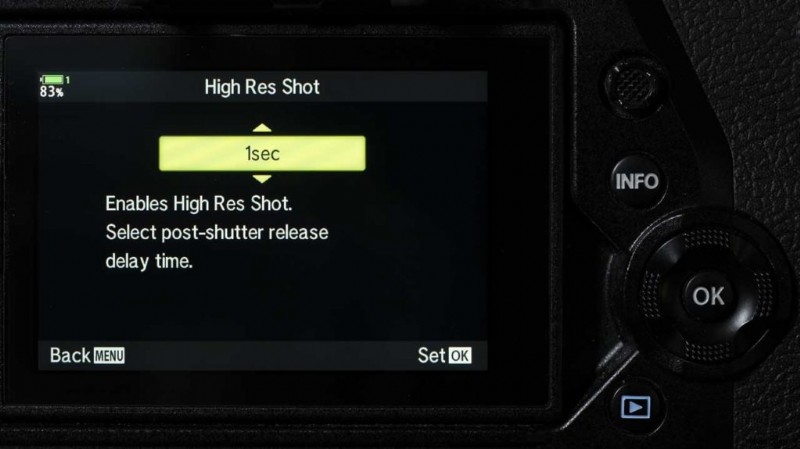
- Select High Res Shot and press the right navigation button twice. This allows you to select the delay time between the shutter button being depressed and the shutter tripping. Simply use the up and down buttons to select the value you want to use. You can set a value between 1/8 and 1sec. It’s more important with the Tripod version of High Res Shot mode, but it’s worth setting a time in case you switch between the modes a lot. I tend to use 1 sec. When you’ve made your choice, press OK.
-
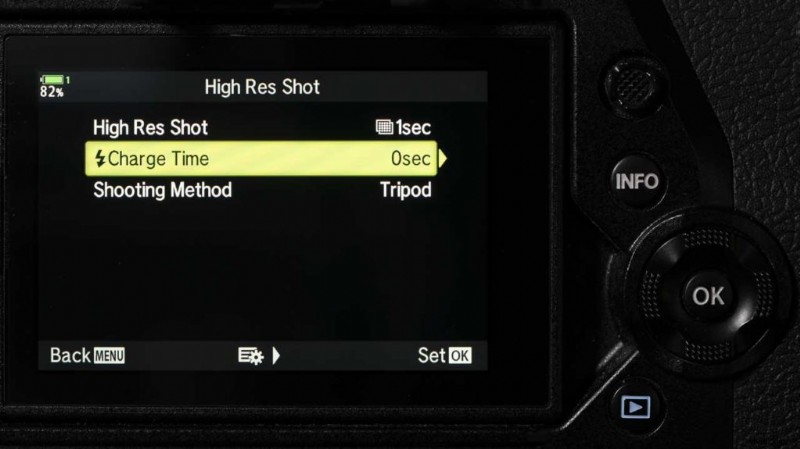
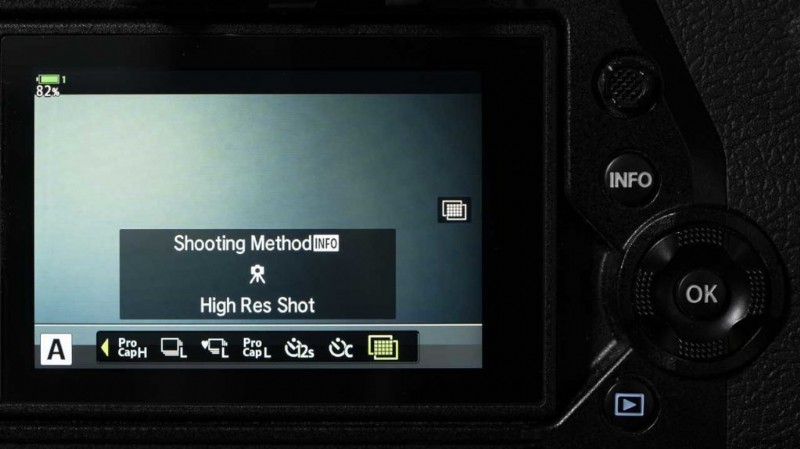
- Scroll down to Shooting Method and press the right button. Now you have the option to change between Handheld and Tripod mode using the up and down buttons.
-
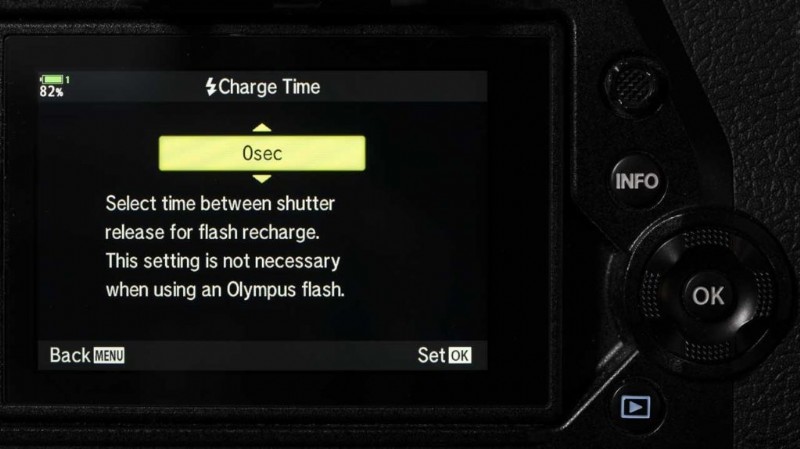
- If you’ve selected Tripod mode, you now have the option to set the Charge Time for the flash. This isn’t necessary if you’re using an Olympus flashgun. This setting determines how the long the camera waits for the flash to charge in High
Res Shot mode. Select the value you want to use and press OK.
-
- Press menu to exit from the High Res Shot settings screen.

Activating Olympus High Res Shot Mode
- Now press the Drive mode button. Use the navigation buttons or the dials to select High Res Shot at the far right end. Alternatively, you can activate High Res Shot mode via the Super Control panel. This is accessed by pressing the OK button. Whichever method you use, pressing the Info button while High Res Shot mode is selected lets you use the front and rear dials to switch between Handheld and Tripod mode.
-
- Compose the image as normal and press the shutter release. Don’t forget that there will be a delay before the shutter fires if you set a delay time.
- The camera takes a series of shots and then processes them into a high-resolution image a few seconds.
Check the price of the Olympus OM-D E-M1X at Amazon UK, Amazon.com, Wex Photo Video, Park Cameras, Adorama, B&H Photo Video.