Do you watch a lot of YouTube videos on your iPhone and iPad? If you’re someone who likes to fiddle around with the video quality settings rather than sticking to the one that’s automatically set by YouTube, you may have noticed that things have changed in the YouTube app on iPhone and iPad.
The YouTube app has received some updates to its user interface and the service now offers a wider variety of video resolution options. Until now, when you accessed your video quality settings, you were able to quickly select from a bunch of available resolutions. That’s not the case anymore, since YouTube has added some basic video quality settings to the mix and moved the resolutions to a separate section altogether.
How to Use YouTube Video Quality Settings on iPhone & iPad
First and foremost, to see all the new changes, make sure you’ve installed the latest version of the YouTube app on your iPhone and iPad. Once done, follow the steps below:
- Start watching the video in the YouTube app and tap once on the video to access the playback controls. Next, tap on the triple-dot icon to view more options as usual.
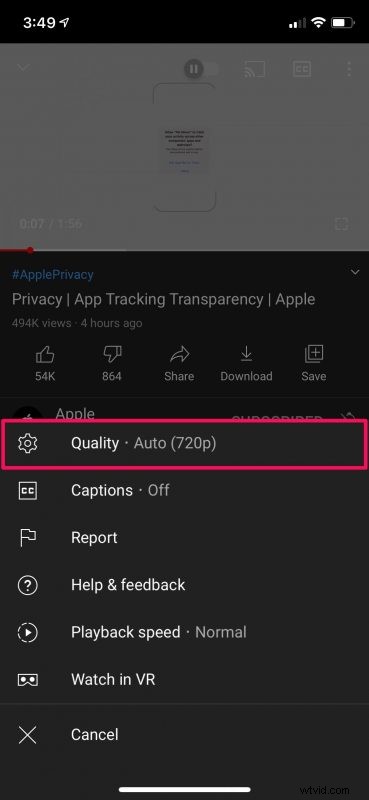
- Tap on “Quality” which is the first option in the menu. You’ll see that the video quality is set to Auto. The current resolution will be specified in brackets.
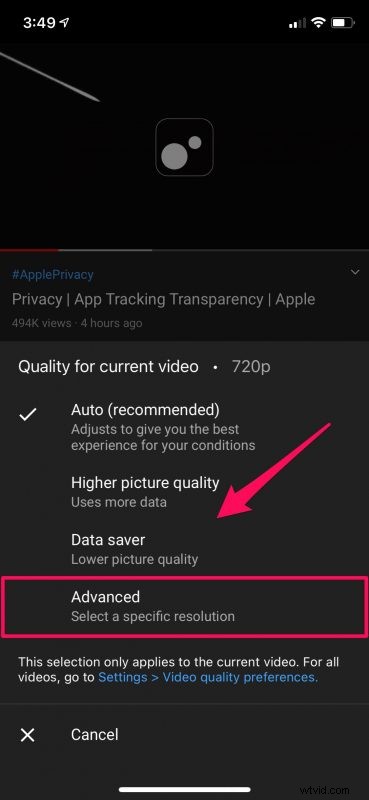
- Here, you’ll find the new video quality options called “Higher picture quality” and “Data saver”. The former setting is preferable when connected to Wi-Fi whereas the latter mostly targets cellular users. To select the exact resolution that you desire, tap on “Advanced”.
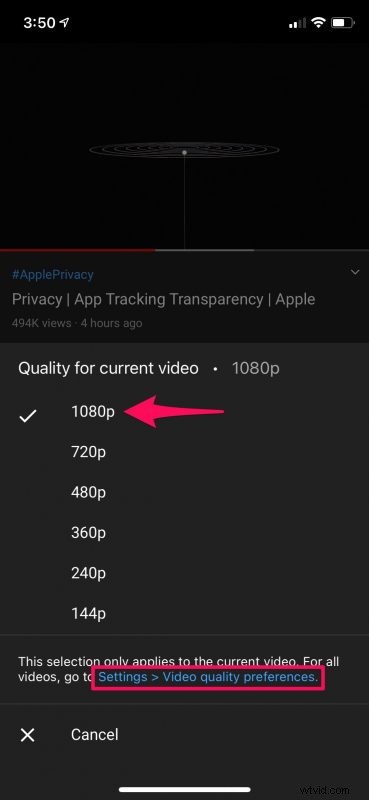
- Now, you’ll be able to see all the available resolutions like you’re used to. Select the resolution of your choice. Keep in mind that the changes you make only affect the current video. To adjust the settings for all videos, tap on “Settings > Video quality preferences” right below. This option can be accessed from the previous menu too.
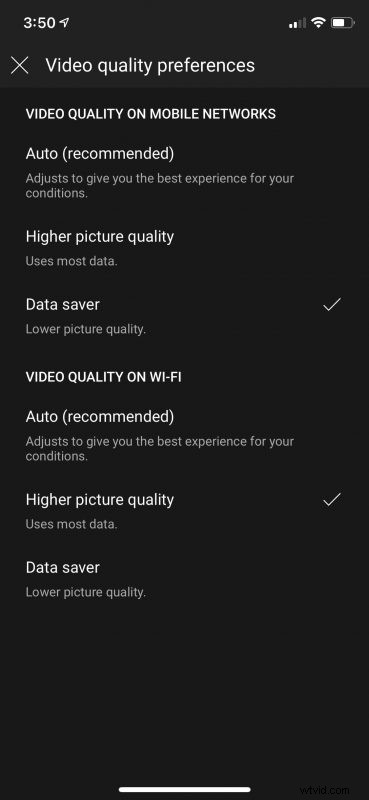
- Here, you’ll be able to choose your preferred video quality settings for both Wi-Fi and cellular. Simply exit the menu when you’re done with the selection and your changes will be saved.
There you go. Now you know how to make proper use of YouTube’s new video quality settings on your iOS/iPadOS device.
We assume YouTube made this change to help new users who’re not familiar with the various resolutions pick a desirable video quality while watching their videos. It’s worth pointing out that choosing the Higher picture quality option does not set the highest available resolution for video playback most of the time. The same goes for the Data saver mode which does not set the lowest possible resolution.
If you’re someone who uses the Auto setting, this change wouldn’t bother you. But, if you’re someone who always makes sure you’re on the highest possible resolution or even a low resolution to save data, you may be disappointed with this change since you need to go through an extra step to adjust the video quality.
Of course, we were focusing on the iOS and iPadOS versions of the YouTube app in this particular article. But, you can follow these exact steps to adjust the video quality settings in the YouTube app for Android devices too.
We hope you were able to familiarize yourself with YouTube’s updated video quality settings and preferences on your iPhone and iPad. What are your overall thoughts on the new changes? How can YouTube improve it? Do share your personal opinions and feel free to leave your valuable feedback in the comments section down below.