Have a voice memo that you’d like to convert to a ringtone for iPhone? If you want to create your own custom ringtones for incoming texts and phone calls, you can turn to Garageband. But beyond setting songs as ringtones or making your own from scratch, you can also use Garageband to turn voice recordings into a ringtone, right from your iPhone, and no computer is required.
Any kind of audio can be recorded directly on to your iPhone, iPad, or iPod touch using the Voice Memo app that comes pre-installed on Apple devices. This allows you to create custom audio recordings for free within a matter of seconds. With GarageBand, you can trim these voice clips and even set them as your default ringtones or contact-specific ringtones right within the app, as long as they’re under 40 seconds in length.
Can’t wait to make your first custom voice memo ringtone on iPhone or iPad? Great, let’s get to it!
How to Convert a Voice Memo into Ringtone for iPhone
Before you go ahead with the procedure, you’ll need to download GarageBand from the App Store. In order to use this technique to convert your audio recording into a ringtone, your device needs to be running iOS 11 or later. You’ll also need to record audio first using the Voice Memos app. Once you’re done, simply follow the steps below for making a custom ringtone.
- Open the “Voice Memos” app on your iPhone.

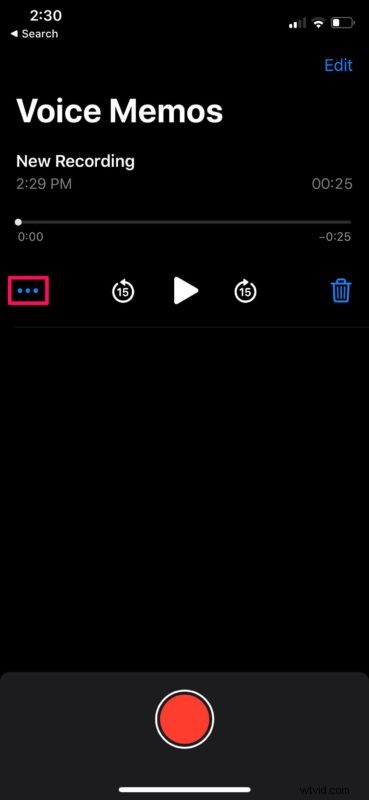
- Your previous recordings will show up here. Tap on the recording that you want to set as your ringtone and press the “triple-dot” icon for more options.
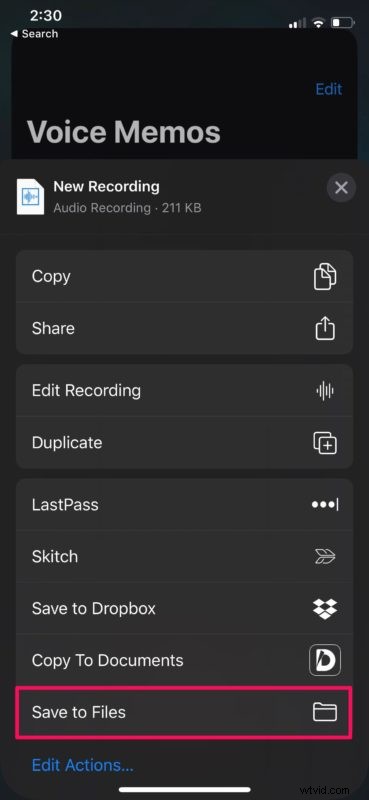
- This will open the iOS share sheet. Tap on “Save to Files” to save this recording within the Files app.
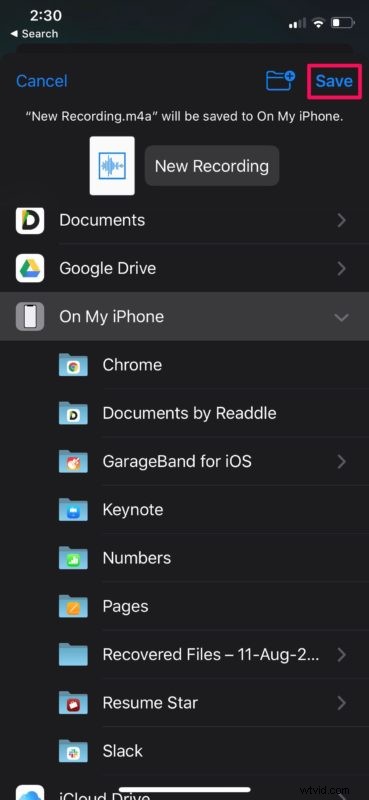
- Choose a preferred directory to save the recording and tap on “Save”.
- Next, Open the GarageBand app on your device.

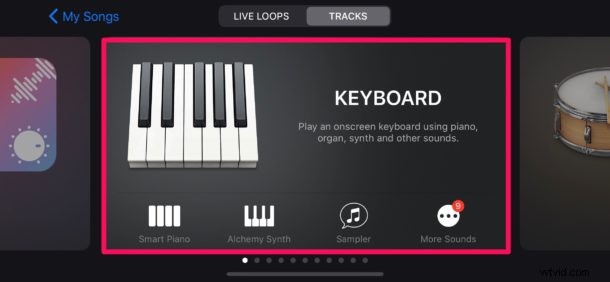
- Choose any instrument that’s available. It doesn’t matter which instrument you choose, as the procedure is going to remain the same. In this instance, we’re choosing Keyboard.
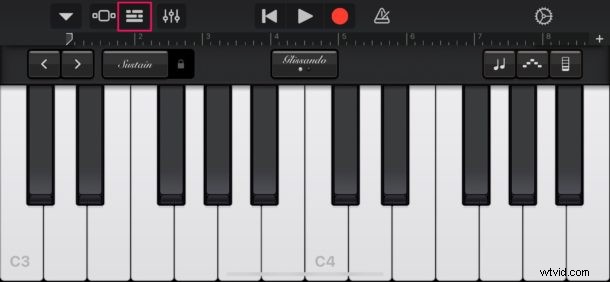
- Once you’ve opened the instrument, tap on the “project” icon as shown in the screenshot below.
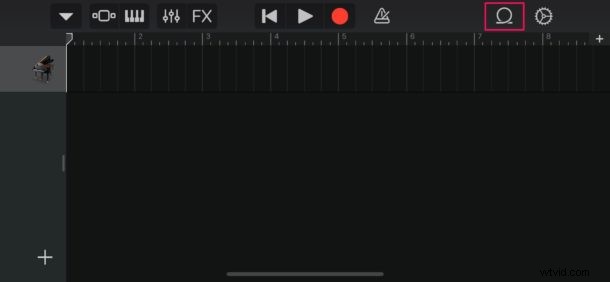
- Here, tap on the “loop” icon located at the top-right corner in order to open your audio recording.
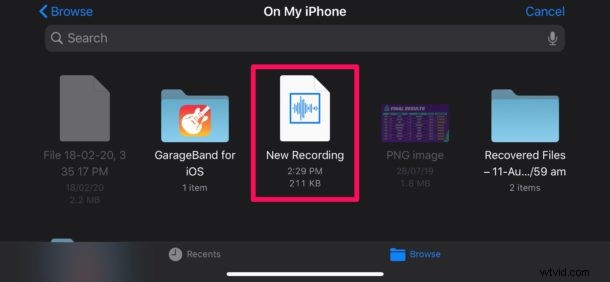
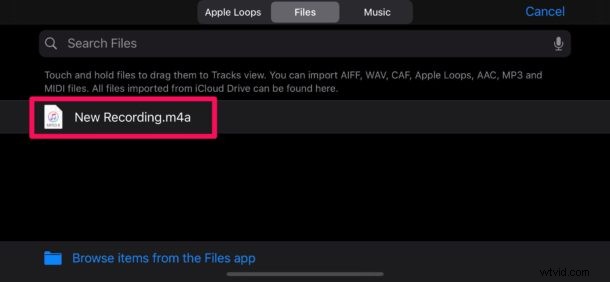
- Make sure you’re under the “Files” section and then choose “Browse items from the Files app”.

- This will open your Files directory within the GarageBand app. Find and tap on the audio recording you saved in Voice Memos.
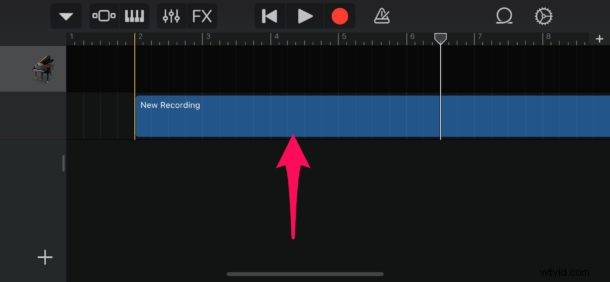
- In this step, long-press the file name in order to open it in the project menu within GarageBand.
- Drop the file as the second track, because the first track by default is reserved for the instrument you chose.
- Now, tap on this track and drag the ends to trim the audio recording according to your preferences. You can play it back using the “Play” icon located at the top, if necessary. However, you might want to disable the annoying metronome by pressing the icon located to the right of “record” icon.
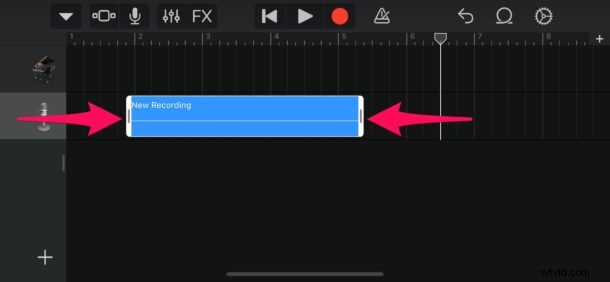
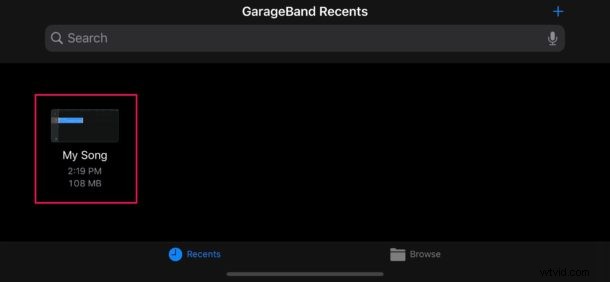
- Once you’re done adjusting your clip, make sure it’s under 40 seconds in length. Now, tap on the “downward arrow” icon at the top-left corner and select “My Songs”.
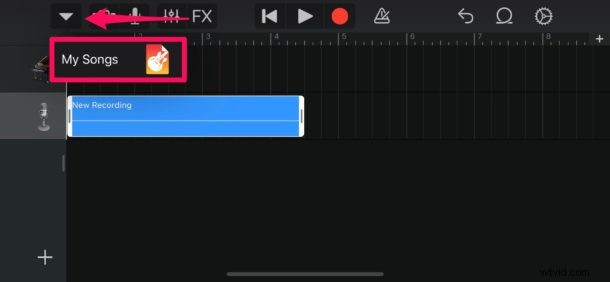
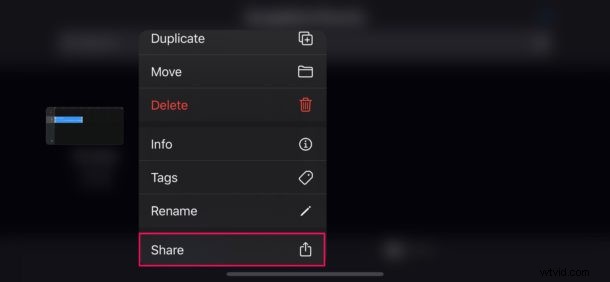
- Your GarageBand project will show up under Recents as “My Song”. Long-press on it to access more options.
- Now, tap on “Share” as shown below.
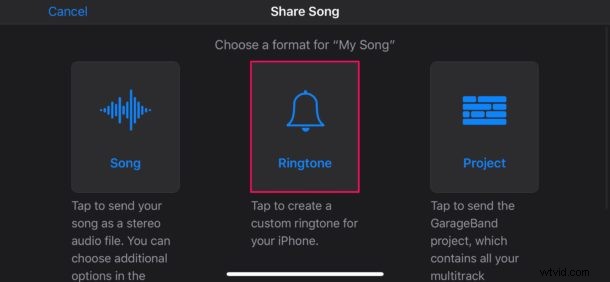
- In this step, select “Ringtone” in order to export your project as a ringtone.
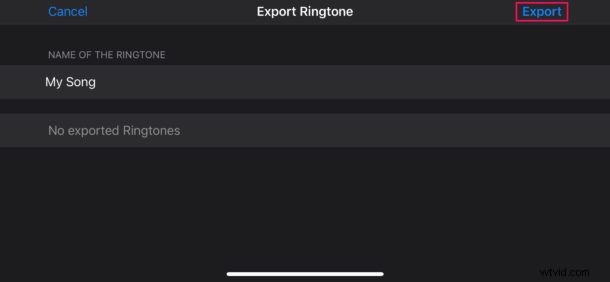
- Now, you can give the ringtone a name of your choice. Once you’re done, tap “Export” located at the top-right corner of the screen.
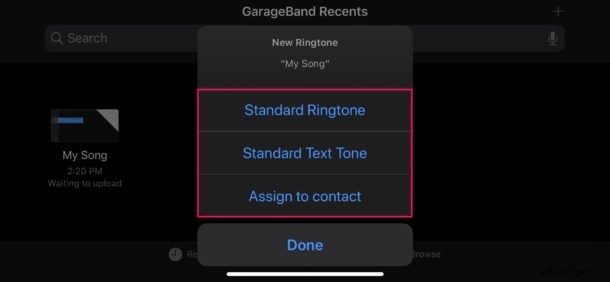
- Once the export is successful, tap on “Use sound as…” in order to set it as your default ringtone right within GarageBand.

- Here, you can choose to set it as your default ringtone or a text tone. Additionally, you also have the option to assign the sound to a specific contact. However, if you just want to add it to the list of existing ringtones, tap on “Done” instead.
Now you’ve learned how to set your voice recordings as a custom ringtone by using GarageBand on your iPhone.
It takes a few steps to turn a voice memo into a ringtone on iOS or iPadOS, but if you have a particularly worthy voice memo saved that you want to hear as a ringtone or text tone, then it’s well worth the effort.
Although this article focuses primarily on the iPhone, you can also use these apps on the iPad to create a custom alert tone for iMessage and FaceTime audio/video calls too.
It’s important to note that ringtones are limited to 40 seconds in length. For alert tones or text tones, this limit is even lower at 30 seconds. If your GarageBand project is between 30 and 40 seconds, it will only be available for use as a ringtone. Of course you can also make the ringtone or text tone shorter too, for example if you have a friend or family member saying something like “Heeeeeere’s Johnny!” then that alone can simply be the ringtone or text tone.
It’s often easiest to check how long the project is within the app by exporting it. However, GarageBand will automatically convert your custom ringtone to 40 seconds if it’s too long, by cutting off the audio after the 40-second mark. If in doubt, aim for a shorter audio clip.
With this handy feature, you can record voice memos and assign it to specific contacts so that your close friends or family members have their own unique ringtones and alert tones. This makes it easier to identify who’s calling or texting you without having to look at your phone, and it’s one of the many wonderful and fun ways to customize the iPhone experience.
If you find the GarageBand procedure a little complicated or you’re just not as comfortable on iPhone or iPad, you can simply import your voice memos to iTunes on your computer, and then set it as a custom ringtone from there too. That method is a bit more old school but it continues to work just fine.
Did you make a custom ringtone with a voice memo by using GarageBand? Do you know of another approach for converting voice memos into ringtones or text tones for iPhone? Let us know your experiences and thoughts in the comments.