If you’ve ever wondered what the small icons in the Layer palette do, you might be surprised at how useful they can be. Here’s what the Lock Transparent Pixels icon does and how you can use it.
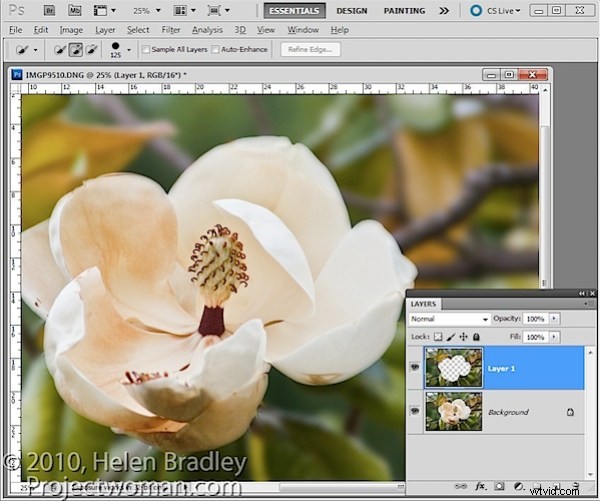
There are times when you are working with content on layers in Photoshop that the layers can do things that you don’t expect them to do. For example, in this image, I have extracted the background to a layer of its own by selecting it and then choose Layer > New > Layer via Copy.
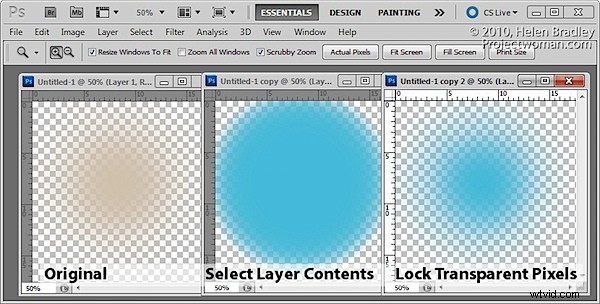
I now want to blur this layer so if I select it and apply a Gaussian blur filter to it, you will see that the Gaussian blur filter pushes the background over the edges of the flower.
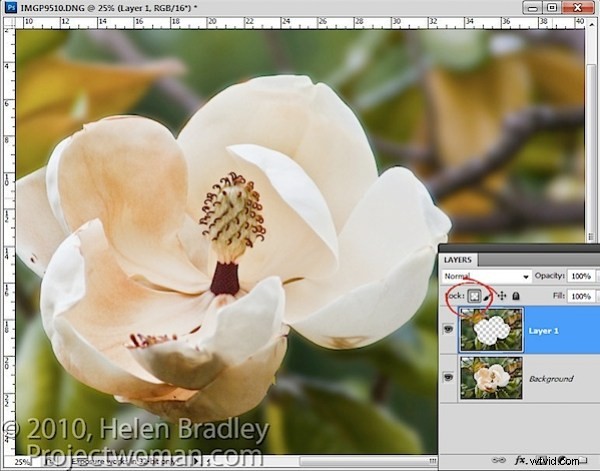
This time, instead of selecting the layer contents I selected the Lock Transparent Pixels icon in the layers palette.
Now when I apply the same heavy blur filter you’ll see that the edges of the background are maintained.
The layer is blurred but only the area that was covered by the original pixels is blurred and the blur isn’t permitted to ‘bleed’ into the area that contains fully transparent pixels.
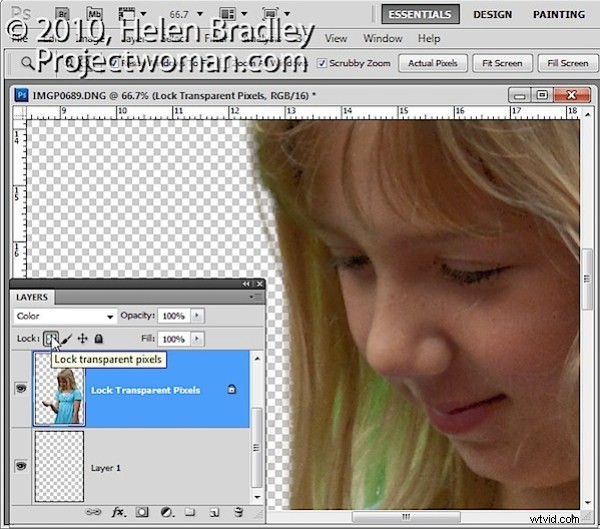
This option is useful when painting over details to change their color. For example, when you photograph someone against a green screen background you will find hairs and areas around the very edge of your subject may have a green tinge. Or when you extract a subject, like a building, photographed in bright sunlight it may display some chromatic aberration around its edges.
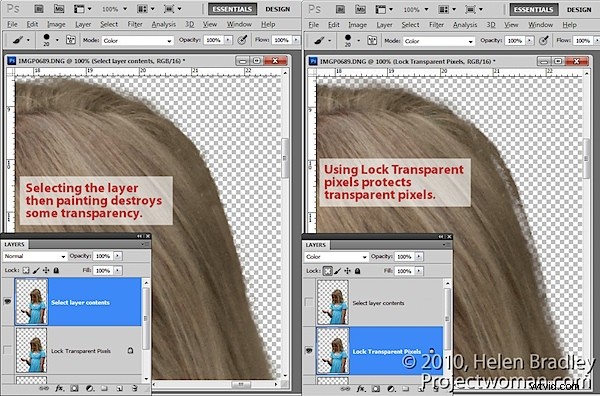
If you select the layer by Control + Clicking on it (Command + Click on the Mac) and sample a color from adjacent pixels you can set the Brush to Color mode and paint over the edges. The problem is that, as you paint, the color is built up on partially transparent pixels which, if you paint too many times, begin to lose their transparency.
If, on the other hand, instead of selecting the layer, you click the Lock Transparent Pixels option and then paint with the brush set to the same Color blend mode and sampling colors from the image as you go, you’ll paint out the problem colors but without affecting transparency.
The same option can be used when you fill a selection with a foreground or background color by pressing Alt + Backspace (, Option + Delete on the Mac). If the selection is partially transparent and if you simply Control + Click on the layer to select it, the more you fill it the more transparency is lost. On the other hand, if you select Lock Transparent Pixels you can fill it over and over again and no transparency is lost.
In short, using Lock Transparent Pixels ensures that an object on a layer can never become more or less transparent than it was when first created and that its edges won’t change if you, for example, add a blur to it.