Ever wondered what Lomography is?
Have you seen Lomo images and wanted to know how to do it? Do you know what Lomo photography is but don’t want to go back to film or buy more cameras?
If you answered yes to any of these questions, read on to learn about Lomo, and how to achieve a hassle-free, totally digital image like it.
What is Lomo?
You’ve probably heard of this term or its more colloquial name Lomography. It became very trendy over the last decade, and there are even workshops, contests and more dedicated to it.
It refers to a style of photography made with a particular brand of camera from Austria called Lomo. Thus, the name of the technique comes from the camera brand. Different models create a different kind of image.
What is Lomography?
Regardless of the model of camera, the make is mostly plastic including the lens.
Sometimes they have light leaks and allow very little control over the settings. Therefore, the results are fun and unpredictable. While technically they have photographic ‘flaws,’ it creates a particular style that created an entire visual culture around it – Lomography.
How to Mimic the Lomo Effect in Photoshop
As I’ve explained, Lomo photography can be unpredictable, and also includes different models of camera that create a different kind of photograph. Therefore there’s no specific set of rules.
I’ll mention some of the most common and characteristic effects of the Lomo cameras and how to achieve them using Photoshop. These are not set in stone. The fun part about real Lomo or digital Lomo effect is that you can be as creative as you want.
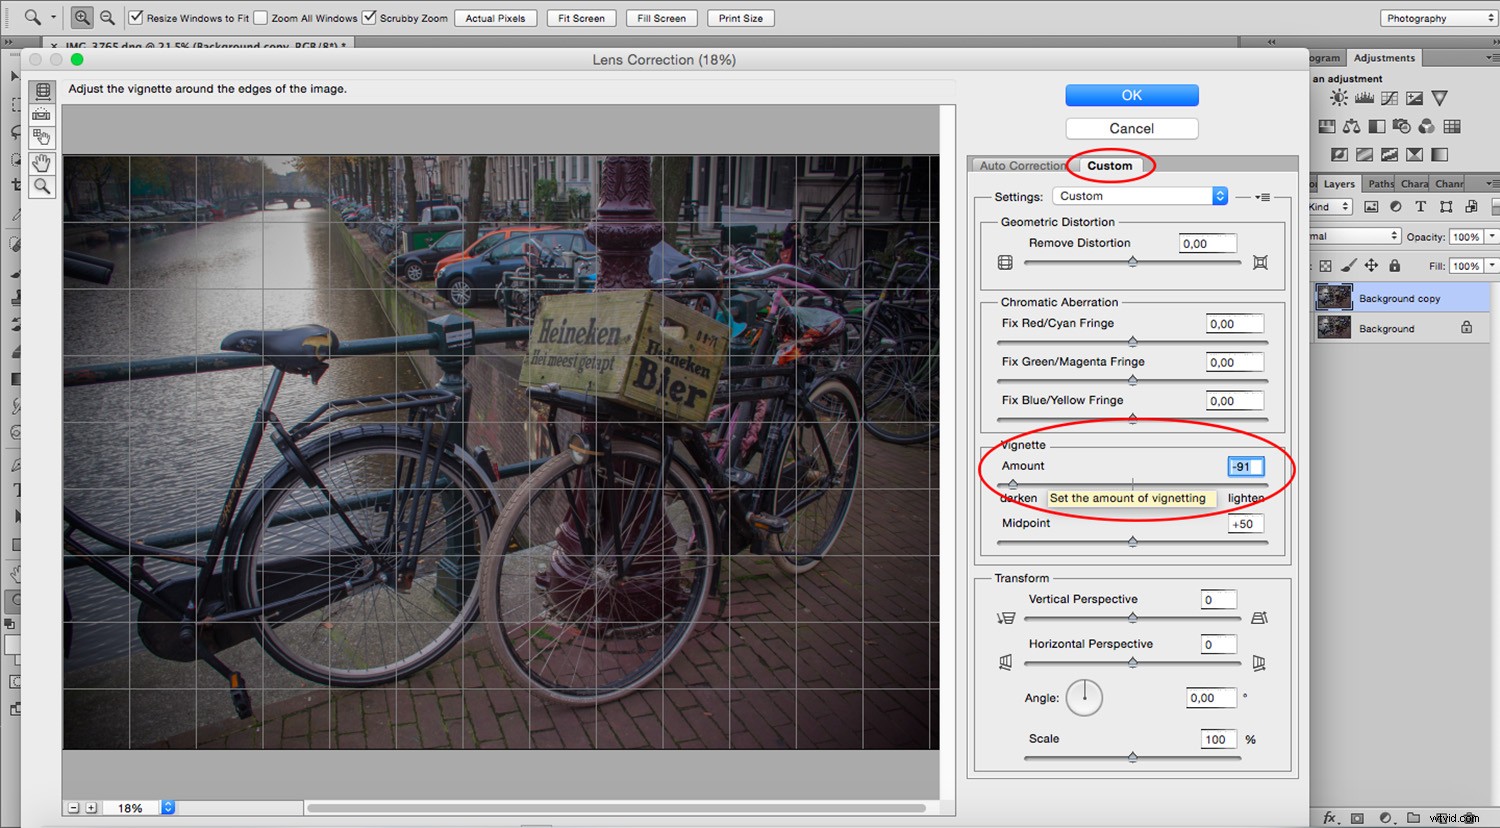
1. Vignette
Most of the images created with a Lomo camera, especially if made with long exposures, have a vignette.
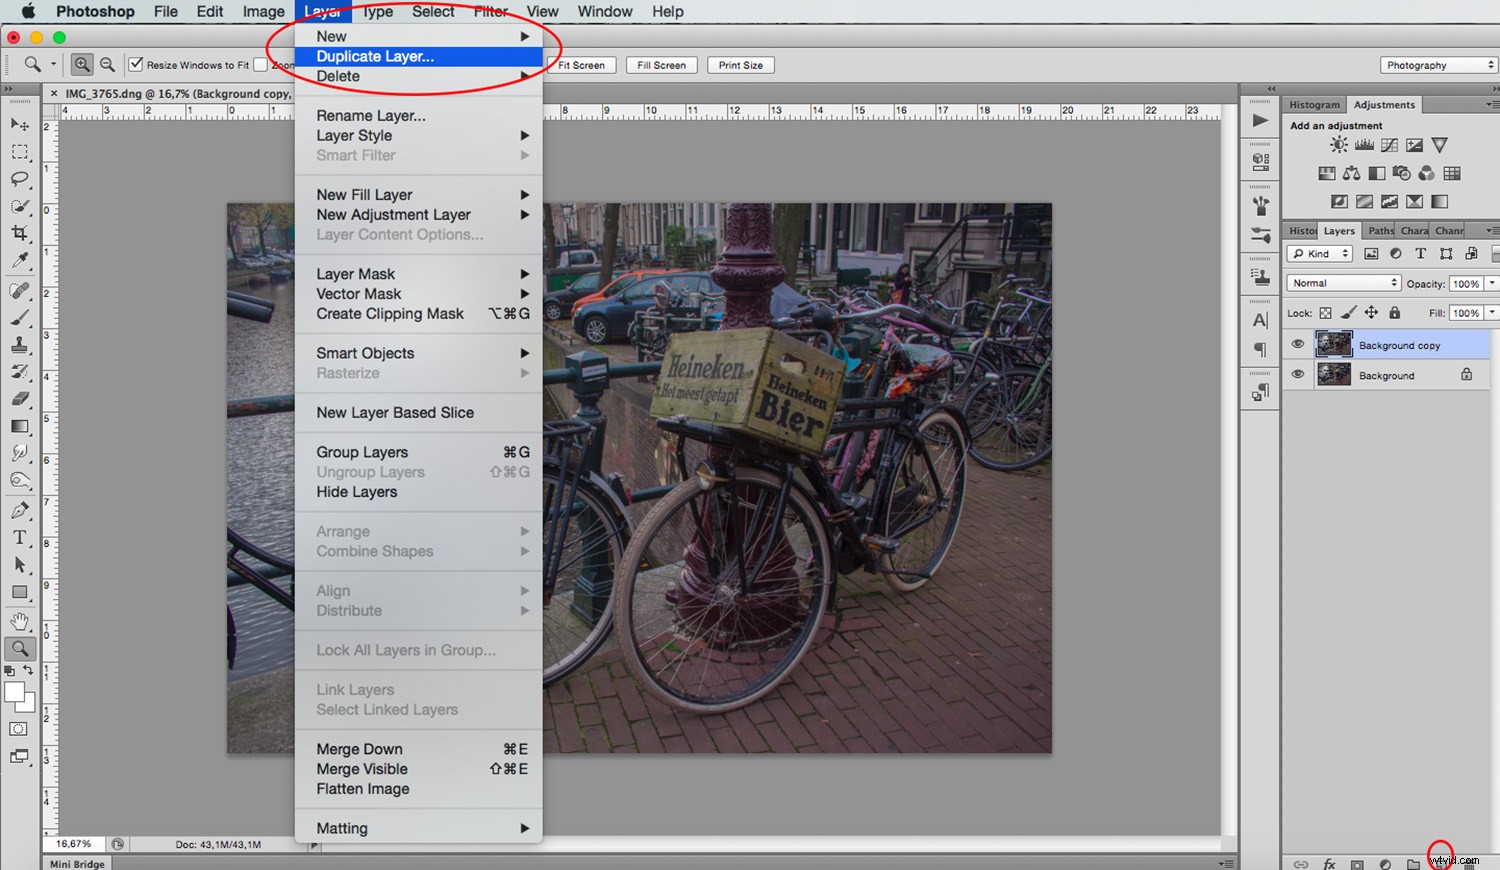
To create a Lomo image in Photoshop, you need to duplicate the background layer by dragging the existing one to the bottom into the New Layer button, or by going to Menu-> Layer-> Duplicate Layer.
Next, go to Filter-> Lens Correction (If you don’t immediately see it in your version of Photoshop, go inside ‘Distort’ to find it). In the ‘Custom’ tab, move the slider called ‘Vignette.’ Once satisfied, apply the filter.
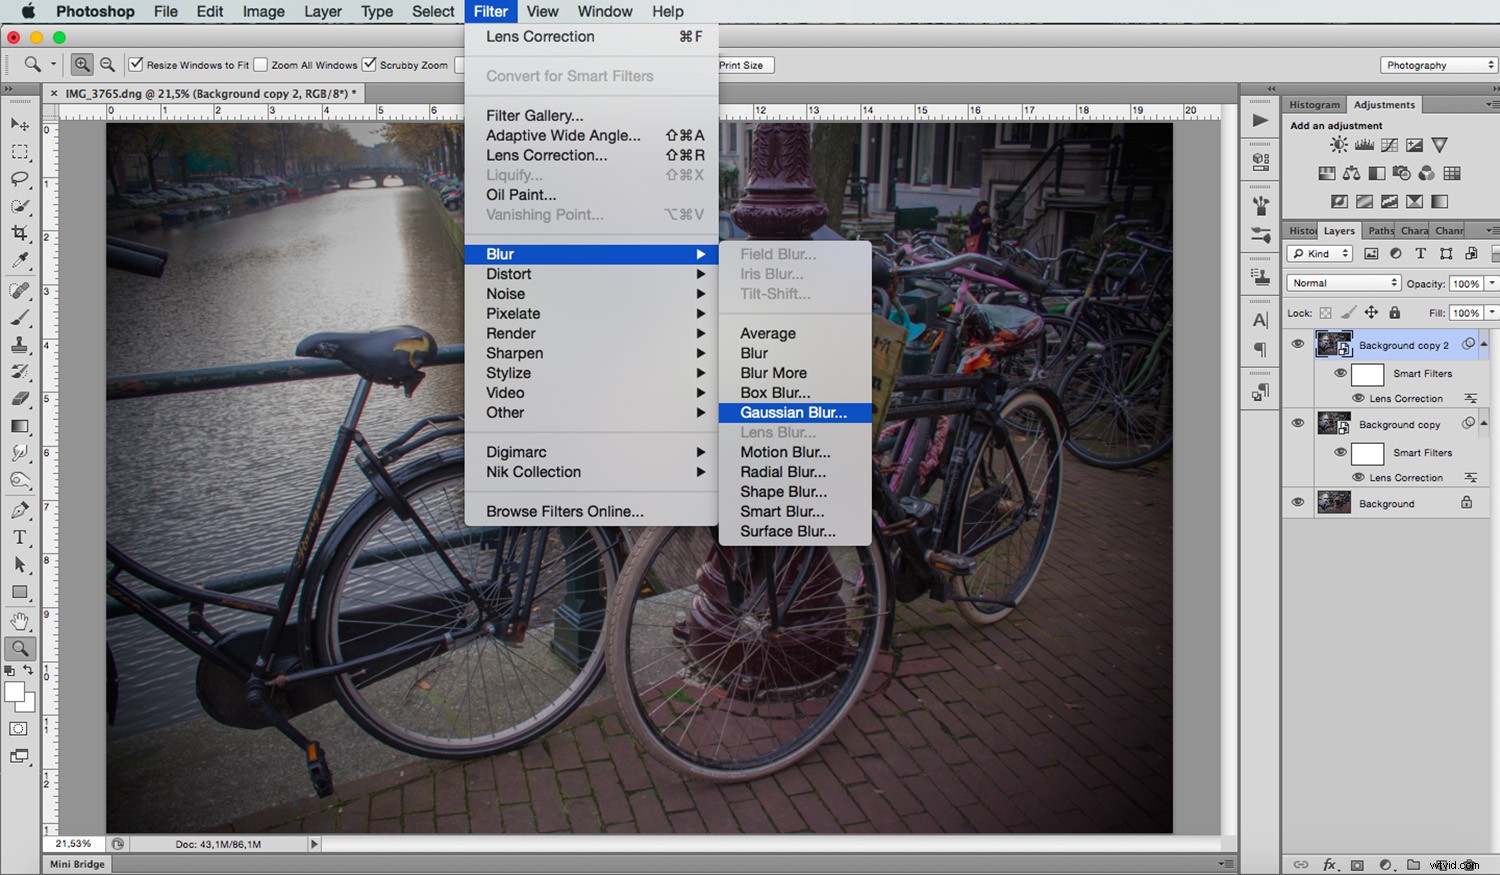
Duplicate this ‘Vignette’ layer. Go to Menu -> Blur -> Gaussian Blur. I’ll set it to 3 pixels, but this is entirely up to you.
Now use the ‘Eraser’ tool. Start to delete the center and slowly widen your moves towards the outside. We do this process because the edges are not super sharp in Lomo photography, due to the lenses often being made of plastic.
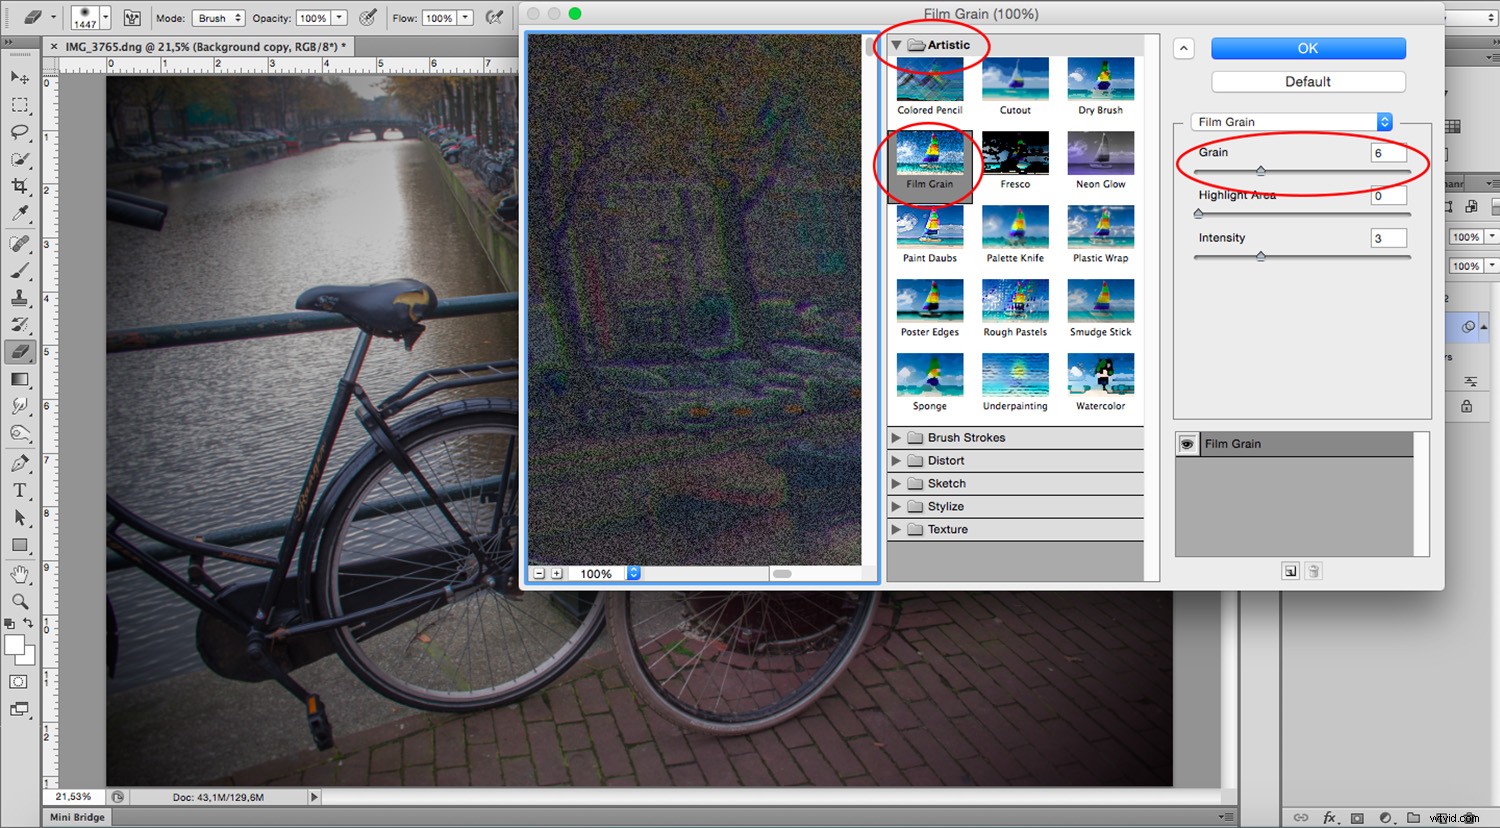
2. Grain
Since Lomo cameras use film, you can give the illusion of analog photography by adding a little grain to the image. To do this, select the first Vignette layer and go to Menu -> Filter -> Filter Gallery- > Artistic -> Film Grain.
Again, the quantity is for you to decide as it’s an authors choice and not an exact recipe to follow. I’ll do 4 with an intensity of 3.
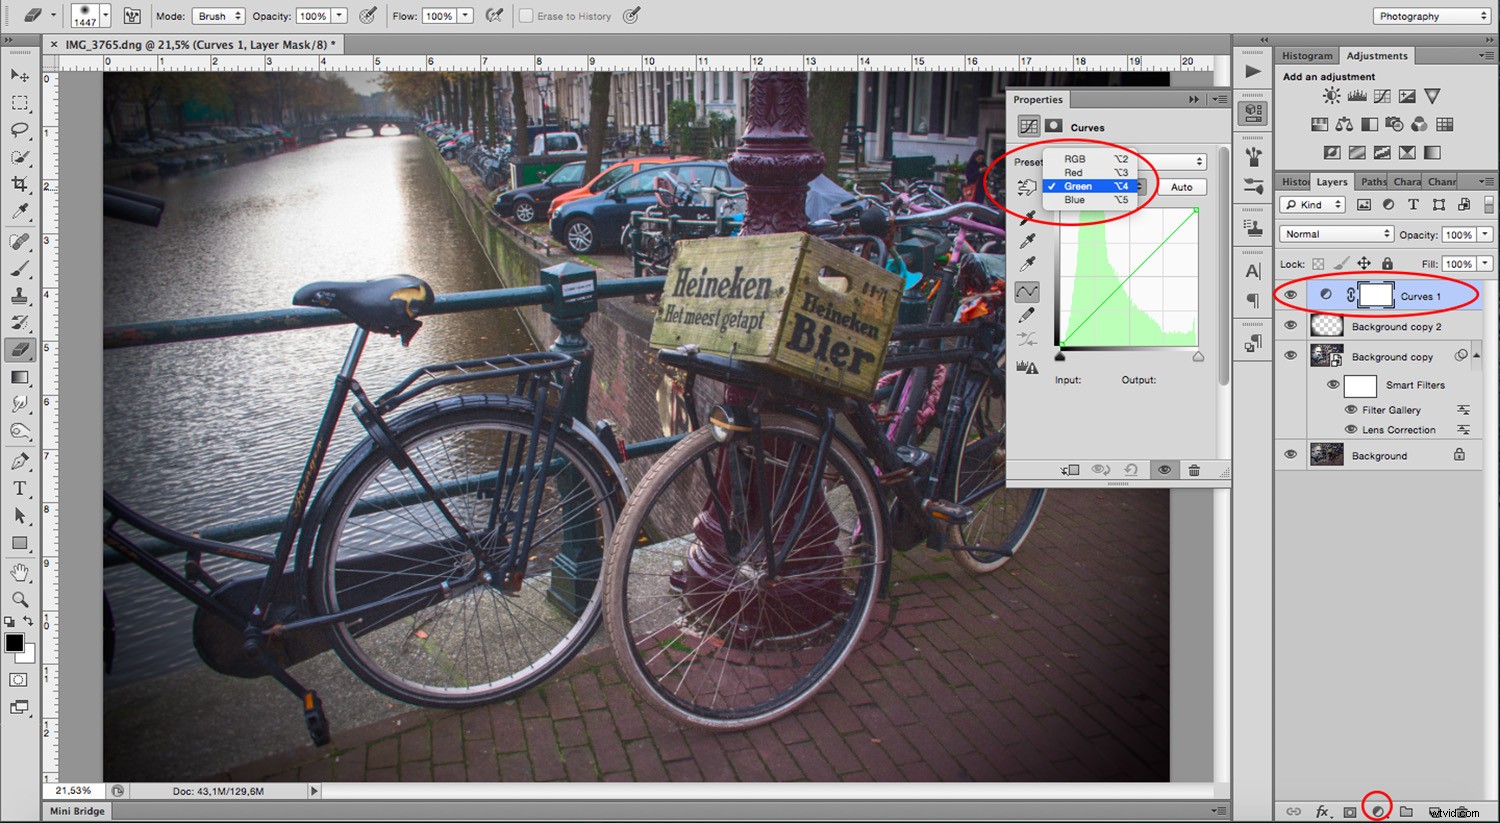
3. Color Saturation
Finally, Lomo’s characteristic colors are overly saturated. To achieve this, while there are many ways in Photoshop, I like to do it channel by channel with the ‘Curves’ tool. Firstly, add an adjustment layer.
To do this, click on the button at the bottom of the Layer panel with the circle symbol, and choose ‘Curves’ from its pop-up menu. You can move around the settings in each channel separately by opening the ‘Preset’ drop-down menu as per the picture below:
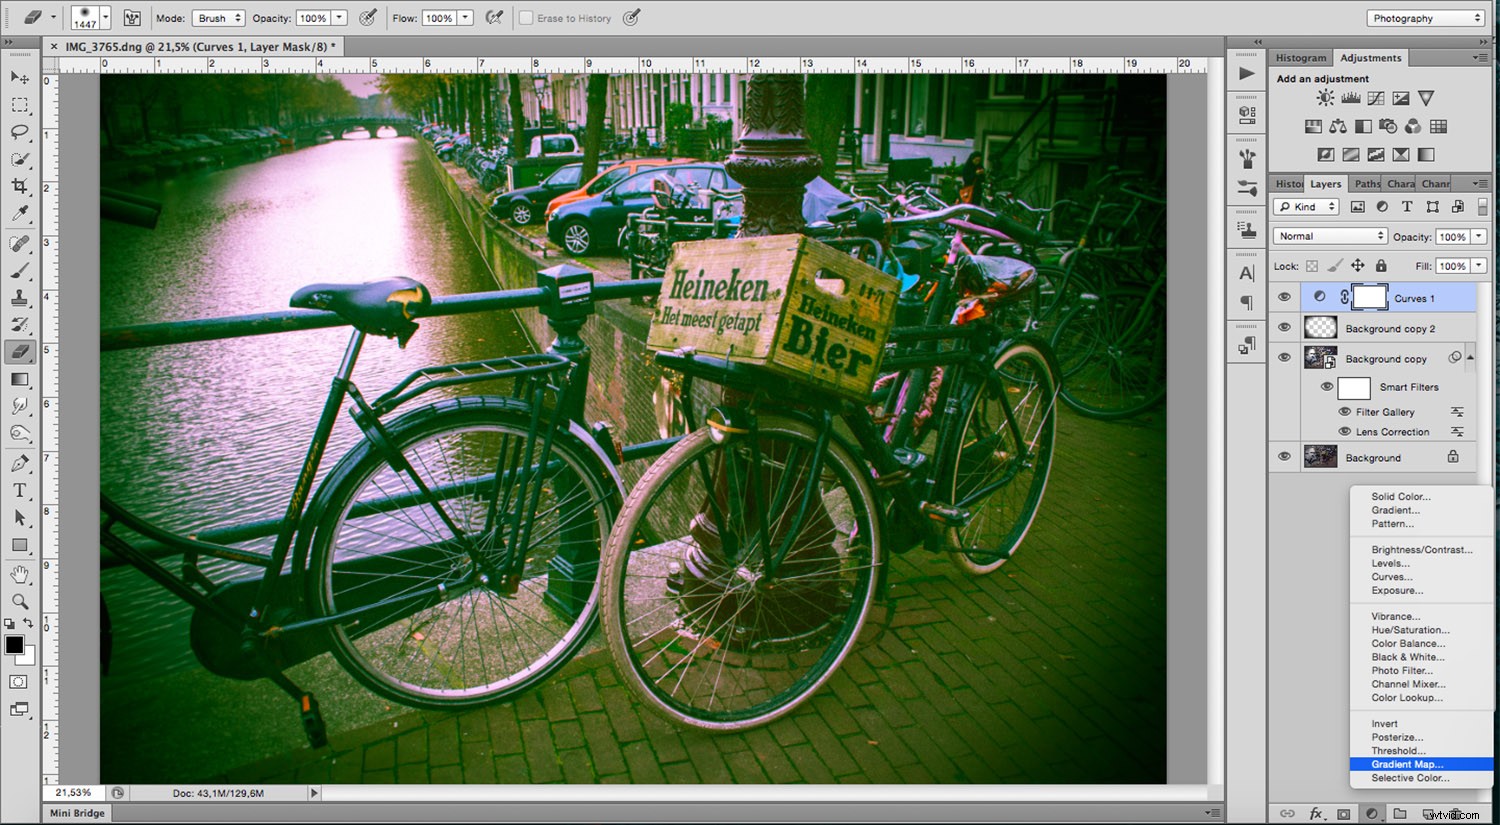
You may continue adding some adjustment layers to keep modifying the effect. I added a ‘Gradient Map’ with an ‘Overlay’ blending mode. I also added a ‘Vibrance’ and ‘Saturation’ layer where I pushed the vibrancy up a bit more. Experiment until you are satisfied with your adjustments.
Remember that you can double-click any adjustment layer to open its properties and move the settings as many times as you want.
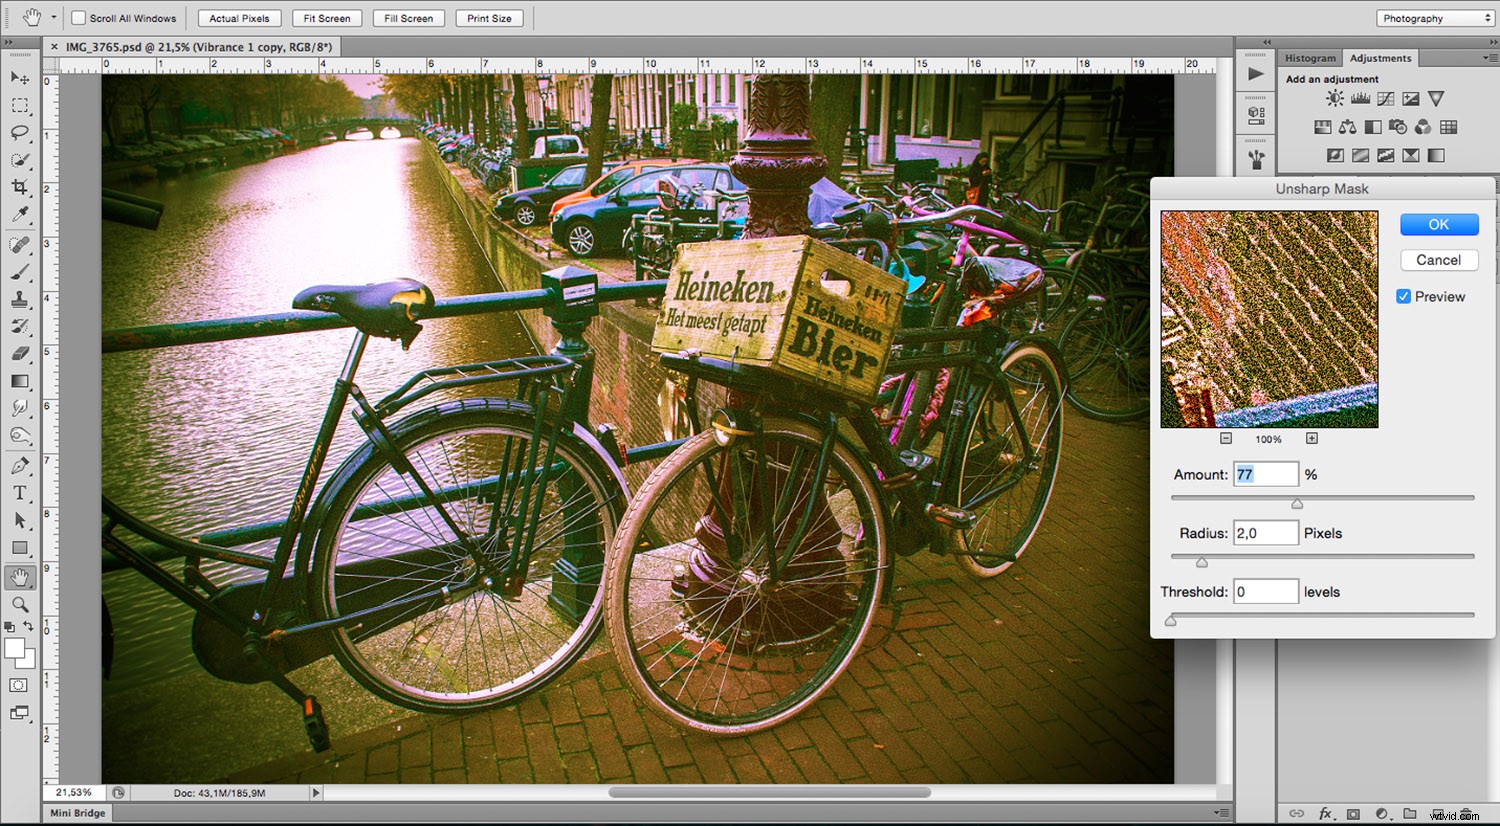
Once your adjusts are set, go to Layer -> Flatten Image which will compact all the layers you created into one. If however, you’d like to keep your layered file first, save a copy of it before you flatten. Once your image is flattened, go to Menu -> Filter -> Sharpen -> Unsharp Mask and apply it to your image.
Be careful not to exaggerate this because it will enhance the film grain from before. Just move the sliders while keeping an eye on the preview window.
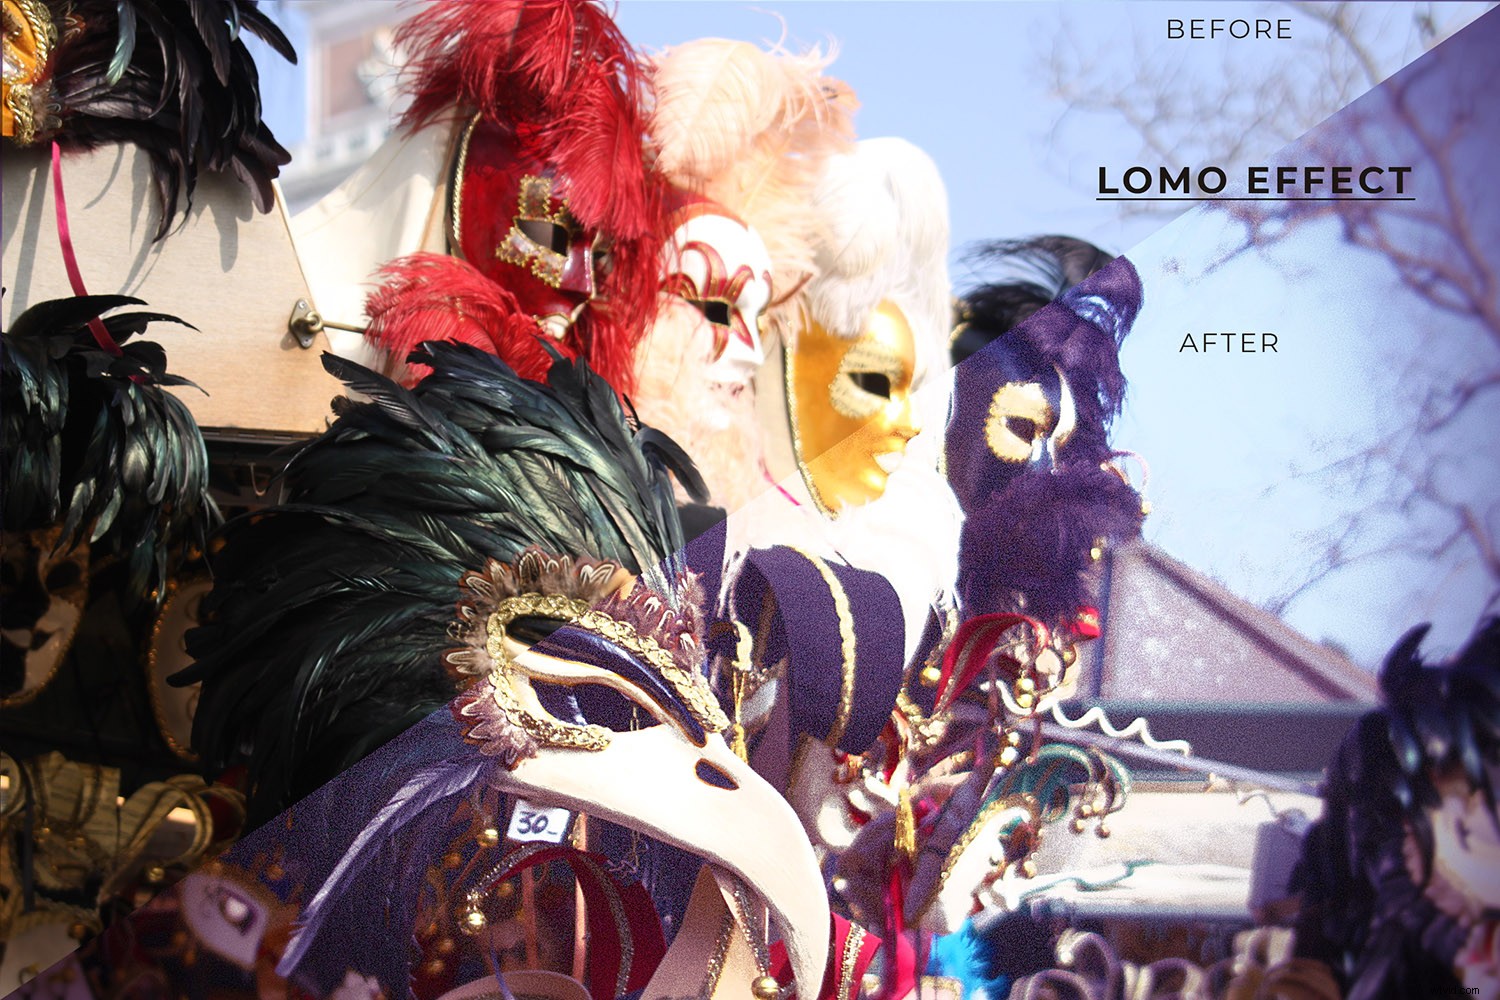
That’s it! Take a look at the before and after images below.
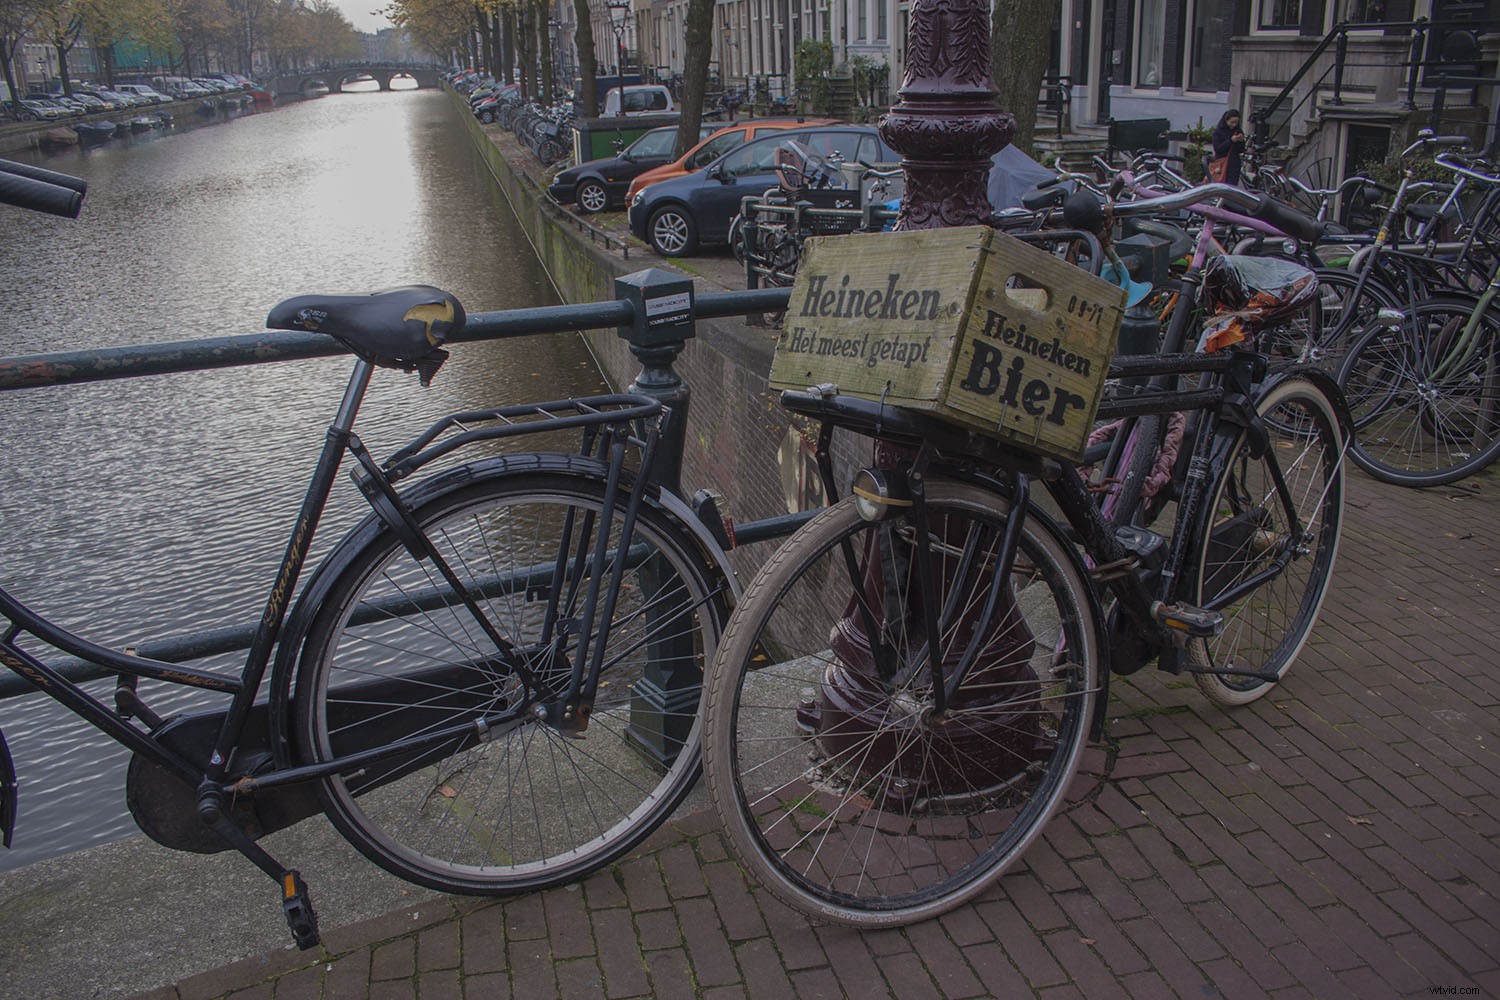
Before
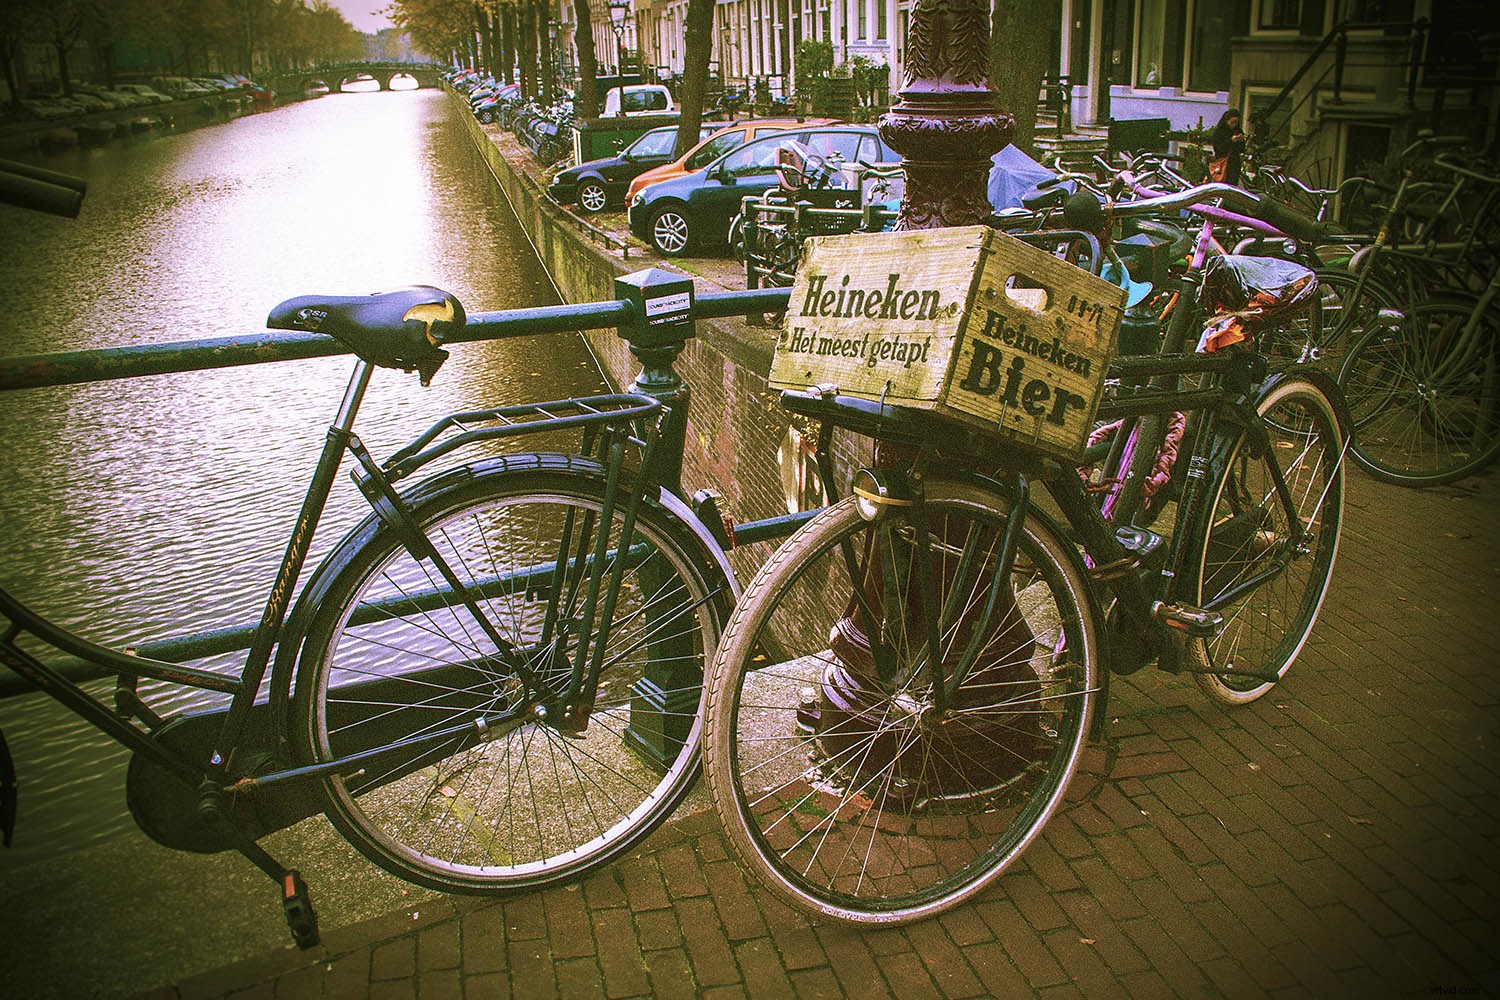
After
Try out this technique for yourself, and show us what you come up with in the comments section below.