Some time ago I wrote a blog post called “Turn Ho-Hum Color into WOW! with Photoshop” which involved using the LAB color space to adjust an image. In the interests of those of you who use Gimp instead of Photoshop, this blog post is a revisit on the topic of dragging color out of lackluster images this time using Gimp.
One of the hidden secrets of Gimp is that it supports the LAB color space so you can get access to the L, a and b channels in an image. This adjustment therefore produces similar results to those you can achieve with my earlier post using Photoshop it’s just that the process in Gimp is a little different.
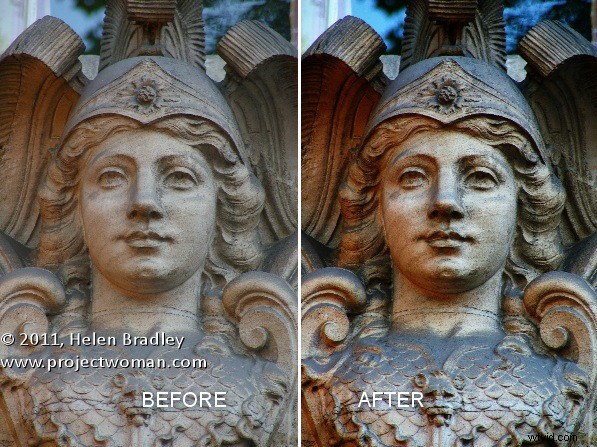
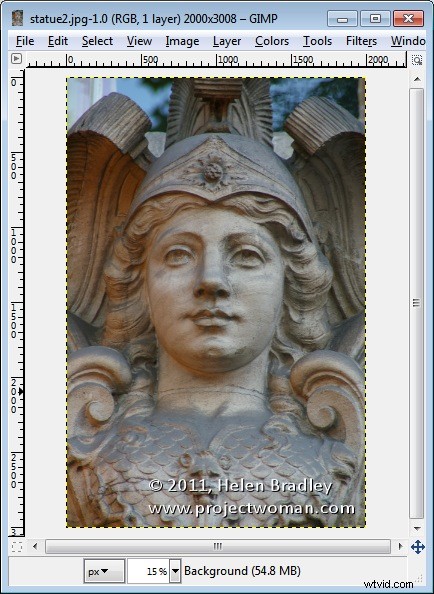
Start out with an image that could use a color boost. This image of a statue over a door in Paris is very monochromatic so it’s a great contender for this process.
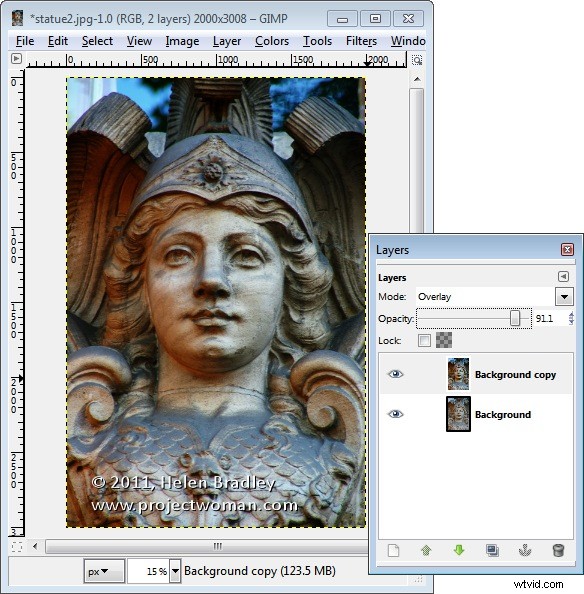
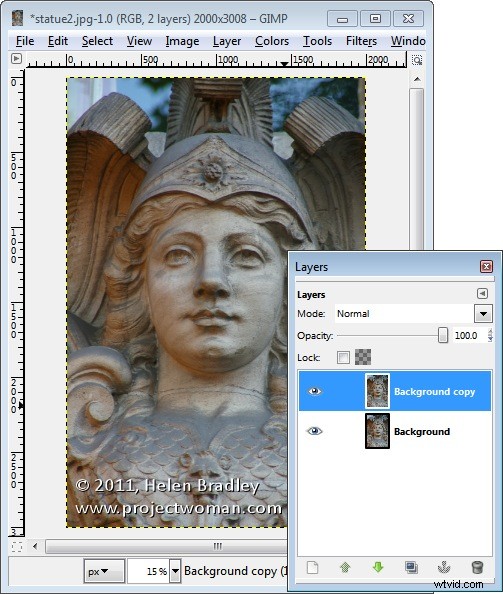
Start by making sure your Layers panel is visible – if not, choose Window > Dockable Dialogs > Layers (or Control + L) to display it. Right click the Background layer and choose Duplicate Layer. Select this new top layer.
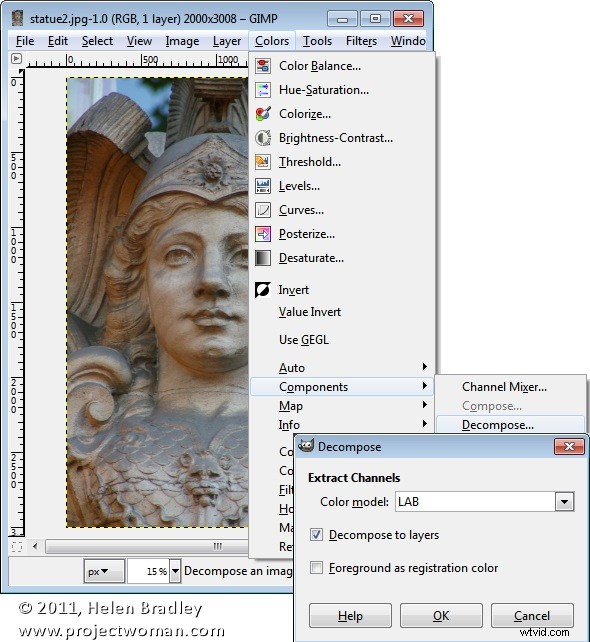
To convert the image to LAB color, choose Colors > Components > Decompose. From the color model dropdown list, select LAB. You will want to decompose to layers so select Decompose To Layers and click Ok.
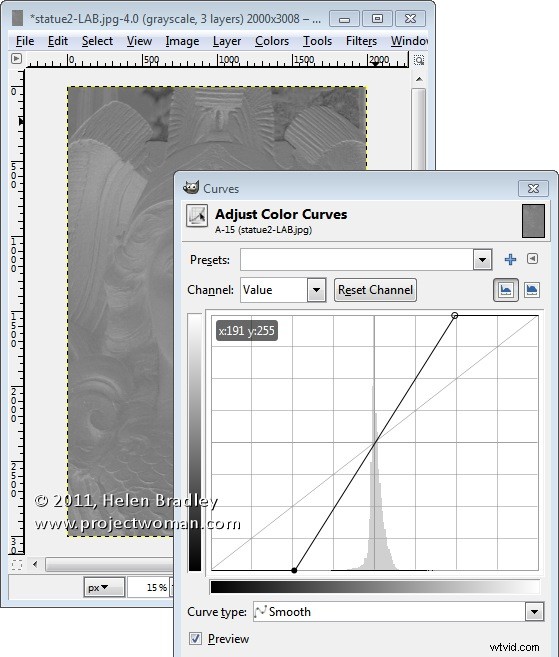
You’ll have a new image on the screen with three layers. Right now you’ll be looking at the L channel and below it in the Layers palette are the A and B channels.

Disable visibility on the L layer and click the A layer to select it. You should have a dark murky almost negative looking image on this layer. Choose Colors > Curves and adjust the curves by dragging the top right and bottom left points on the curve one, two or three boxes inwards on the grid. You can read off the values so pairs of values like (30,0) and (225,255) or (64,0) and (191,255) are good.
You need to make sure the line goes through the middle of the grid, or you will get an unwanted color cast in the final image. This A channel controls the Magenta and Green in the image and you’re boosting it now to very high levels. Click Ok.
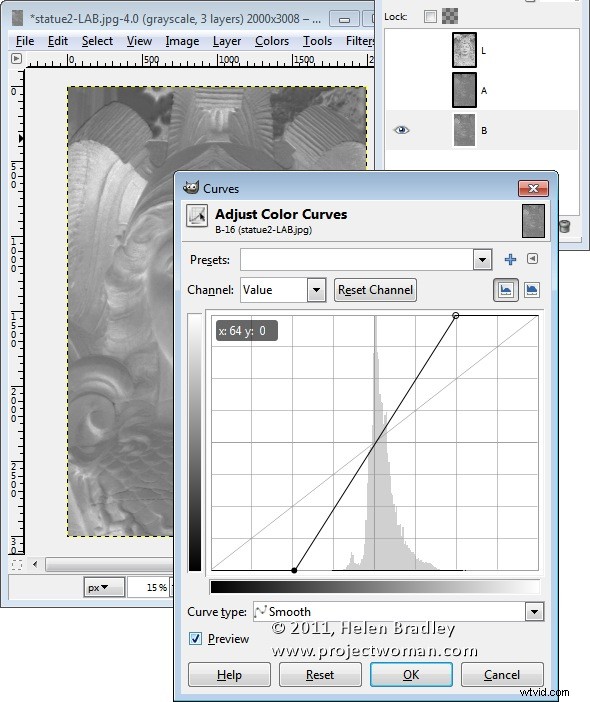
Repeat this by disabling the visibility on the A channel and do the same on the B channel. This is the Yellow/Blue channel. When you’re done, turn back on the visibility of all three channels. You should see no difference in the image at this stage.
If desired, you can adjust the contrast in the L channel using curves – this will give you some additional boost in contrast in the final image. The L channel is the luminosity channel and it has no color in it at all so you can create a different shape curve here and there is no requirement for the line to go through the middle of the grid.

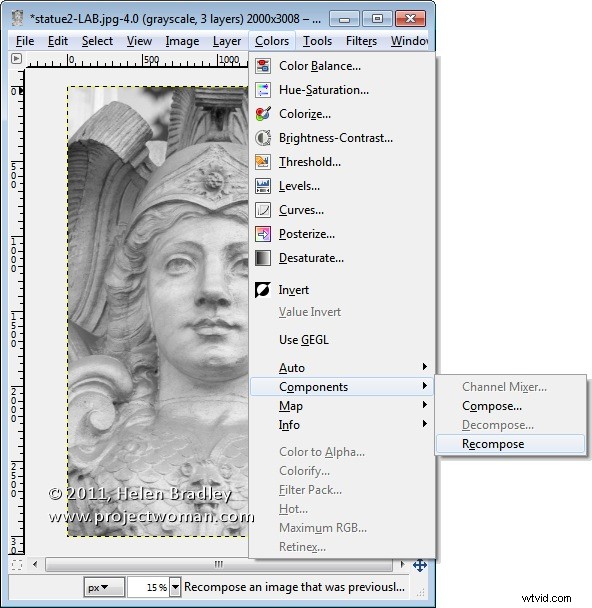
When you’re done, choose Colors > Components > Recompose. The layers will be recomposed back into the original image.
To see it, you will need to close the LAB version and return to your original image. Because you’re working on a duplicate layer, you can now blend the top layer by selecting a different blend mode such as Overlay for the top layer and then adjust down the Opacity to suit.