“I swear, the walls were white!” you exclaim as you look through indoor photos taken from an earlier shoot, that now appear to have an annoying yellow tint over everything. Sound familiar? Don’t worry, you’re not crazy. This is a common frustration, photographers of all experience levels face due to what’s referred to as “color casting”. Color casting is simply the effect of light striking different surfaces and bouncing back other colors into your camera’s sensor. Though annoying, it’s also relatively unavoidable without careful calculation and additional equipment.
Powerful photographs are created before, during, and after the click of your camera. Sometimes, especially when it comes to photographing wiggly, unpredictable children, you don’t exactly have time to calibrate with a gray card, adjust your camera settings, or take a test shot. If you’re not already bored by the thought of it, by the time you actually work through this process, the moment has passed, and you’re still fiddling with a camera instead of chasing after your little subject.
Since some of the best natural shots occur in the comfort of your home, it’s important to make sure the walls surrounding you aren’t obstructing the emotion you could be catching with awkward color casts. Even though grasping skills like proper exposure, white balance settings, and other in-camera techniques are key to creating good photos, they are only pieces of the greater puzzle. Sometimes, it’s the things like communicating effectively with your subject, learning to naturally direct posing, and mastering basic post-processing tricks that truly take that in-camera image and reveal the emotion behind it. Luckily, correcting dingy-wall syndrome is a quick and easy way to improve your indoor shots. With just a few quick steps in Photoshop, you can restore brightness to your walls and subjects and drastically improve your shot.
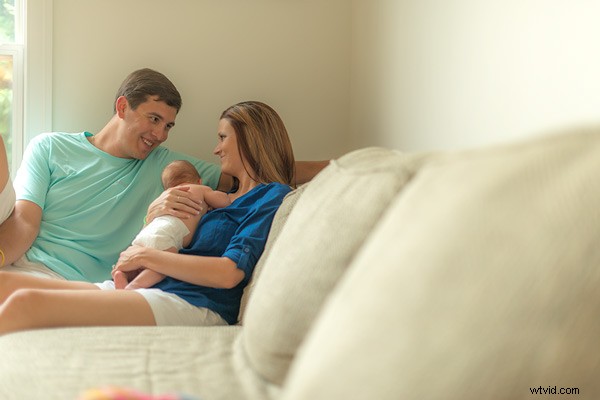
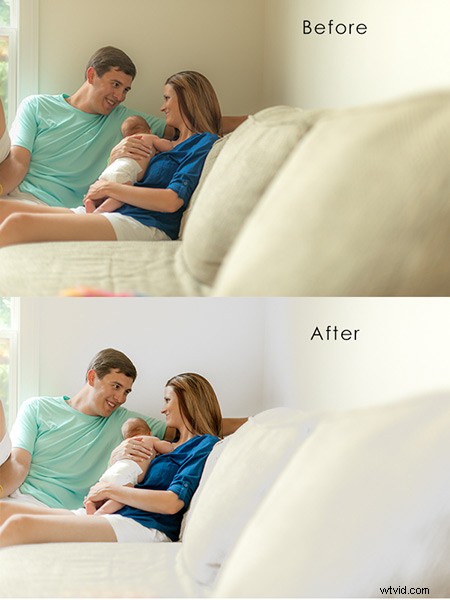
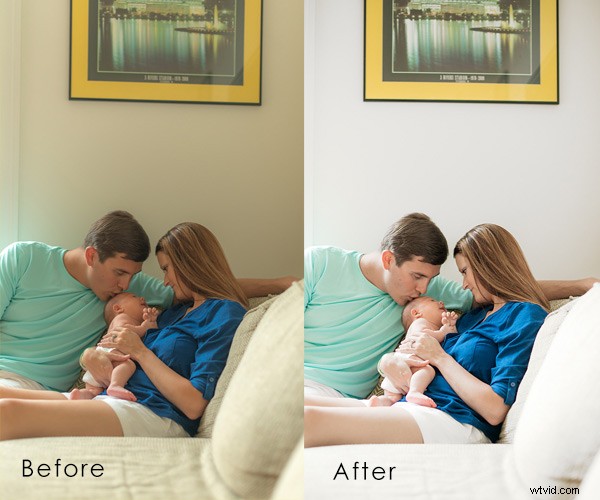
Above is the image I started with. The walls were white and the couch was tan, but the color cast over the image makes everything appear dingy. This is what we’re working towards:

How to fix this – steps:
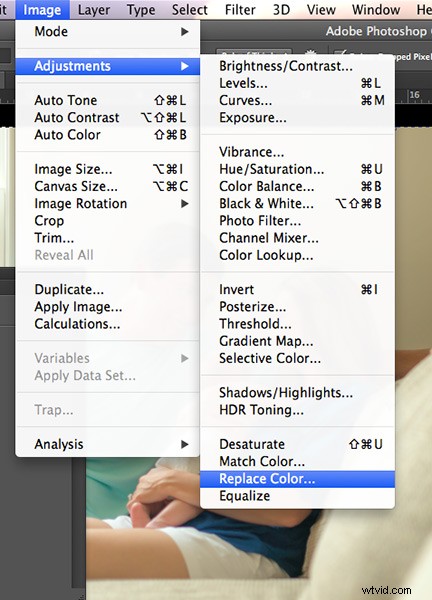
Step one
Operating on a new layer, navigate to the ‘Replace Color’ tool by clicking on Image > Adjustments > Replace Color
Step two
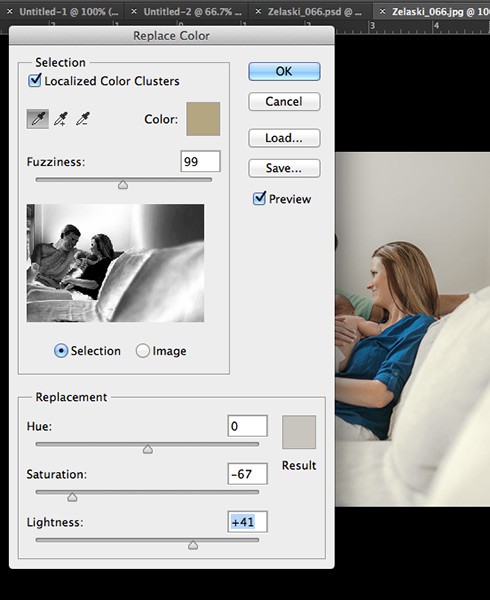
A dialog box will pop up. Make sure the ‘Localized Colors’ box is checked and the ‘Eyedropper’ tool is selected. Sample a section of the wall from the original image you want to adjust. With the ‘selection’ option active, your preview shows what color will be affected by with adjustment in white. Play with the fuzziness slider until your preview shows the best selection. It’s okay if it picks up some colors from other parts of the image you don’t want to adjust; we’ll go back and fix that later.
Option: You can also select just the portion of the image you want to change by using the Quick Select tool.
Step three
Slide the saturation bar to the left to decrease the color tones, but not too far that it creates noise (grain) from the contrast. Slide the ‘lightness’ bar to the right to adjust the brightness of your white, but again, not so much that it creates unusual contrast. Use your judgment based your particular photo to determine the levels that achieve the best result. Click ‘Ok”.
Step four
If your fuzziness picked up any samples from areas that you did not wish to change, like faces for example, simply select the ‘Eraser’ tool and paint over those areas to restore the original color. You can adjust the opacity of your eraser to control the amount of color you wish to restore as well. (You can also use a layer mask to do this)
That’s it! Now you can make any other changes or adjustments to the image. This one simple fix makes a huge difference in the impact of your images and takes less than a minute to complete once you get the hang of it. Normally, “I’ll fix it in post-processing” is not a great motto to adopt as a photographer and of course, you should aim to do as much in camera as possible. But hey, life is spontaneous! This quick little trick is an easy way for you to truly enhance the natural beauty of your indoor images and you’ll never have to worry about missing the shot again because of your in-camera white balance.