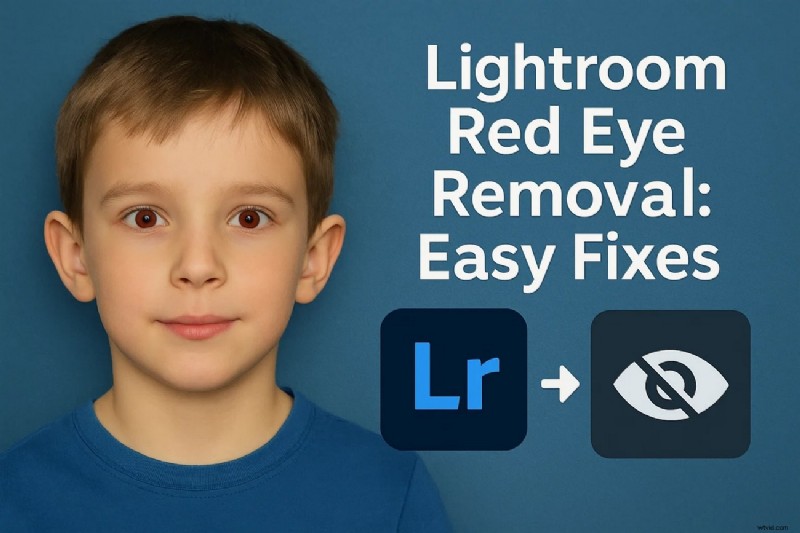
Red-eye can instantly spoil an otherwise perfect portrait when a flash reflects off the retina. Adobe Lightroom's Red Eye Removal tool gives you a fast and precise way to fix the problem and bring back natural-looking eyes in your photos. Still, Lightroom doesn't always handle every situation perfectly—harsh lighting or strong reflections may leave you wanting more control.
This guide shows you exactly how to use Lightroom Red Eye Removal, shares advanced editing tips for tougher cases, and compares Lightroom with creative alternatives like Filmora, which lets you refine eyes using masking, hue adjustments, and beautification effects. With these methods, you'll know how to correct red-eye quickly and even take your portraits to a more polished, artistic level.
Part 1. Fix Red Eye In Lightroom: Automatic & Manual Solutions
Looking for a way to remove red-eye from your photos? Adobe Lightroom's Red Eye Removal tool makes the process simple and accurate. Whether you're fixing portraits of friends or editing pet photos, this feature quickly restores a natural look. Powered by intelligent detection, Lightroom highlights the red area in the eyes and removes it in just a few clicks.
For more control, the Lightroom Red Eye tool lets you adjust the pupil size and use the Darken slider to fine-tune eye color. Lightroom actually offers two official methods to correct red-eye, and in the next section, we'll cover each approach step by step along with advanced tips to achieve the best results.
Official Methods (Recommended)
The desktop version of Lightroom offers two modes of eye correction:
- The Red Eye tool is designed to fix human portraits
- The Pet Eye correction works specifically on pets
Follow the steps below to learn how to remove red-eye in Lightroom:
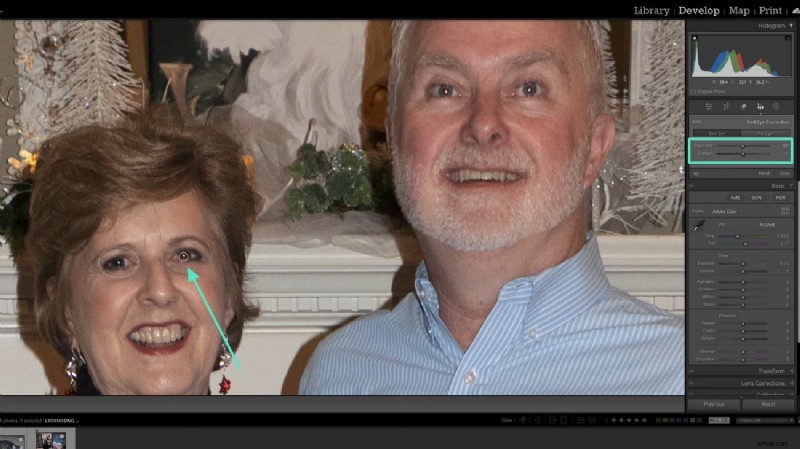
Approach 1. Red Eye Tool on Desktop
1
Open the Red Eye tool
Go to the right panel and select the Red Eye Correction mode. From there, click on the "Red Eye" option to start.

2
Zoom in and adjust the pupil
Zoom into the photo and select the eyes you want to fix. Expand the correction area to cover the entire eye socket so that Lightroom's AI can detect and remove the redness. Then, fine-tune the look using the right panel:
- Use the Pupil Size slider to adjust eye size.
- Use the Darken slider to control pupil color and achieve a natural tone.
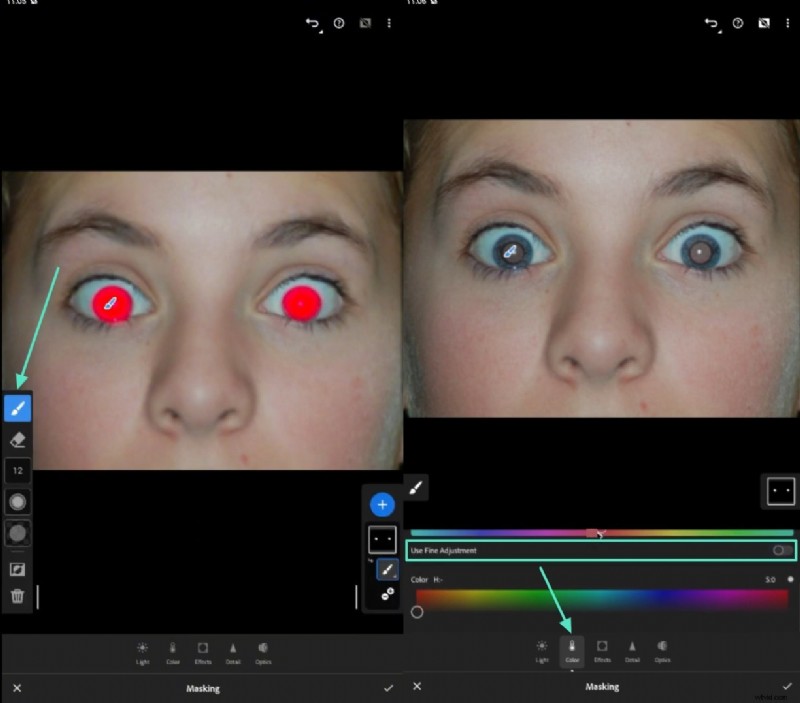
Approach 2. Selective Edits in Lightroom Mobile
Users looking for red eye removal on the go can use the mobile app offered by Lightroom. Using this platform, you can benefit from masking techniques to eliminate the redness in your eyes. The following section is a detailed guide on how to remove red eyes Lightroom mobile:
1
Open the Masking tool
Import your photo, then go to the Masking tab and tap the "+" icon. From the pop-up menu, select Brush to begin the correction.

2
Brush over the pupil and adjust the color
Use the left-hand menu to set the brush size, then paint a circle around the entire pupil. Next, open the Color tab at the bottom and adjust the color spectrum until the eye looks natural. For more precise control, enable the Use Fine Adjustment toggle.
Supplementary Methods in Lightroom
We know that there are various other hacks that can be used to get rid of red eyes. The following section covers the supplementary options and how to fix red eye in Lightroom:
Auto Detection in Lightroom PC
In the newer cloud-based desktop edition, the red eye removal has an "Auto Correct" option. Instead of manually marking each eye and fixing the color, users can now have the redness deducted and fixed with a click. After Auto Correct, you can still fine-tune your settings like pupil size and darkness to get the most realistic results.
Healing Method in Mobile App
This method is the smarter fix when you want the red eye part to blend seamlessly within the surroundings. You just have to pick the healing tool and paint over the right part of the eye. The tool replicates the size and tone of the marked area and tries to merge it into the surroundings.
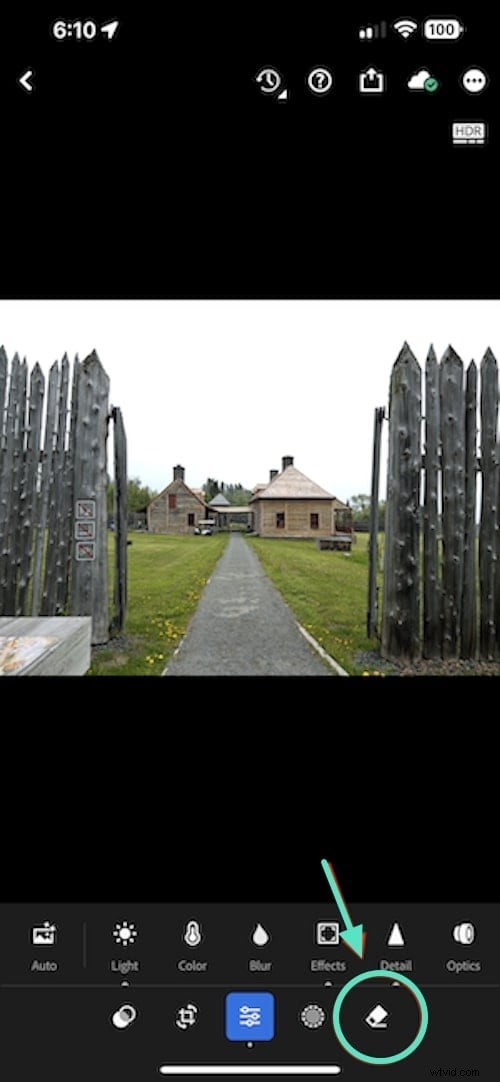
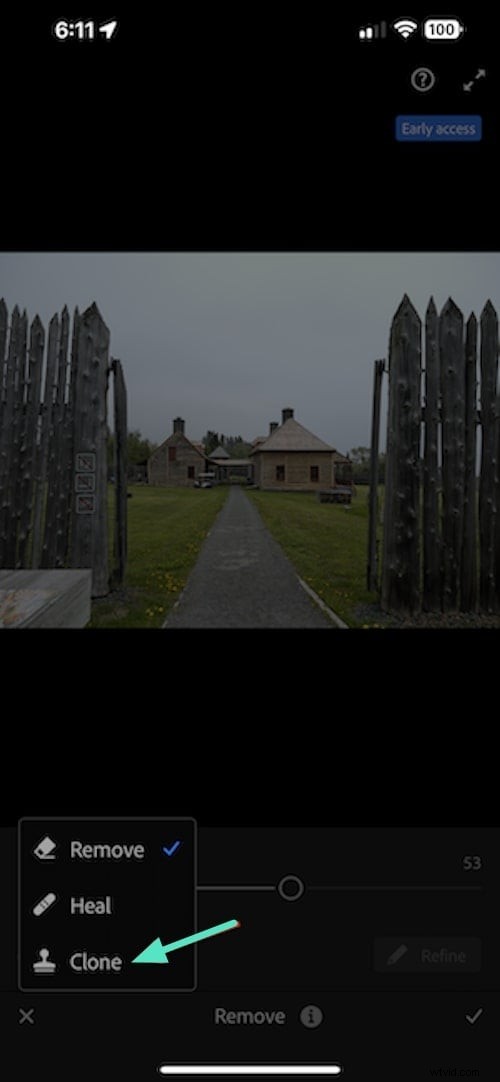
Clone Method in Mobile App
Clone is a more straightforward way of Lightroom red eye removal; however, it requires extensive tweaking to achieve realistic outcomes. All you need to do is create a circle in the desired pupil's color using the color picker. When the clone is created, you can place it inside the eye to fit the pupil and mimic the real eye.
Part 2. From Flaw to Creativity: Superior Red Eye Styling Tools
Removing redness is only the first step in eye editing. While Lightroom focuses on quick corrections, Wondershare Filmoraoffers a more creative approach that fits into complete video and content workflows. Instead of only fixing flaws, Filmora lets you transform the eyes into a stylistic element of your project.

As a strong Lightroom red eye removal alternative, Filmora provides multiple ways to handle eye corrections:
- Masking options help blend the eyes seamlessly into the scene.
- Color grading tools let you adjust or completely change the pupil color for unique effects.
- Creative effects and stickers can be applied to the eyes, turning them into standout visual elements.
Designed for video-first editing, Filmora doesn't just remove red eye — it gives creators the freedom to restyle and reimagine eye details as part of a larger creative vision.

Filmora
AI Video Editing App & Software
Best tool for making videos anywhere for all creators!
Your Perfect First Video Edit Starts Here - No Experience Needed
Method 1. Mask the Red Eyes to Remove the Artifact
Masking is one of the most effective ways to conceal red eyes in Filmora. By isolating only the affected area, you can apply adjustments without disturbing the rest of the photo, ensuring a natural finish. Follow these steps to perform Filmora red eye removal using the masking tool:
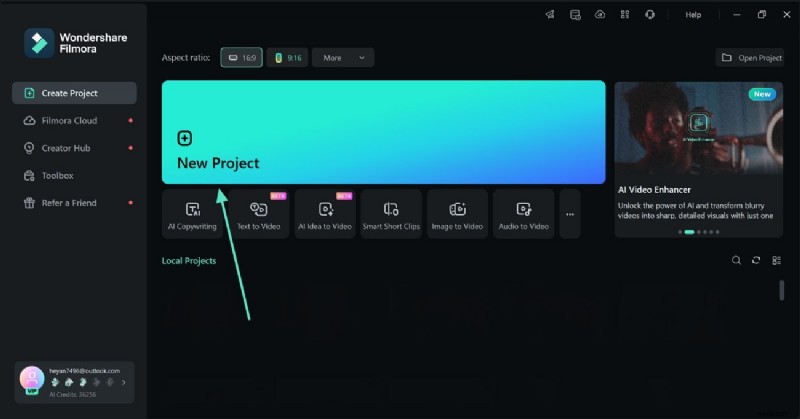
1
Start a New Project to Begin
- To remove the red eye, start a "New Project" and head over to the next interface.
 Secure Download
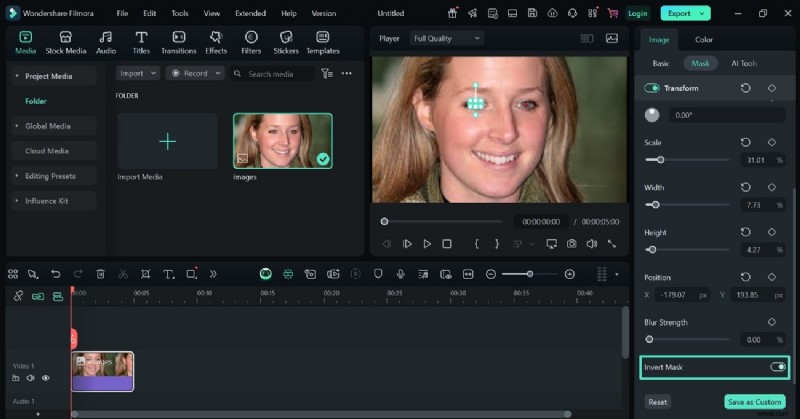
2
Enter the Masking Panel
- "Import" an image and select the image track after dragging it to the timeline.
- Now, enter the "Mask" panel on the right and explore it.

3
Draw a Round Mask and Invert it
- Next, select the "Round" option and draw a circular mask around the red eye.
- Scroll down and toggle on the "Invert Mask" option to conceal the redness.
4
Repeat the Process and Export the Image
- Once the red pupil is concealed, repeat the process on the other eye.
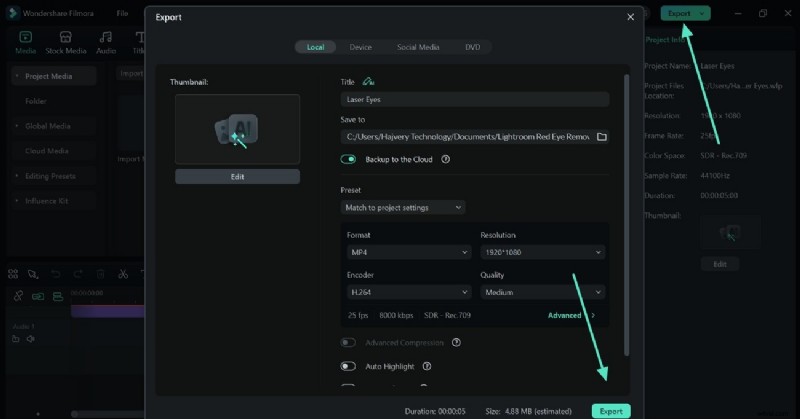
- After the image is ready, select the "Export" button at the top right to save the picture to your device.
Method 2. Turning Red Eyes into a Creative Effect
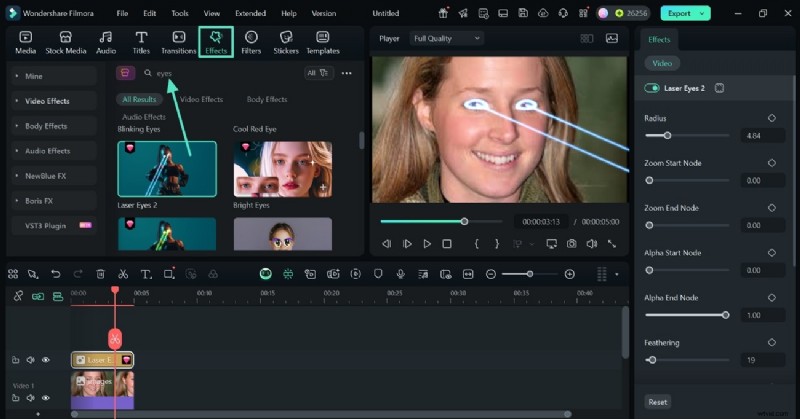
Another approach to concealing the redness in your eyes is to transform them into graphical elements. Filmora offers a range of exciting eye effects that can be used to replace the artifacts. From laser eyes to funky glasses, you can enjoy any element in the eyes. Follow the steps below and learn how to perform this method:
1
Add a Laser Eye Effect
- With the image added, lead into the "Effects" tab, use the search bar to explore "Eyes."
- Apply a suitable asset and customize it using the right panel.
2
Save the Edited Project
- Once the image is ready, save it to your device using the "Export" button on the top right.

Part 3. Lightroom vs. Filmora: Precision vs. Creativity
After a detailed overview of how these two tools work, confusion of choice is natural. To help you pick the best option of the two, the following comparison table will help:
| Feature | Wondershare Filmora | Lightroom |
| Primary Red Eye Fix | Multiple creative methods: stickers, masks, effects | Single official Red Eye Removal tool |
| Stickers | Offers round stickers to cover or replace red pupils | No stickers or overlays available |
| Masking Tools | Can mask eyes to adjust colors or change the entire eye look | Masking only in the mobile app as a workaround |
| Creative Eye Effects | Adds funky effects like sunglasses, stylized eyes, or color swaps | No creative eye effects |
| Adjustability | Flexible controls with creative freedom in terms of shape, color, and effects | Limited sliders for pupil size and darkening |
| Automatic Correction | No need, as the creative fixes bypass manual work | Auto Correct exists only in the cloud-based version |
| User Experience | Beginner-friendly | Aimed at professional correction only |
| Use Case | Best for visually playful edits for social media | Applicable for natural correction for professional portraits |
| Overall Strength | Superior for creativity and variety in fixing or restyling eyes | Strong for precision and workflow efficiency, but less versatile |
Secure Download
Conclusion
In essence, Lightroom red eye removal is an effective way to get rid of the artifacts effectively. It offers multiple methods for this purpose, including its desktop and mobile versions. Due to the limitations of features, we explored Filmora as a better alternative. This replacement allows you to fix the redness and transform the eyes into a visually appealing graphic.