Learn the trick to creating monumental 3D titles in Final Cut Pro X. Master the technique with FREE stock footage and music from Shutterstock and PremiumBeat.
Thanks to an amazing set of textures and presets, it’s a breeze to create 3D titles in Final Cut Pro X. Using various video tools, users can create a wide assortment of 3D text without needing to first master a complex 3D application. Let’s look at how to create 3D titles in Final Cut Pro. This video tutorial will show you exactly how to make your 3D text stand out.
But don’t just watch the clip… fire up Final Cut Pro X and make your own eye-catching 3D text! We’ve teamed up with Shutterstock to give you free assets so you can follow along.
You can download the free footage, sound effects, and assets from the Final Cut Pro X page here on PremiumBeat.
Download Free 3D Title Assets
Creating 3D Titles in Final Cut Pro X
Step 1: Drag the Text to Your Timeline
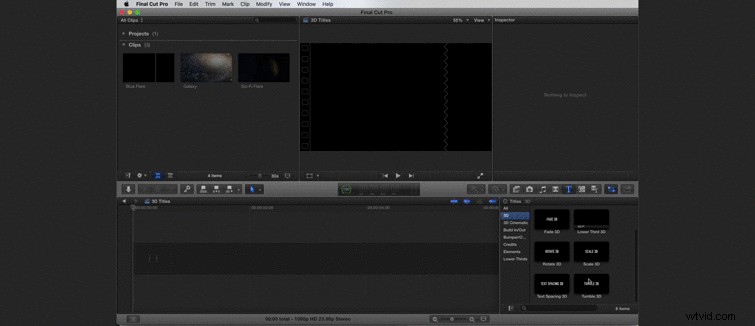
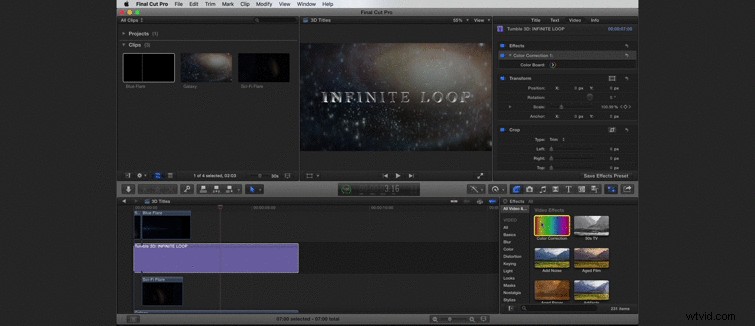
To get started, drag the Tumble 3D text effect into your timeline. You’ll find this effect under the Titles tab — it’s the one with the large “T” icon. When you drag the file into your timeline, you’ll be prompted to name the resolution and frame rate of your timeline. Choose whatever is appropriate for your project. In our example, we’re using 1080p HD at 23.98 frames per second.
Step 2: Stylize the Text
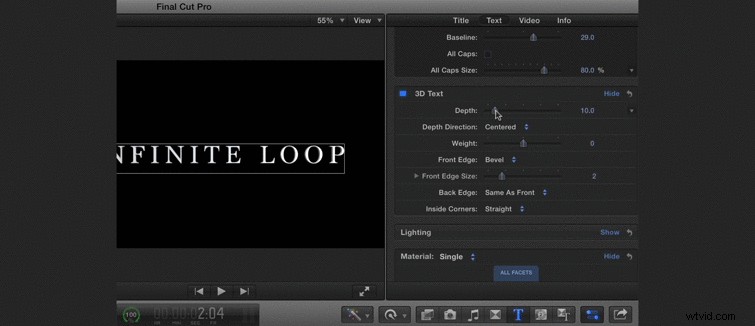
With your text selected in the timeline, navigate to the Text tab in the Inspector window at the top right of the Final Cut Pro window. From this tab you can adjust all the various parameters that are going to make your text awesome. Pick a font that looks great on screen.
For our example we’ll use the font called Marion. Perform the following steps to make your titles look exactly like our example:
- Increase the Depth
- Round the Depth to 40
- Change the Bevel Edge type to Round
- Increase the Edge Size to 3.3
- Change the Lighting Style to Diagonal Right
- Turn the Lighting Intensity Down to 20%
- Change the Custom Environment Map to ‘Soft Box Above’
- Increase the Intensity of the Lighting to 190%
- Change Your Material to Metal>Brushed Circular
- Select Multiple from the Materials Menu
- Change the Side Material to Metal>Old Steel
Step 3: Keyframe a Drift
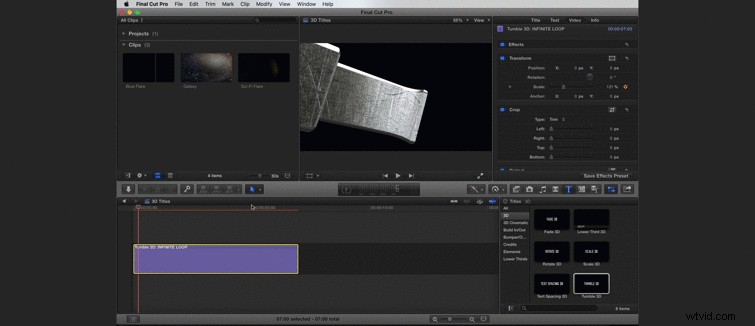
Under the Video tab, add a scale keyframe by hitting the plus icon on the first frame. Move forward about five seconds and scale down the footage to create a drifting effect.
Step 4: Add the Background

Now it’s time to add your background. You can do this by simply dragging your background video element down from your Clips panel.
Step 5: Add the Flare Element
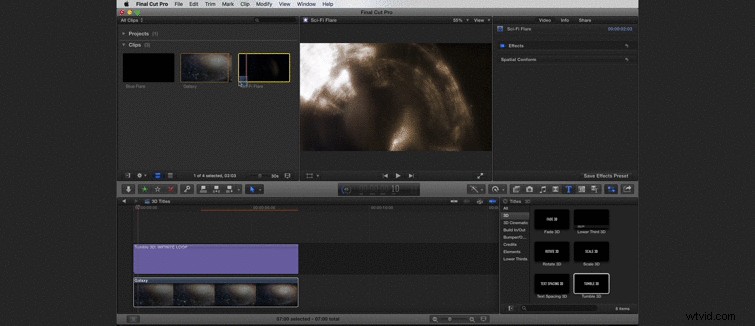
Drag your flare element into your composition. In our example, we had our flare over the text for a few frames, then below for the remainder of its duration. Change the Blending Mode to Add.
Step 6: Apply Some Quick Color Correction
To make your text blend better with your background, apply the Color Correction effect to your text and change the levels as needed.
This is, of course, one of the many ways to stylize 3D titles in Final Cut Pro X. For additional Final Cut Pro tutorials, check out our Final Cut Pro X page here on PremiumBeat.