Convert Mono to Stereo (and Vice Versa) in Premiere Pro
Adobe Premiere Pro is primarily a video editing platform, but it also offers basic audio manipulation tools. One common task is switching a mono audio track to stereo, or collapsing a stereo track into mono, which is essential for consistent voice‑over workflows.

Step‑by‑Step: Mono → Stereo
- Import your file by right‑clicking in the Project panel and selecting Import.
- Right‑click the clip and choose Modify > Audio Channels.
- In the Clip Channel Format dropdown, select Stereo and ensure both Left (L) and Right (R) boxes are checked.
- Click OK to apply the change.
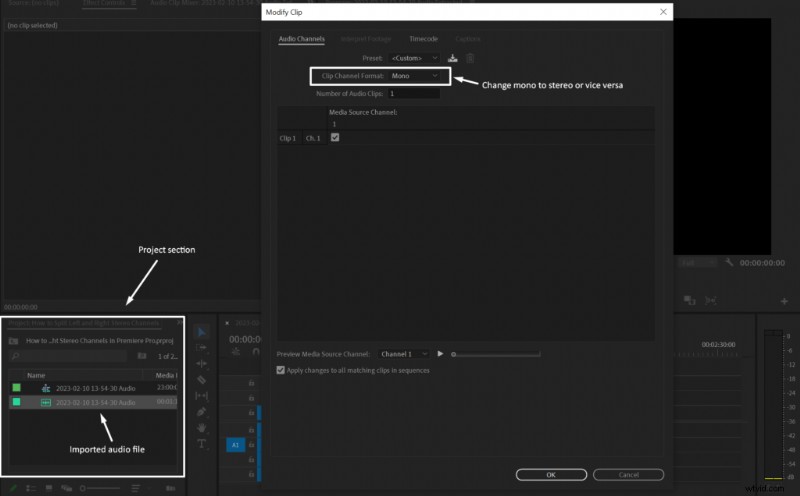
Leaving either the L or R box unchecked will silence that side on a stereo playback device, so always double‑check both.
Step‑by‑Step: Stereo → Mono
- Right‑click the stereo clip and choose Modify > Audio Channels.
- Select Mono in the Clip Channel Format menu.
- Confirm with OK.

These simple adjustments ensure your voice‑over audio sounds balanced whether played back in stereo or collapsed to mono.