Premiere Pro excels at editing, but DaVinci Resolve is the industry standard for color grading. Many editors therefore transfer projects between the two programs to combine Premiere’s robust editing workflow with Resolve’s advanced grading capabilities.
What Is an XML?
XML stands for 'eXtensible Markup Language'. It’s a lightweight file that describes every cut, trim, and transition made in your timeline, allowing DaVinci to reconstruct the edit exactly as it appears in Premiere.
Export From Premiere Pro to DaVinci Resolve: Step‑by‑Step Tutorial
Step 1: Create a New Sequence
Before exporting, prepare your timeline by creating a new sequence and naming it “grade” or a similar label.
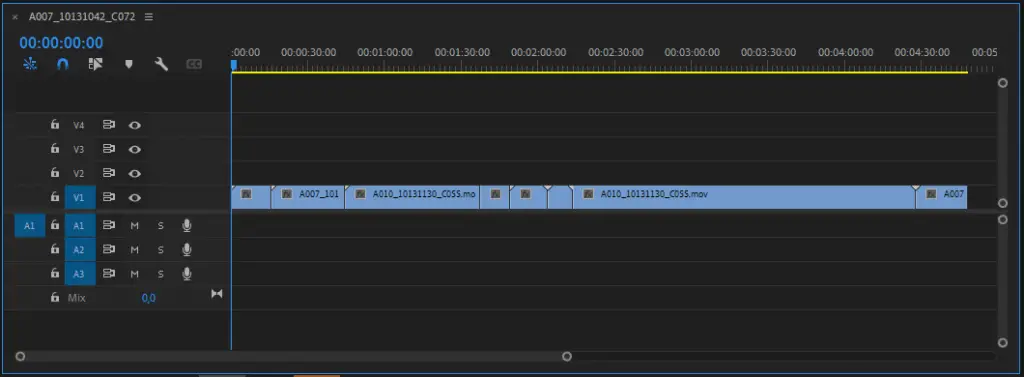
Step 2: Clean Your Timeline
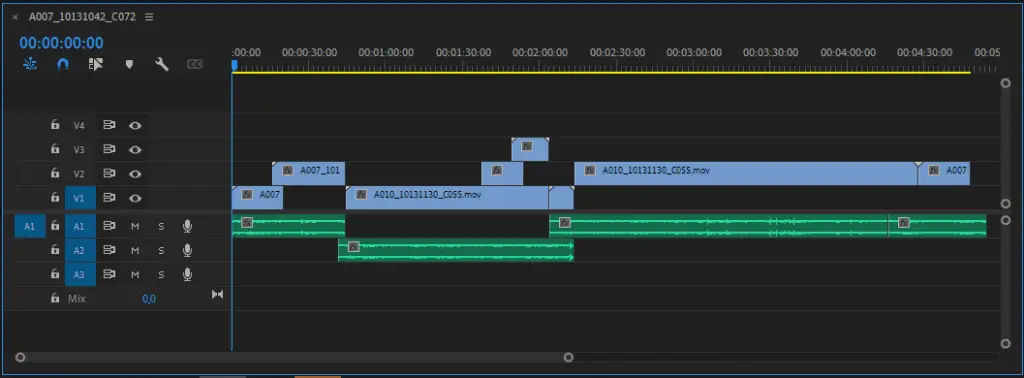
Lock your edit and collapse all tracks so that only a single video track remains. This reduces the chance of mis‑aligned clips or missing edits when the XML is imported into DaVinci.
Step 3: Remove All Sound
Color grading is a visual process, so exclude audio from the XML export. You can re‑add the sound later.
Step 4: Strip Custom Effects
Premiere effects that Resolve can’t interpret will not transfer. Basic transitions, simple motion or crop settings are preserved, but more complex FX such as lens flares should be rendered out before export.
Step 5: Export a Reference File
Export a quick reference clip in the same resolution as your sequence. The file doesn’t need to be high quality – a highly compressed format saves time while still allowing you to verify the import later.
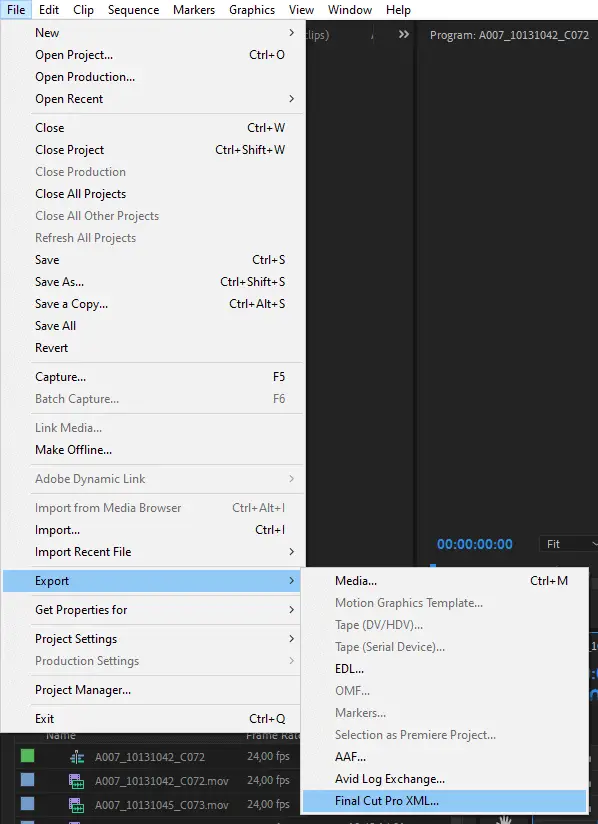
Step 6: Export an XML
In Premiere, choose File > Export > Final cut Pro XML. Don’t be confused by the “Final cut pro” wording; it’s the correct format that DaVinci Resolve can read.
Step 7: Import the Reference & XML in DaVinci
Open DaVinci Resolve, create a new project, and go to File > Import New Timeline > Import AAF, EDL, XML…. Select the XML you exported.
Image Scaling
If clips appear cropped or stretched, adjust the project settings: Files > Project Settings > Image Scaling. Set Input Scaling to ‘Center crop with no resizing’ to preserve the original dimensions.
Step 8: Verify the Import
Overlay the reference clip above the imported timeline and reduce its opacity to 50%. If the two layers align perfectly, the XML import was successful and you can proceed to color grading.
Export Back to Premiere Pro From DaVinci Resolve
After you’ve finished grading, you’ll want to return the edited sequence to Premiere for final assembly.
Step 1: Export XML from DaVinci Resolve
In the Deliver page, locate the Render Settings section and choose Premiere XML. Once rendering completes, exit Resolve.

Step 2: Import to Premiere
Back in Premiere, import the generated XML. Re‑attach your audio tracks and perform any remaining edits.
Alternative Methods
EDL
An EDL is a very simple edit list that records only the cut points. Because it supports just one video track and four audio tracks, it’s largely obsolete but still used by some finishing houses.
AAF
AAF, or Advanced Authoring Format, functions similarly to XML but can include more metadata. It’s a viable alternative if you encounter compatibility issues.
In Conclusion
Moving a project between Premiere Pro and DaVinci Resolve can be a meticulous process, but following these steps will reduce errors and give you confidence in the transfer. Every workflow is unique, so plan ahead and adapt the steps to fit your project’s needs. For more general export tips in Premiere Pro, see our dedicated guide.