When editing video, every tool can influence the final result. Editors invest time mastering each feature—not only to use them but to understand how they elevate the project.
Basic adjustment options such as contrast, white balance, and saturation may appear routine, yet they form the bedrock of a polished final cut. In this article we dive deep into white balance and its pivotal role in achieving accurate color.
In this article
- Part 1: How Does Trimming or Merging Videos Help Users?
- Part 2: Wondershare Filmora: An Introduction to a Great Video Editor
- Part 3: Guide to Cropping and Trimming Videos on Wondershare Filmora
- Part 4: Manual and Automated Techniques of Merging Content on Wondershare Filmora
- Conclusion
Wondershare Filmora
A cross‑platform solution that empowers creators to craft videos anywhere.

Part 1: Understanding White Balance in Video Editing
White balance is a fundamental color‑adjustment tool that ensures white objects render as true white. By aligning the color temperature of a clip, it also harmonizes all other hues within the frame.
When filming under mixed or unbalanced lighting—such as a blend of daylight, tungsten, or fluorescent—the camera’s sensor may introduce a color cast. A dominant blue or yellow tint can ripple across the entire image, distorting the intended mood and realism.
To correct this, a white reference point is selected; the software then recalibrates every other color relative to that point. The result is a natural, coherent visual palette that preserves the creator’s original intent.

Part 2: How White Balance Enhances Color Grading
1. Consistency
Accurate white balance during capture guarantees a uniform color temperature across shots. This consistency eliminates distracting shifts when editing cuts together multiple scenes.
2. Neutral Starting Point
With a properly balanced clip, colors sit closer to their natural state, providing a clean slate for creative grading and stylistic tweaks.
3. Natural‑Looking Colors
Correcting white balance ensures that white objects truly appear white, and that all other colors retain their authentic hues—yielding a video that feels genuine.
4. Creative Control
A balanced foundation allows editors to focus on artistic color manipulations rather than wrestling with unwanted color casts.
5. Enhanced Atmosphere
By fine‑tuning white balance, editors can subtly shift the emotional tone of a scene—adding warmth for a cozy feel or coolness for a tense mood.
6. Matching Footage
When shooting under mixed lighting, adjusting white balance helps unify disparate clips, producing a seamless visual narrative.
7. Correcting Mistakes
Should the camera’s white balance setting be off, post‑production adjustments can rectify color casts and restore visual fidelity.
8. Fixing Mixed Lighting
Even when ideal balance is unattainable during capture—due to conflicting light sources—color grading can compensate and achieve a harmonious result.
Part 3: Introducing Wondershare Filmora – A Versatile Video Editor
Filmora offers a robust suite of tools, from basic white balance adjustment to advanced color grading. Whether you’re editing portrait, widescreen, cinema, or vertical formats, Filmora’s timeline‑based workflow simplifies the process.
Beyond visual tweaks, Filmora includes audio normalization, multi‑track sound balance, and a library of royalty‑free music and sound effects—making it a one‑stop solution for video production.
Advanced AI Features of Wondershare Filmora
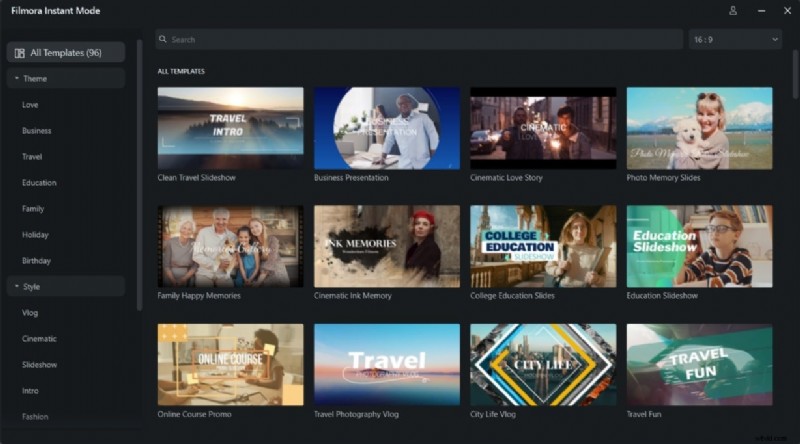
1. Instant Mode
Instant Mode lets you create high‑quality videos with minimal editing skill. By selecting from curated templates, the software automatically highlights key moments, adds expressive text, and generates a polished final product.
2. AI Audio Stretch
Automatically re‑timing audio to match video duration is effortless with AI Audio Stretch—no manual cuts or ripple editing required.
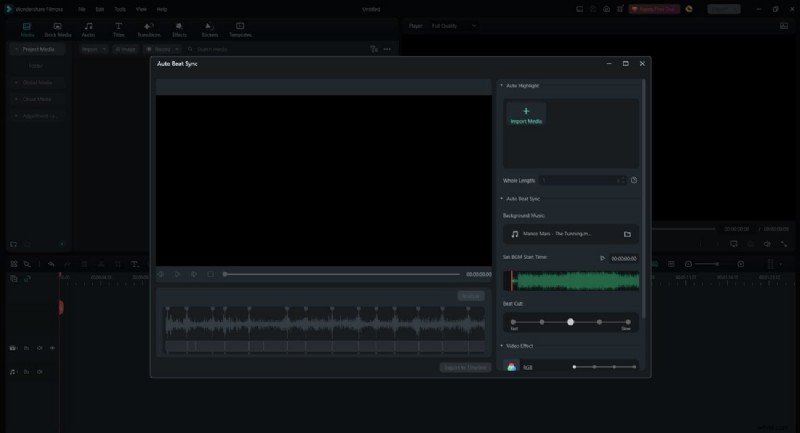
3. Auto Beat Sync
Synchronize audio perfectly with your footage using Auto Beat Sync, ensuring a rhythmic alignment that enhances the viewer’s experience.
Part 4: Managing White Balance in Wondershare Filmora
Filmora’s white balance tool is intuitive and powerful. Follow these steps to fine‑tune your clips:
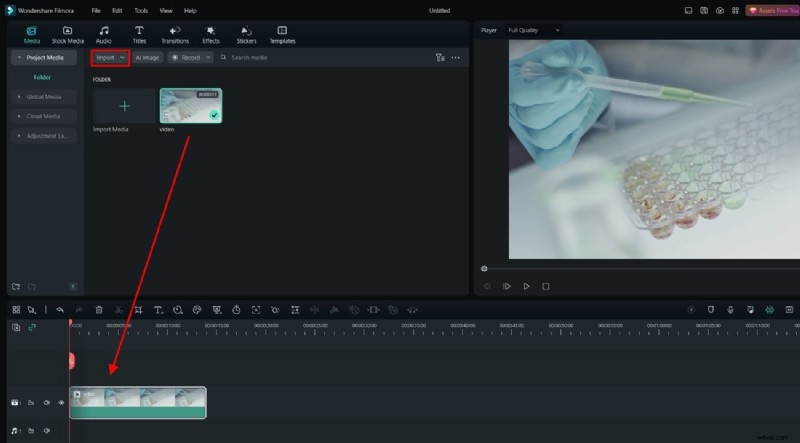
Step 1 – Create a Project and Add Videos to the Timeline
Import your footage with Ctrl + I, then drag the clip onto the timeline.
Step 2 – Access the Color Options
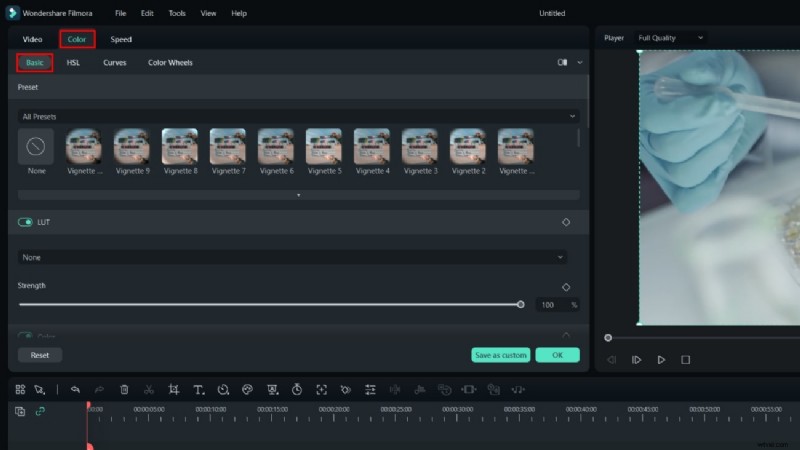
Click the clip in the timeline to open the right‑hand panel. Navigate to the Color tab and select Basic.
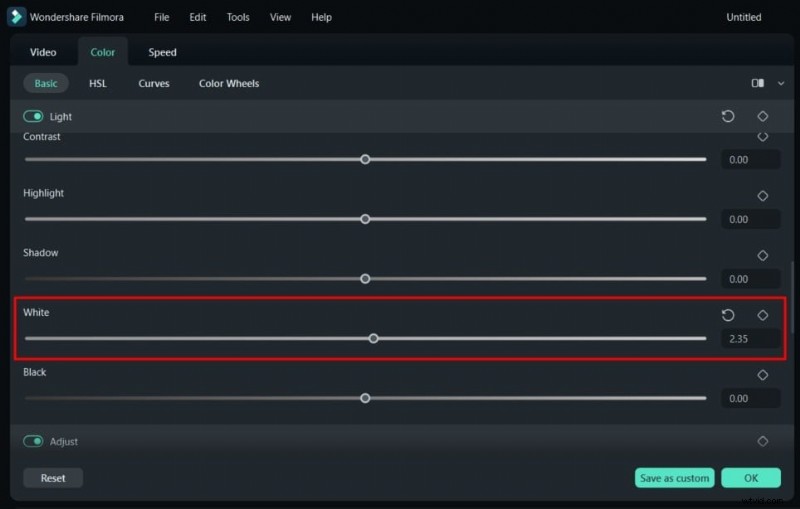
Step 3 – Adjust White Balance
Locate the White slider. Drag it or enter a numeric value to set the desired balance. For dynamic shots, add keyframes to adjust the balance over time.
Pro Tip: Filmora’s mobile app lets you correct color tones on the go—achieve a professional look from your iPhone or Android device.
Conclusion
White balance is a cornerstone of video editing. By addressing color casts early, you preserve realism, simplify color grading, and maintain creative freedom. Wondershare Filmora equips editors with both essential and advanced tools to master this technique, ensuring every frame reflects your vision.