Video effects breathe life into footage, adding creativity and engagement that elevate a production from ordinary to memorable. Among them, zoom‑in effects stand out as powerful tools for directing attention, emphasizing detail, and creating cinematic depth.
Whether you’re highlighting a product, intensifying an interview, or simply adding visual flair, mastering partial zooms can transform a scene. Fortunately, today’s editing suites offer a range of intuitive tools to achieve this effect with precision.
In this article
- Why Partial Zooming Matters in Video
- The Best Video Editor for Zooms: Wondershare Filmora
- Step‑by‑Step: Creating Partial Zooms in Filmora
- Achieving Smooth Zooms with Adobe Premiere Pro
- Conclusion
Wondershare Filmora is a cross‑platform editor that blends an approachable interface with professional‑grade features, making it ideal for creators of all skill levels.

Why Partial Zooming Matters in Video
A partial zoom effect serves multiple strategic purposes. Here are the core benefits that experts consistently see:
1. Highlight Key Details
Zooming in sharpens focus on specific elements—be it a product feature, an emotional expression, or a critical piece of information—drawing the viewer’s eye exactly where you want it.
2. Inject Visual Energy
Dynamic zooms break the monotony of static shots, creating a sense of motion and momentum that keeps audiences engaged throughout the clip.
3. Convey Intimacy and Emotion
Closer camera work fosters a personal connection, enhancing the storytelling impact in interviews, documentary footage, and narrative scenes.
4. Provide Context and Scale
Pulling back to reveal surroundings establishes setting, while zooming in offers a detailed view, helping viewers understand spatial relationships.
5. Smoothly Bridge Scenes
Zoom transitions can serve as natural segue between locations or timeframes, maintaining narrative flow without jarring cuts.
6. Achieve a Cinematic Look
Strategically applied zooms emulate film‑grade techniques, lending a polished, professional aesthetic that resonates with audiences accustomed to high‑quality media.
The Best Video Editor for Zooms: Wondershare Filmora
Filmora combines an intuitive drag‑and‑drop workflow with powerful AI‑enhanced tools. Its extensive library of effects, presets, and templates ensures that even beginners can create polished, cinematic zooms.
With Filmora, you can craft a zoom‑in effect from scratch, apply pan & zoom to still images, and layer LUTs or custom color grades—all without a steep learning curve.
Key Features for Zoom Effects
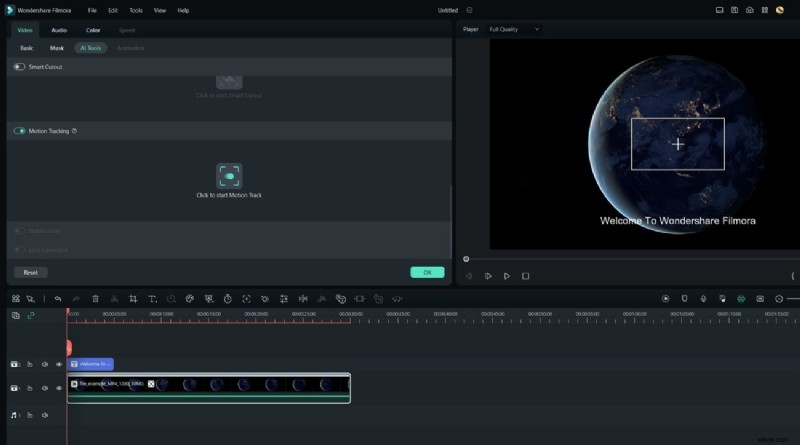
1. Motion Tracking
Track moving subjects and anchor zoom effects so they follow the action flawlessly, adding dynamic interest without manual keyframing.
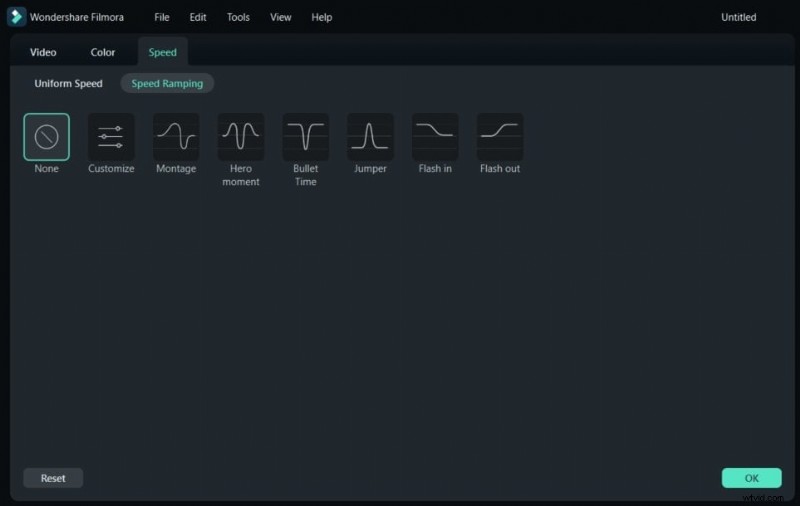
2. Speed Ramping
Adjust playback speed on the fly—slow‑motion to emphasize details, fast‑motion to build excitement—while preserving the integrity of your zoom.
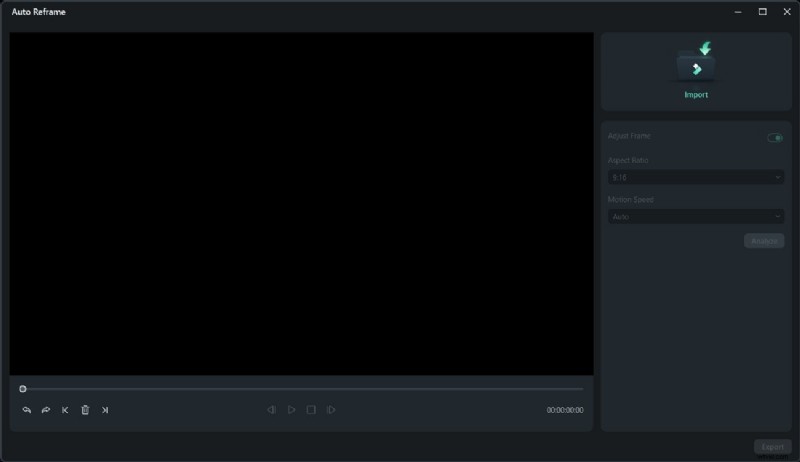
3. Auto Reframe
Automatically resize clips for any aspect ratio, ensuring your zoomed subject remains centered across platforms.
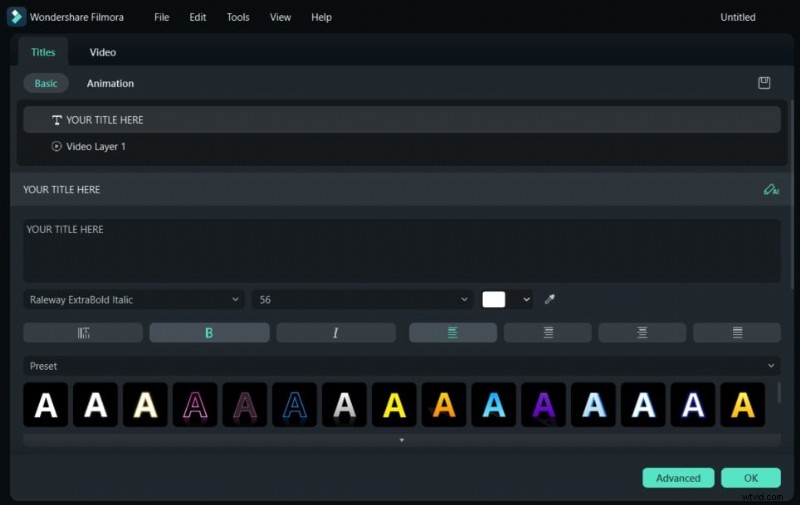
4. Text & Title Editing
Create professional titles and overlays that complement your zoom, using animated templates and precise placement tools.
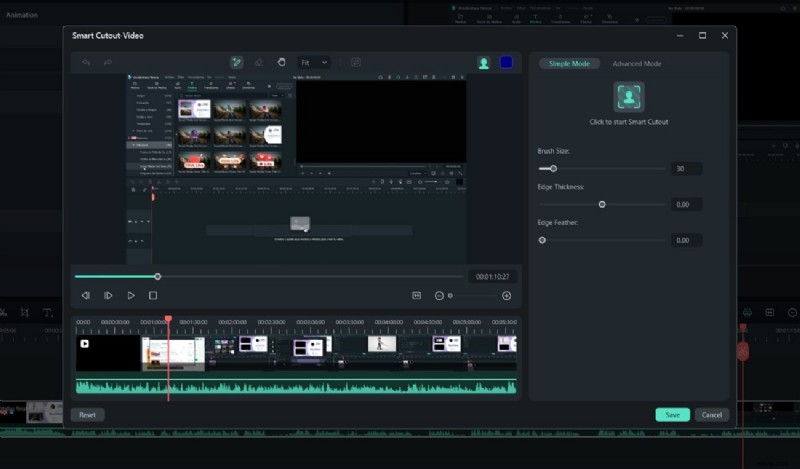
5. AI Smart Cutout
Isolate foreground subjects with AI, making it effortless to replace backgrounds or apply creative effects while the zoom remains crisp.
Step‑by‑Step: Creating Partial Zooms in Filmora
Below are two proven methods to add a zoom effect in Filmora—one using the Magnify effect and the other leveraging the Crop tool.
Method 1: Magnify Effect
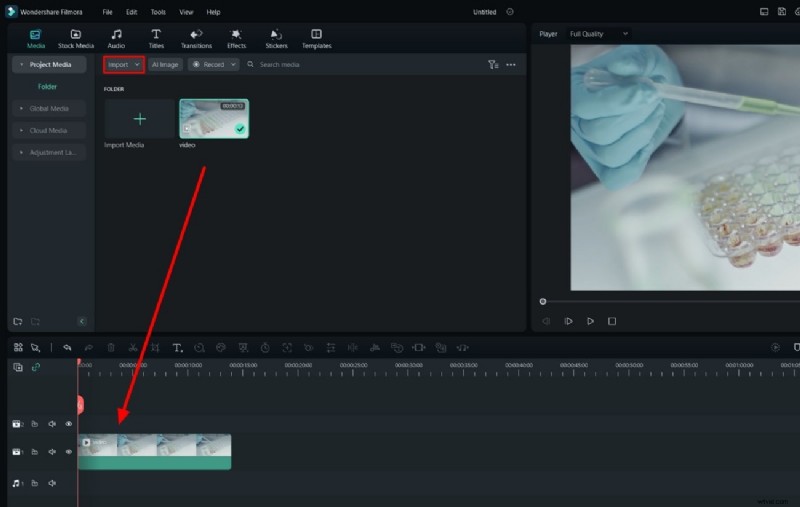
Step 1 – Import Your Media
Drag your video into the Project Media panel, then place it on the timeline.
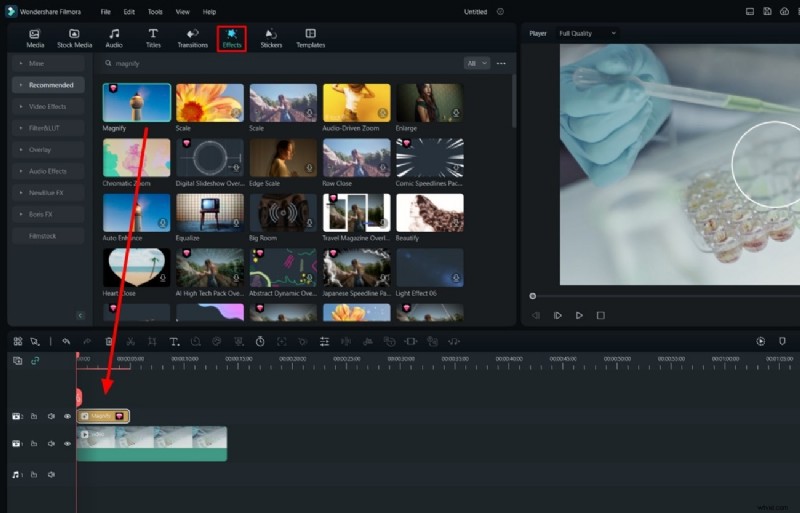
Step 2 – Apply Magnify
Navigate to the Effects panel, search for “Magnify,” and drop it onto your clip. A settings window will appear.
Step 3 – Adjust Settings
Fine‑tune the Radius, Center X/Y, and Zoom Rate sliders. Optionally add a Border Color for a spotlight effect.

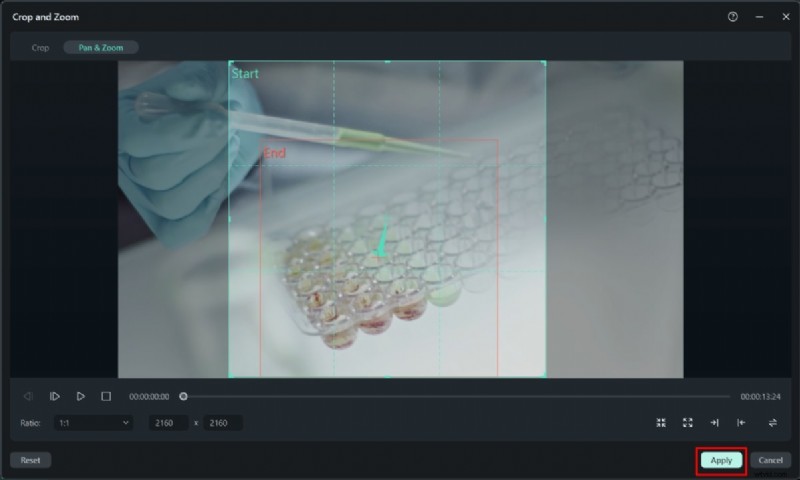
Method 2: Crop & Zoom
Step 1 – Open Crop Tool
Select the clip and press Alt + C to launch Crop & Zoom. Choose the Pan & Zoom tab.
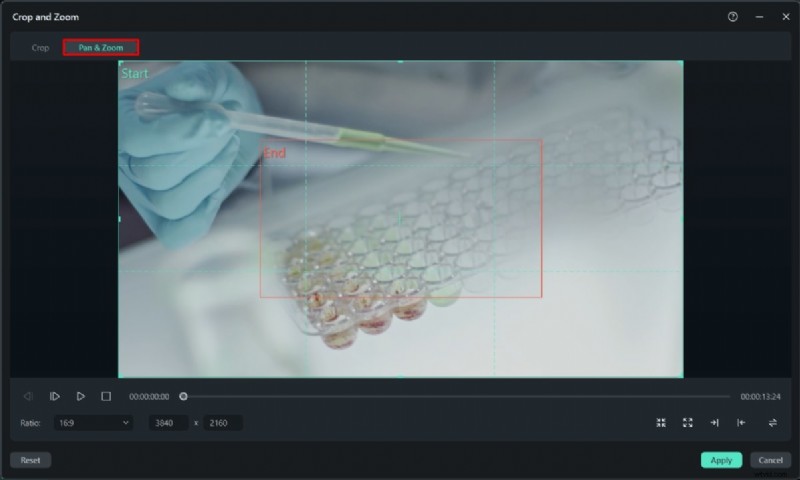
Step 2 – Define Start & End Points
Adjust the Start and End frames to set the zoom timeline. Use the Ratio slider or manual input to shape the crop. Click Apply when satisfied.
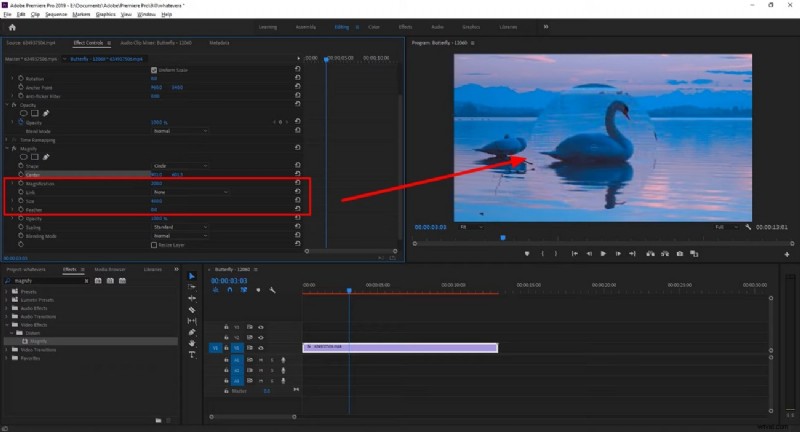
Achieving Smooth Zooms with Adobe Premiere Pro
Premiere Pro offers robust control over zoom effects via the Magnify effect. Follow these concise steps:
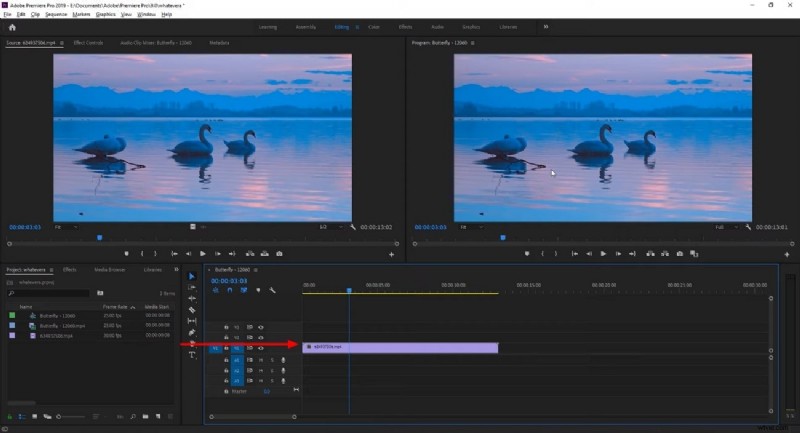
Step 1: Import your clip and place it on the timeline.
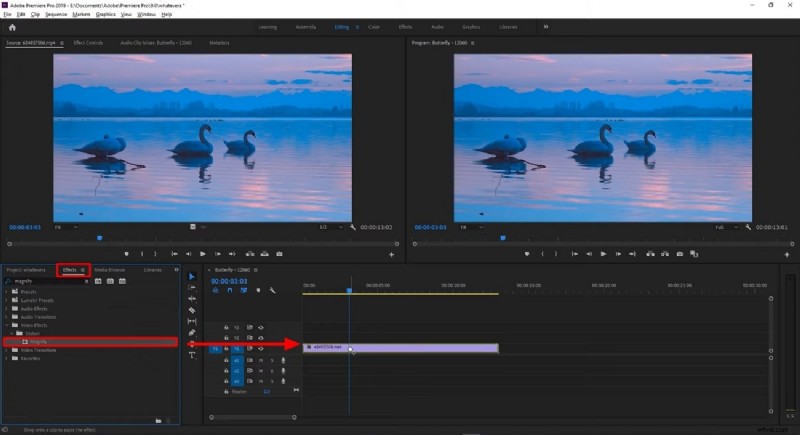
Step 2: Search for “Magnify” in the Effects panel and drag it onto your clip.
Step 3: In Effect Controls, set Shape to Circle to define the zoom area.

Step 4: Adjust the Center values to position the focal point.
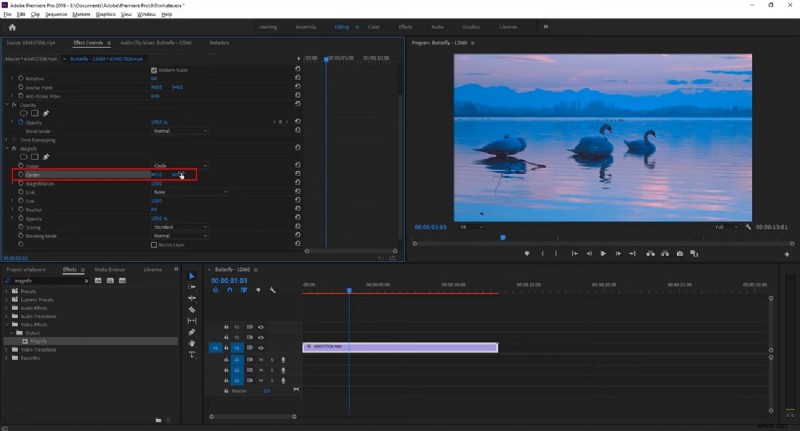
Step 5: Control Magnification for zoom depth and Size for the area of focus. Feather smooths edges for a natural transition.
Conclusion
Zoom effects are indispensable tools that can elevate the storytelling power of any video. By mastering partial zooms—whether through Filmora’s user‑friendly interface or Premiere Pro’s precise controls—you can guide viewer attention, enhance emotional resonance, and achieve a professional, cinematic look. Embrace these techniques to unlock your creative potential and deliver compelling, polished content.