Here’s everything you need to know about preparing for and creating streaming video content for YouTube Live.
If you find yourself tasked with creating live content for a client or for any work-from-home scenario (or if it’s just something you’re curious about), then YouTube Live is a great free streaming option. Let’s take a look at how to take your content from prerecorded to live in four simple steps.
1. Equipment
Before you hit the button to go live, there are a couple things to consider. First, the built-in camera on your laptop (if you’re using a laptop) is perfectly fine. However, if you want to ensure your stream is high-quality, with good auto-focus and auto-exposure capabilities, it might be worth looking into an external camera designed for streaming. The same goes for audio. There are high-quality microphones that capture professional-grade audio that are simple to set up and totally affordable.
2. Have a Concept and Thumbnail

Obviously, you need to have an idea what you will be doing and how long you plan on doing it. You need to map out this concept before you ever start rolling. Remember, you no longer get multiple takes when you’re going live. Develop an outline for your content and script out as much as you can.
The other very important aspect to consider is creating a thumbnail. YouTube gives creators the ability to “premiere” their stream. So, you can let your audience know ahead of time when you plan on streaming. To do this, create an enticing thumbnail to attract viewers. If you choose to premiere your stream, this gives you even more of a reason to plan out what you’re going to do ahead of time.
3. Choosing Settings
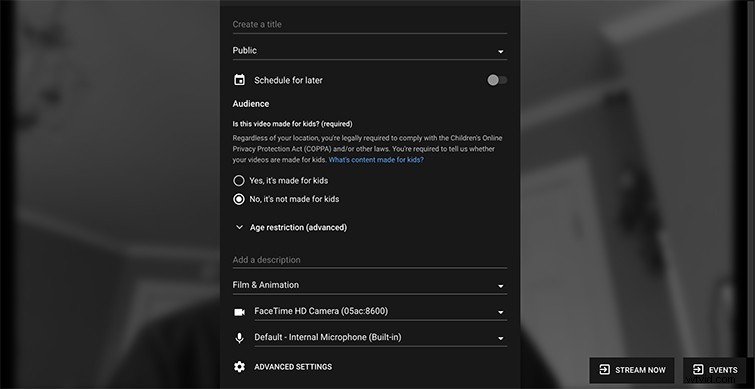
So, let’s say you hit “Go Live” in the top right corner. What next? You can see from the image above, you have the option to “Create a title,” when to make it public/schedule it, then choose the normal YouTube back-end information. You can add a description, then choose your camera and microphone input.
4. Camera and Microphone Options
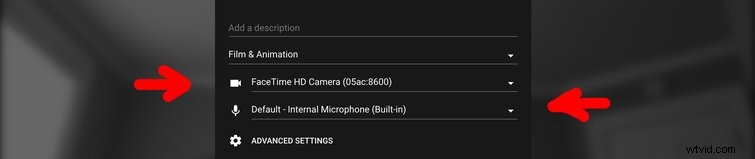
So, if you decide to purchase an external camera or microphone, this is where you select them. Another important setting to choose is whether or not to enable chat. This allows viewers to comment in real time as you stream. Once you’ve selected the settings you’d like, you’ve scheduled out the stream, created a thumbnail, and positioned your microphone and camera the way you want, you can now go live!
Good luck out there . . .
This post was originally published in April of 2016. We have updated it to reflect changes in the industry.