Transitions are essential for creating engaging, polished videos. They smooth the flow between scenes, guide the narrative, and add visual flair, ultimately enhancing viewer experience.
This guide explains why transitions matter and how to apply them effortlessly in Wondershare Filmora, the industry‑leading video editor.
Table of Contents
- Why Transitions Matter
- Introducing Wondershare Filmora
- Adding Transitions in Filmora
- Other Editing Features in Filmora
- Conclusion
Why Transitions Matter
Effective transitions:
- Provide a smooth visual flow between shots.
- Improve the narrative structure by signaling time or location changes.
- Introduce visual interest and stylistic variety.
- Highlight key moments with dramatic fades, zooms, or swish‑pan effects.
- Elevate the video’s professionalism and polish.
- Maintain audio continuity, preventing jarring cuts.
- Compress or expand time for storytelling efficiency.
- Offer creative expression through diverse transition styles.
Introducing Wondershare Filmora
Wondershare Filmora combines an intuitive interface with powerful editing tools. Its drag‑and‑drop workflow, AI‑powered features, and extensive library of stickers, effects, and transitions make it ideal for both beginners and advanced creators.
Adding Transitions in Filmora
Follow these steps to apply transitions that enhance your video’s flow and impact.
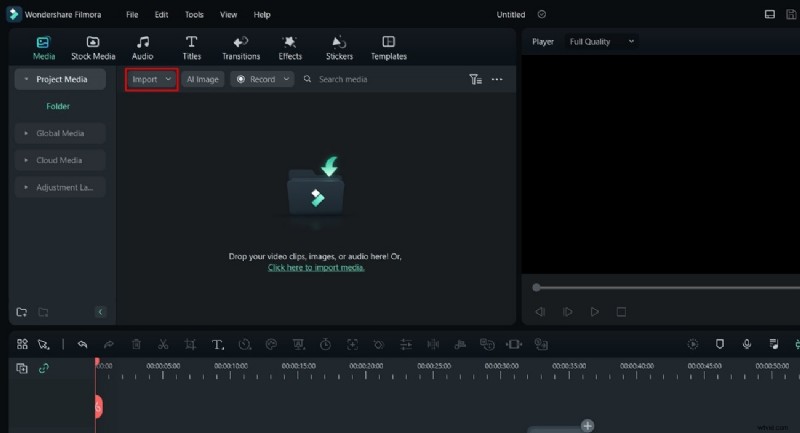
Step 1: Launch Filmora and Create a New Project
Open Filmora and click New Project. Import your media via the Import tab.
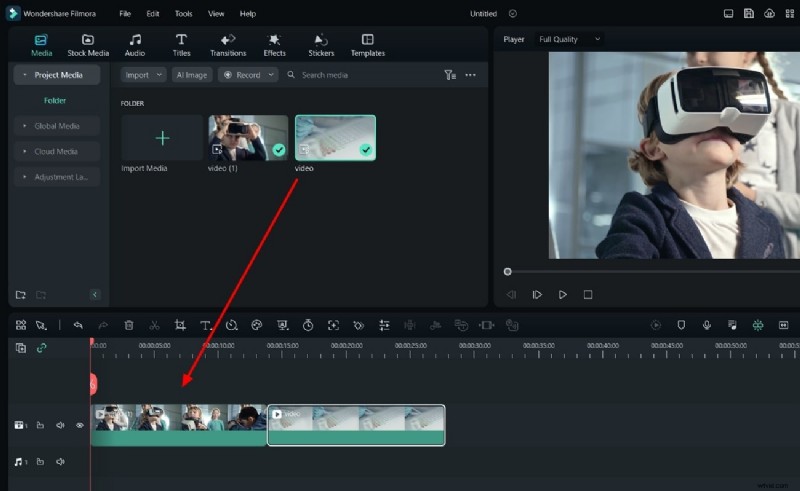
Step 2: Arrange Clips on the Timeline
Drag your clips onto the timeline, ensuring they are placed sequentially without gaps.
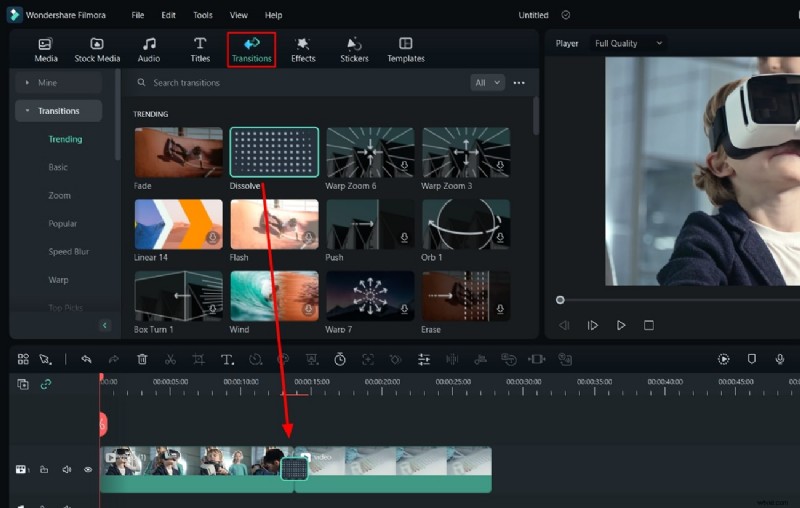
Step 3: Insert a Transition
Open the Transitions panel, choose a style, and drag it between two clips on the timeline.
Step 4: Customize Transition Settings
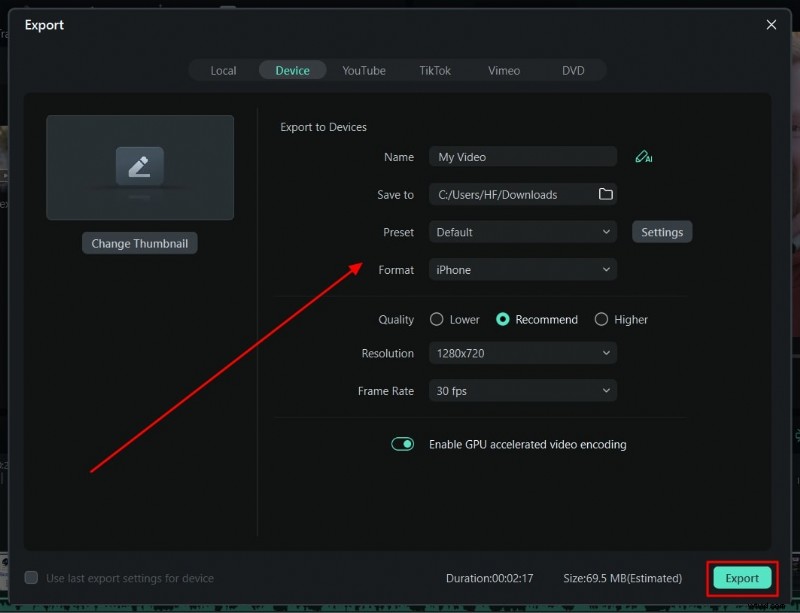
Click the transition on the timeline to access the Transitions tab. Adjust Duration, Mode, and other parameters to match your creative vision. When satisfied, export your project.

Other Editing Features in Filmora
Beyond transitions, Filmora offers several essential tools. Below is a concise guide to each feature.
1. Trim (Instant Cutter)
Use the Instant Cutter to remove unwanted portions quickly.
Procedure
- In the Import window, select Instant Cutter and open your file.
- Drag the edges to trim the clip.
- Export the trimmed clip back into the main editor.

2. Merge
Combine multiple clips into a single continuous sequence.
Procedure
- Import clips into the timeline.
- Place them on the same track in the desired order; Filmora merges them automatically.
- Export the merged video.
3. Crop
Adjust the frame of a clip to focus on the subject.
Procedure
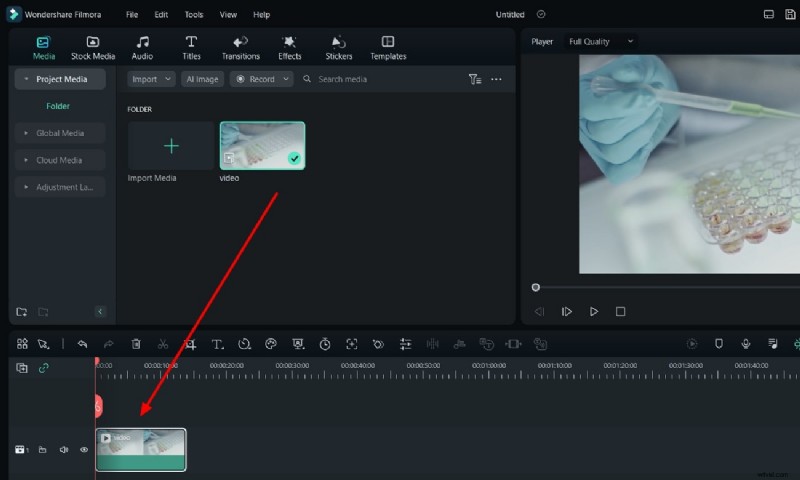
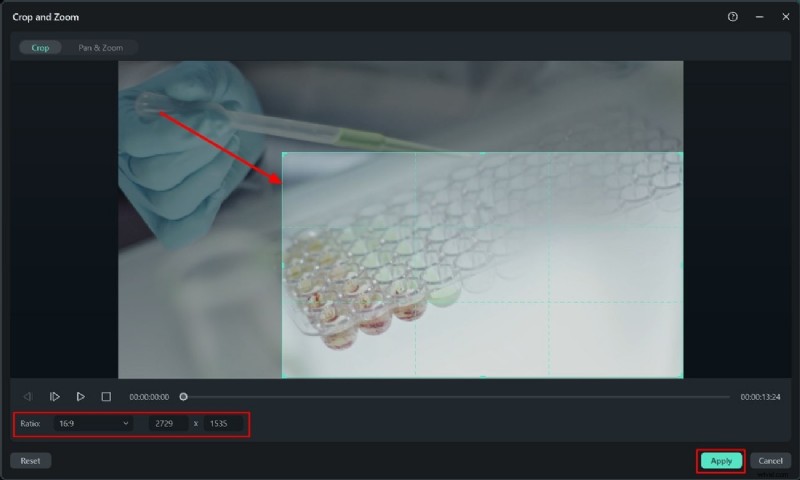
- Import the clip to the timeline.
- Open Crop & Zoom (Alt + C). Set the ratio, reposition, and apply.
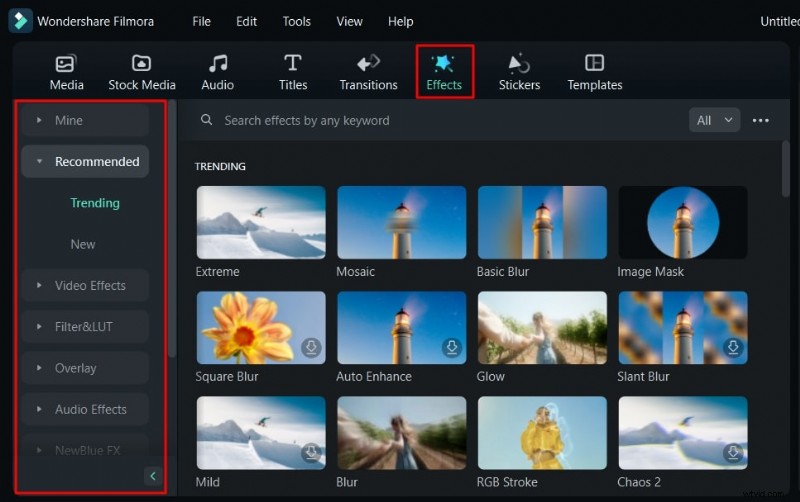
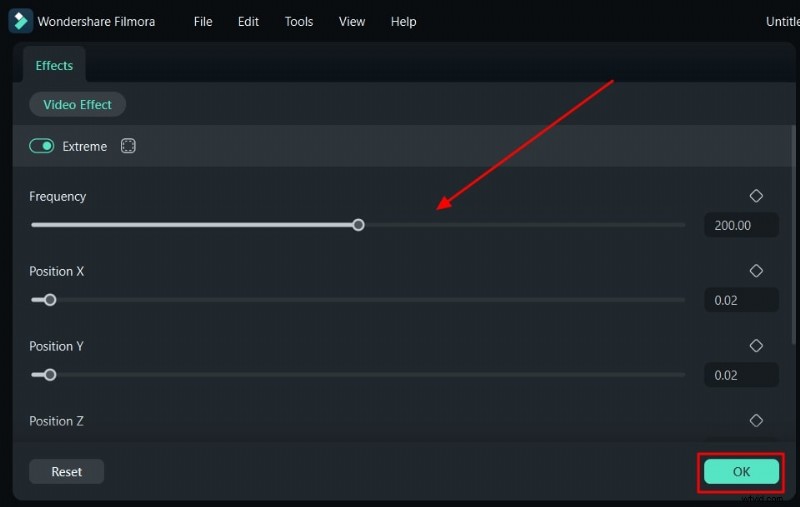
4. Add Effects
Enhance visual style with a wide range of effects.
Procedure
- Drag your clip onto the timeline.
- Open the Effects panel and select an effect.
- Drag it onto the clip, then adjust strength and opacity.
- Export when done.
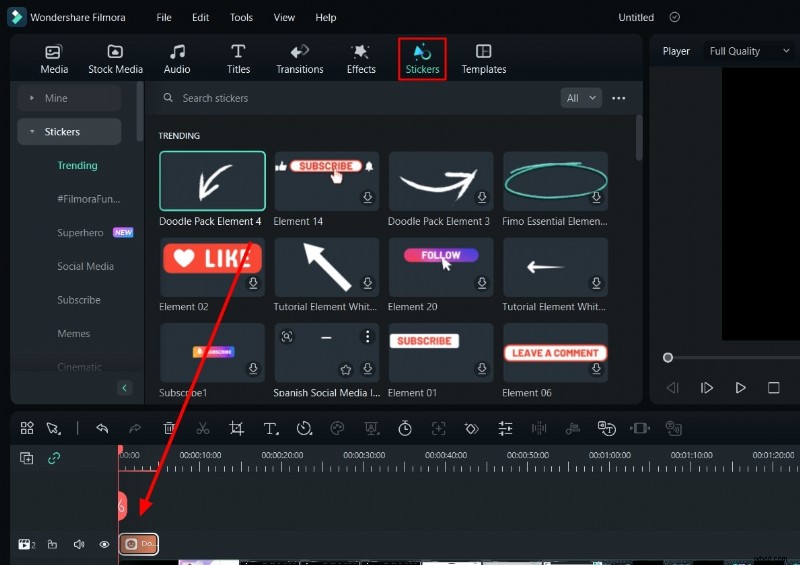
5. Add Stickers
Inject personality with animated stickers.
Procedure
- Import your video into Filmora.
- Open the Stickers panel, select desired stickers, and drag them onto the timeline.
- Adjust size, position, and duration as needed.
- Export the finished video.
Further Resources
- How to Create Smooth Warp and Turbulence Transition Effect in Filmora?
- How to Apply Fast Mask Zoom Transition in Filmora
- Expert Tips on Using Smooth Transitions in Filmora
- How to Create Splitscreen Transitions in Filmora
Conclusion
Transitions are a powerful tool to elevate the quality and engagement of your videos. With Filmora’s user‑friendly interface and rich library of transitions, effects, and stickers, you can produce professional‑looking content quickly and confidently.