This post reveals 3 methods that you can use to make a slideshow with detailed steps.
Slideshows can be a good tool for storytelling. They aid in business presentations, pitches, and other kinds of reports, collages in a visualized manner. Creating slideshows is not that hard like it used to be in the past. You can create a dynamic slideshow in a couple of minutes.
In this post, 3 ways are introduced to create slideshows. First is through Microsoft’s Powerpoint, which comes bundled in MS OFFICE. You will need to purchase the license for using it.
The second is through a free video editor which offers many transitions and effects for standing out. Lastly, you can also use an iPhone for creating a rather run-out-of-the-mill slideshow. Let’s dive in.
Method 1. How to Make a Slideshow via a Free Video EditorMethod 2. How to Make a Slideshow in PowerPoint
Method 3. 2 Steps to Make Slideshow on iPhone
Further Reading – Slideshow Making FAQs
Before we get into the steps listed following, you can also learn the detailed methods from this video tutorial.
How to Make a Slideshow via a Free Video Editor
For the sake of making the slideshow easily and breezily, we will begin with the easiest way that does not leave you stagnant, pulling out hair. Here we meet FilmForth, a free video editor designed for creating flabbergasting slideshows with great built-in music, effects, and transitions at the drop of a hat.
On top of that, there is no watermark of the free editor on your video. No restriction of any kind on the video. It also packs an extensive library of transitions for use in the slideshow. Add captions in different styles or, even better, presets coupled with animation.
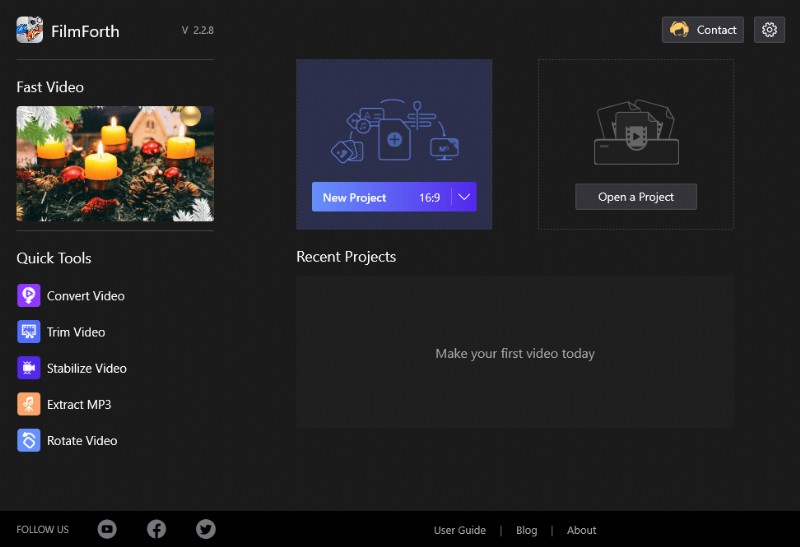
Step 1. Run the Free Video Editor
Launch FilmForth after installing it from the Microsoft store. Create a new project for your slideshow. Click on the new project button to proceed.
New Project on FilmForth
Kudos on creating a project. Now, we import the pictures/videos by using the Add Photos/Video clips button. The faster way is to simply drag and drop them into the timeline. Add all the photos and even videos together.
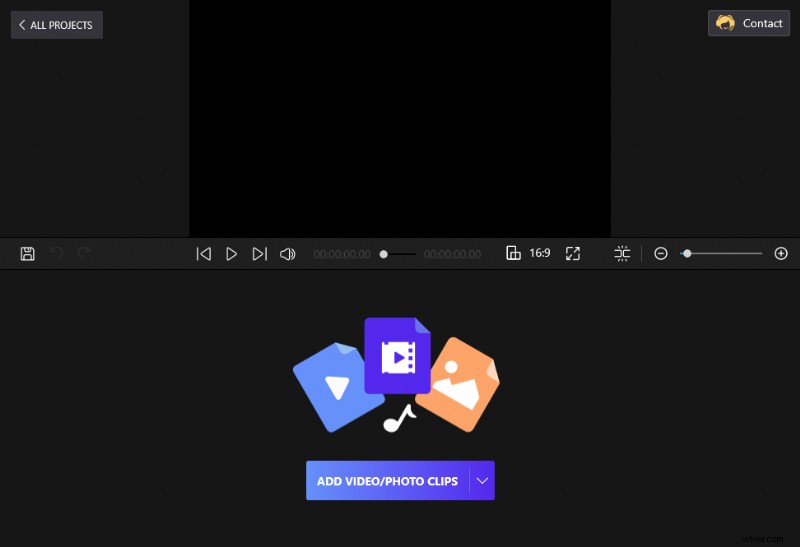
Drag and Drop the Clips to FilmForth
Step 2. Start to Edit the Slideshow
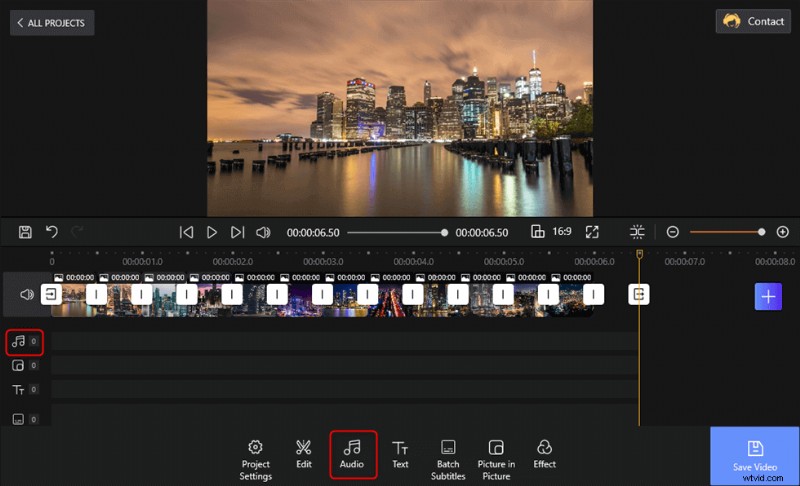
After adding your videos and photos, they will appear as blocks on the timeline. You can add music to the slideshow which will need you to head to the audio menu by clicking on its shortcut, located in the timeline.
How to Make a Slideshow with Music
Here, click on the Add Audio button, and a menu will open up. You have three options here
Tap the 2 Options to Add Audio to Slideshow
- Add Audio: Add your own music stored on the local storage. Make sure you have a license of the music if you are planning on using it in public.
- Built-in music: FilmForth offers dozens of license-free music pieces. You can use them for free.
- Voiceover: Fancy adding a narration? Then select the option and get your mic ready.
If we go with the Built-in music option and select Joyride by clicking on the Add button. The music will appear as a red bar on the timeline.
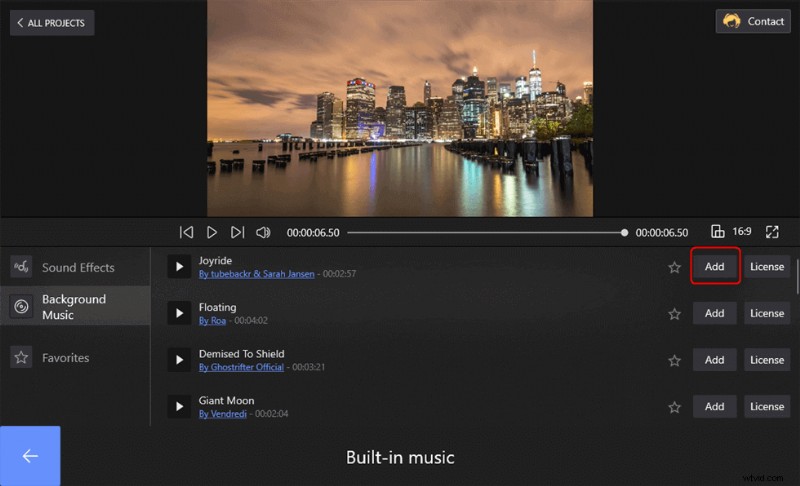
Choose the Built-in Music to Add
Any idea to make a voiceover on FilmForth? Then you won’t want to miss this guide: How to Make a Voice Over Video>>
And Add Transition and Effects to the Slideshow
You can see there are some other great features you can apply to the slideshow. Tap the Edit can go on cropping, flipping, rotating, and setting the duration of the slide clips. The Text allows adding animated text while the Batch Subtitles enables users to add subtitles and captions to the slideshow.
Now head to the Effect menu from the project’s home screen to apply transitions and effects.
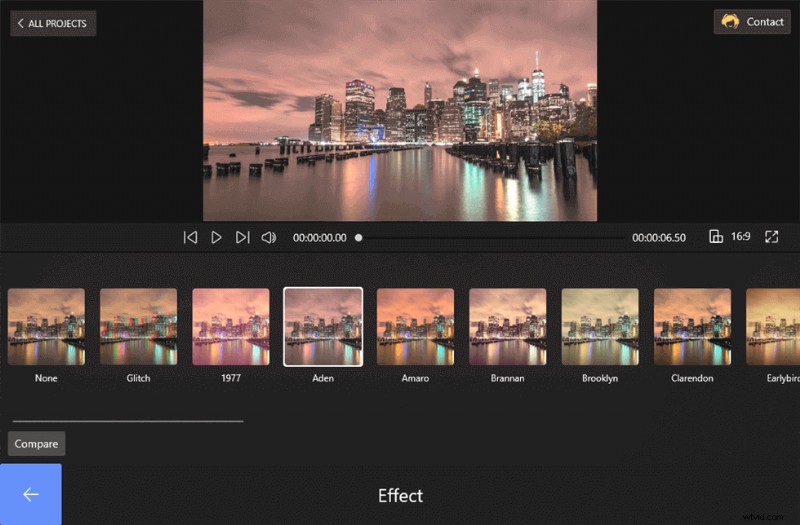
Apply Effects to the Slideshow
Once inside the menu, click on any of the options for applying it to the slideshow. You can apply it individually to each photo, video using the split option.
How to Add Text to the Slideshow
In the toolbar, you can see the Text button. Tap the Text button you can add the words you want to the slideshow. There are Preset, Font, Alignment, and Speed Ballun that you can choose to edit the text.
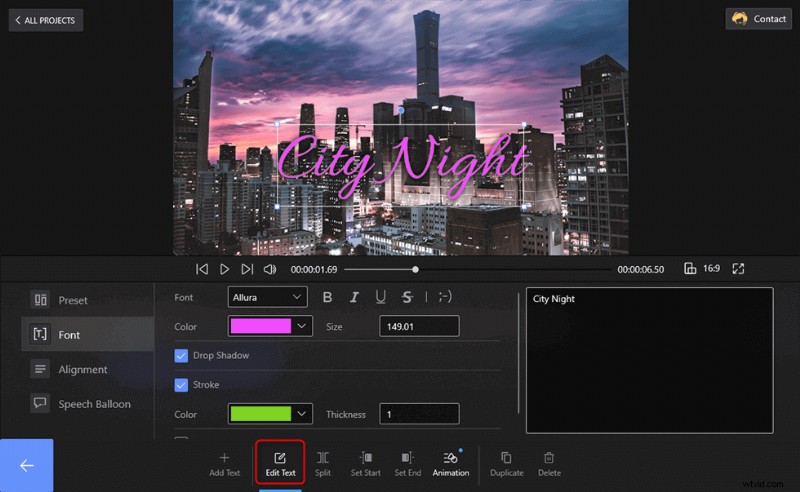
Add Text to the Slideshow
Also, hit the Animation button you can go on to add some entrance and exit effects to the words.

Animate the Text
Step 3. Export and Share the Slideshow
Now you can go back to the front page and select the Save Video button. Then there will pop up a window which is asking you to set the Video Resolution, Video quality and Frame rate of this work. Get them done and get the slideshow exported.
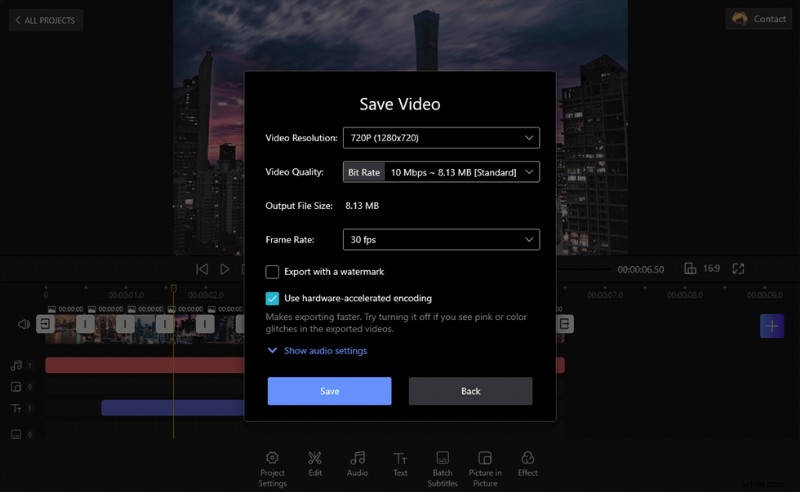
Export and Share the Slideshow
In this post, there are 3 methods introduced to make a slideshow with music and effect. Except for FilmForth, you can also give a try to Microsoft Offical – Powerpoint. Let’s take a look.
How to Make a Slideshow in PowerPoint
Microsoft’s PowerPoint is a distinctive application made for creating slides and other types of presentations. You start by opening a blank presentation. Otherway is to look online for well-designed templates, which often cost money.
Then you individually add photos to different slides, followed by adding music of your choice. The application has a vast learning curve, and beginners may find it intimidating. But no worries! Here in this part, you can learn the steps one by one which can make the slideshow making look much easier.
Step 1. Run PowerPoint on the Computer
Once you launched the PowerPoint, you can select the Blank Presentation for getting to the editor.
Step 2. Import the Clips to PowerPoint
Now, unlike FilmForth, there is no way to drag and drop all the photos at once without causing a commotion. They will pile up over each other. Create new slides by pressing Ctrl+M on the keyboard, and then individually drop one photo in each of the slides.
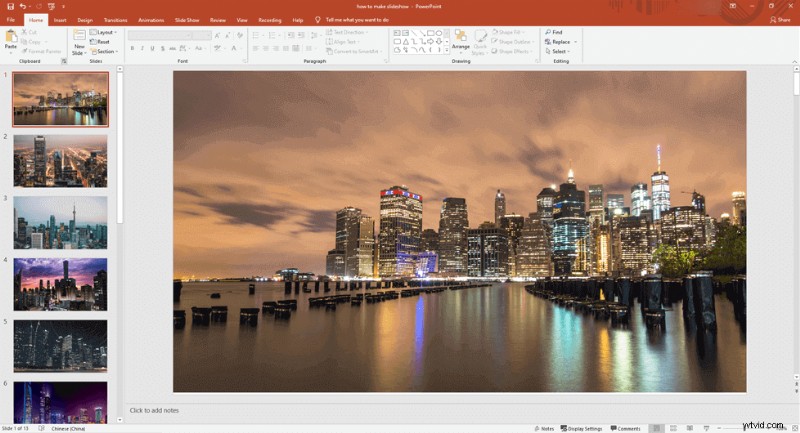
Import the Clips to PowerPoint
Step 3. Edit the Slideshow
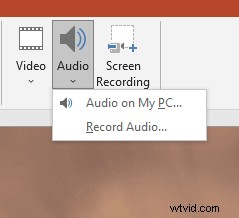
Time to add music. Head to the Insert tab of settings and go right all the way to the Audio option. Select the Audio On My PC option for adding your own music. Unfortunately, there is no in-built music offered, like it was on the FilmForth video editor.
Add Audio to Slideshow
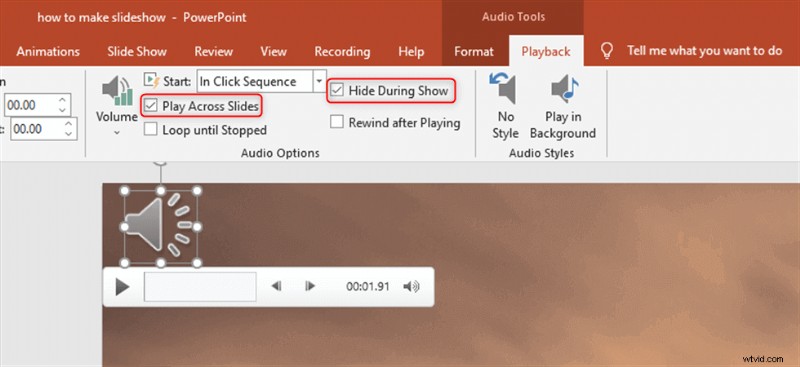
Hold on, it’s not complete yet—time we set it for playing across different slides. Head to the Playback settings tab and inside the audio options section. Tick the following boxes shown on the screenshots below.
- Play Across Slides: When you want to play the same music across different slides
- Hide During Show: It will hide the audio toolbar during the slideshow that plays the music.
Set the Audio
And in cases when you want to play automatically without a trigger, simply select the Play In Background from the audio styles section.
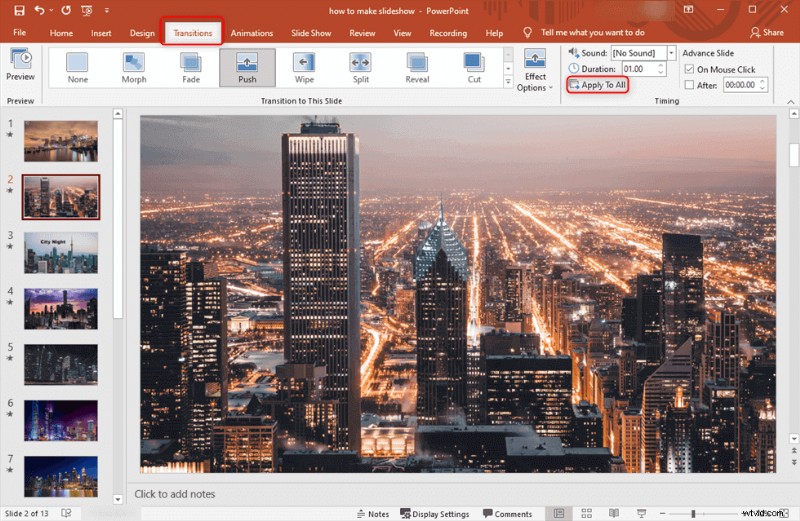
PowerPoint also supports adding transitions between the clips. Just tap the Transition button on the top and you can select one transition effect to apply to the slideshow. Tap the Apply To All, slideshow pics will change their scenes in the way you applied.
Add Transition Effect to the Slideshow in PowerPoint
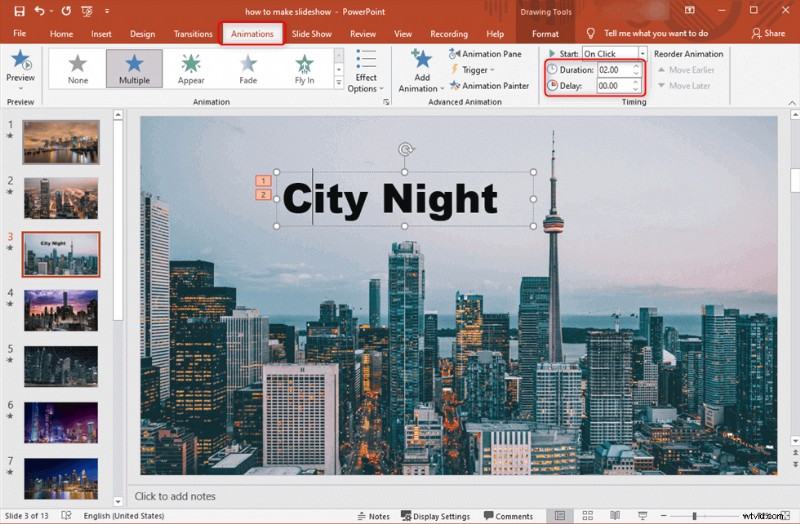
If you want some animated text to the slideshow, you can also hit the Insert and import your text. Then select the Animation to give the words life.
Set Animated Text
Step 4. Export the Slideshow
Once satisfied with a brief slideshow inspection, press Ctrl+S on the keyboard to save the slideshow. Then you can view the slideshow on the computer or share it with others. It owns no watermark.
Besides the 2 selections above, you can learn the quickest way to complete a slideshow with music and effect on iPhone.
2 Steps to Make a Slideshow on iPhone
iPhone has a quick method to create a slideshow out of your photos. You don’t even need the iMovie app for this. Head to the Photos app on a good day and select the photos for the slideshow.
Select the slideshow option, add music, and you are ready to roll in a few seconds.
Step 1. Choose Photos to Make Slideshow
Go to Photos and select the photos you want in the slideshow. Then, tap on the Share button located at the left-bottom corner of the screen. Scroll down the share menu and select the Slideshow option. It will immediately create a slideshow out of the selected photos.
Choose Photos to Make Slideshow
Step 2. Edit the Slideshow
Select the Options button, given at the button of the slideshow in action. From here, we can change the music, which also includes some in-built options. You can change the theme as well.
The speed of the transitions between each photo can be calibrated through the turtle-rabbit button, given the bottom.
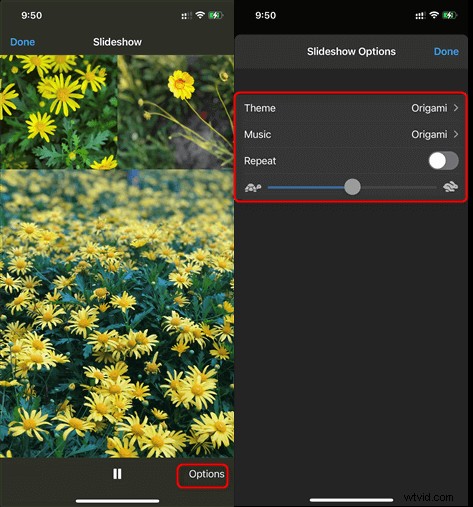
Set Slideshow Music and Duration
Slideshow Making FAQs
1. What is the best way to make a slideshow?
The best way to create a slideshow involving photos and videos is by using a good video editor.
Powerpoint feels hectic, and you cannot play it on a DVD/BluRay player. Mirror your video directly from the phone into a smart TV.
2. How do you make a slideshow step by step?
Let’s be clear; it is not rocket science. First and foremost, gather all your photo and videos clips at once. Then, you need a video editor such as FilmForth and a couple of minutes to produce a decent-looking slideshow. Import all the media files, add a little bit of music, and then export right away.
3. What is the best free Slideshow Maker?
We hand over the mandate to you for that. FilmForth is a pretty good place to start. PowerPoint is overwhelming, and often people have spent months learning it from an instructor.