Step‑by‑Step Guide to Adding Rapper Light Effects in Filmora
Follow these expert instructions to transform your rap video with dynamic lighting, fire‑like outlines, laser eyes, neon rings, and more.
What You’ll Need
- A Windows or macOS computer
- Your rap footage and any supplementary images or stickers
- Wondershare Filmora (latest version)
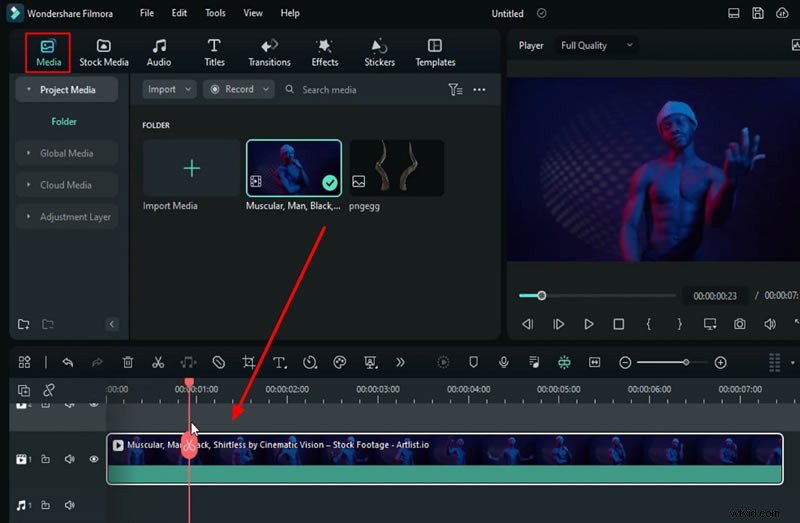
1. Import and Organise Your Media
Open Filmora and navigate to Media → Import. Drag your rap clip and any additional assets into the timeline.
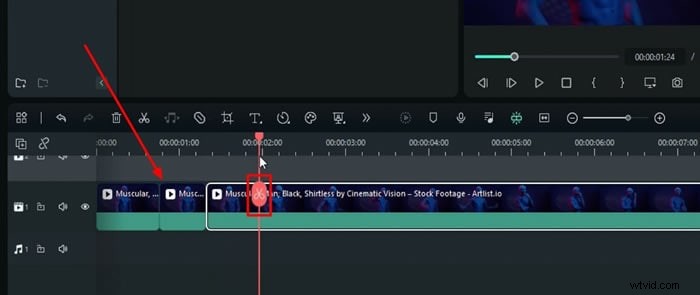
2. Isolate Hand Movements with Splits
Play the clip frame‑by‑frame and split the timeline where each hand begins its motion. Repeat for the second hand.
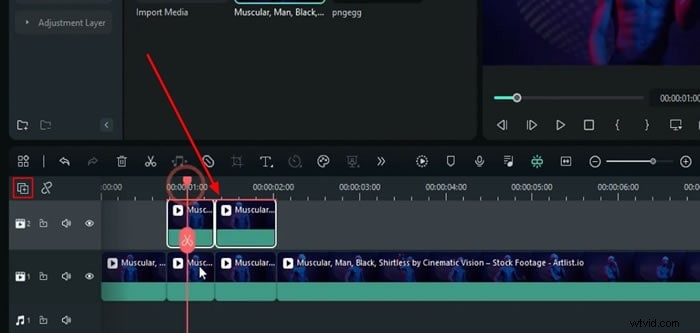
3. Duplicate Splits on a New Track
Open the Manage Tracks panel and add a new video track. Drag both splits onto this track. Double‑click the first split to open its properties.
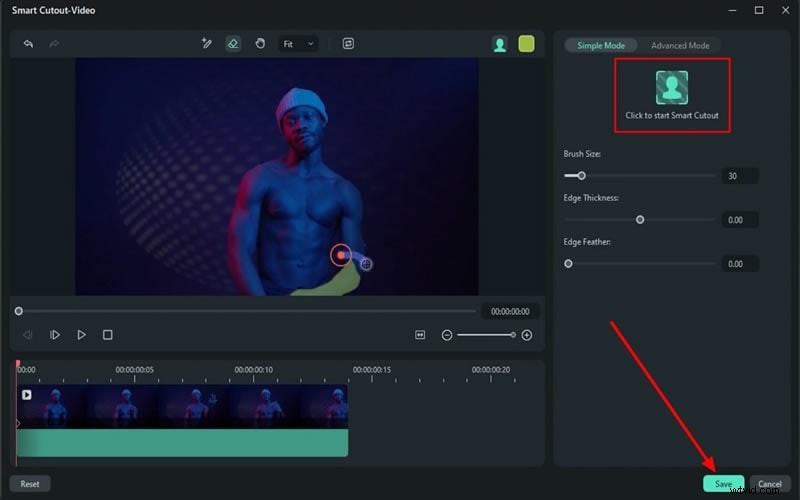
4. Apply Smart Cutout to Remove Background
In the right‑hand panel, choose AI Tools → Smart Cutout. Use the brush tool to mask each hand frame‑by‑frame. Repeat for the second split.
5. Add Burning Outline 2 Effect
Navigate to Effects → Video Effects → Burning Outline 2 and drag it onto both split clips. Adjust the parameters:
- Radius: 2.5 (first clip), 3 (second clip)
- Alpha Start: 0.3
- Alpha End: 0.9
- Eclosion: 89
- Section Length: 0.9
- CoreLine: Off
6. Add Lightning Twined Effect
Split again at the point where the hand motion ends. Apply Lightning Twined with a warm orange or yellow hue.
7. Incorporate Gunshot Stickers
Under Stickers, download the Big Gun Shots 04 pack. Place it on a new track (Track 4). Keyframe its Transform properties to align with the hand tip, slightly shrinking the effect for realism.
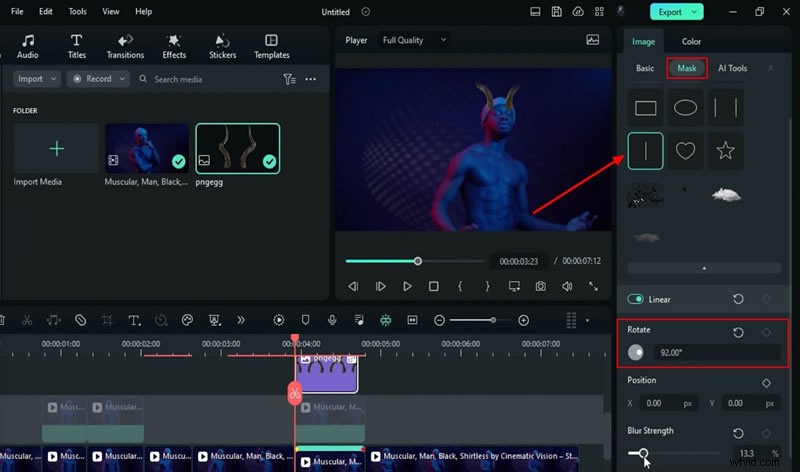
8. Use Motion Tracking for the Rapper’s Head
Duplicate the original split on Track 2, lock the track, and activate Motion Tracking on the rapper’s head. Link a PNG horn image (downloadable from PNG Egg) and animate it using keyframes and the Linear mask for smooth motion.
9. Add Laser Eyes 2 Effect
Place the Laser Eyes 2 effect on a new track. Set its color to orange and disable the Ray option. Animate scale from 149.8 % to 133.2 % to 100 % and fade out using opacity keyframes.
10. Apply Burning Outline 3 and Neon Ring 6
Apply Burning Outline 3 with custom settings (Radius 20, Alpha End 0, Eclosion 100, etc.) to create a pulsating halo. Then add Neon Ring 6 with an orange or yellow color for an extra glow.
11. Finish with Edge Grow and Final Adjustments
Duplicate the clip on Track 2, apply Edge Grow, and set Edge Scale frequency to 20. Fine‑tune color grading, contrast, and saturation via the Color panel.
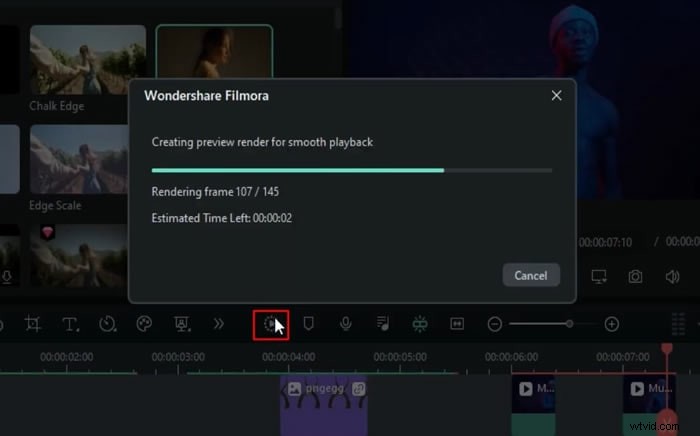
12. Preview and Export
Use the Render Preview button for smooth playback. Once satisfied, export the project by clicking Export in the top‑right corner.
Summary
By following these steps, you’ll add captivating light effects to your rapper’s performance, enhancing visual appeal and keeping viewers engaged. This workflow is straightforward, yet powerful, making it ideal for creators who want to elevate their rap videos.
Learn More Magic Effects
Explore additional time‑freezing and visual tricks in our advanced effect tutorials.