 Pin
Pin
Instagram is meant to be a mobile app and, if you can, you should use the Instagram app to upload photos and stories.
If you’re shooting photos with a DSLR or mirrorless camera you know it can be a hassle to get your photos to Instagram. Here is a list of techniques on how to post on Instagram from PC or Mac. This list is up to date with only working apps.
If you don’t have an Instagram account you can sign up for an account on their website.
How to send photos to your phone
If you’re having an issue getting photos to your iPhone or Android phone I recommend using Dropbox, AirDroid, or AirDrop to do this task. Every photo I edit in Lightroom is then exported to a Dropbox folder so I can easily post to Instagram with my phone.
There are also apps like Hootsuite and Buffer which will let you write captions beforehand and remind you to post. You can also use the Instagram draft feature which is built into the Instagram app.
Using the Instagram Site to Upload Photos/Videos from Desktop (Recommended)
2022 Update: Instagram now lets you upload directly to the site from any web browser. Simply head to Instagram.com and you’ll see a plus button on the top right of the site. Once you click the plus button it’ll allow you to choose any photo or videos from your computer to upload to Instagram.

This feature is great for anyone managing multiple accounts and just wants to upload to Instagram from their desktop. Of course this also works if you’re on the mobile site as well making it so that you don’t need the Instagram app to upload.
If you’re curious of the previous ways to upload to Instagram from desktop before Instagram added the feature keep reading below:
Desktop apps to upload photos to Instagram (Not Recommended)
Using Instagram’s Mobile Site (Web)
This has to be the quickest and easiest way to use Instagram on any computer. If you want to post to Instagram from PC or Mac (or even a Chromebook) this will be the easiest route.
Instagram now offers a mobile version of their site which you can access using by changing your browser’s user agent. This is a simple thing to do in Google Chrome.
Using Google Chrome
Below is a mini guide on how to change your user-agent in chrome which will allow you to use Instagram’s mobile site.
First, open Instagram.com
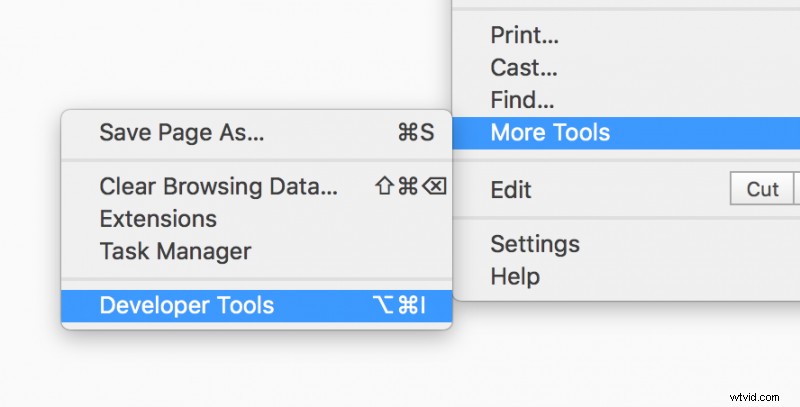
Then you’ll need to open the developer tools in Chrome which is in the settings bar under More Tools > Developer Tools alternatively you can right-click the page and click Inspect as well.
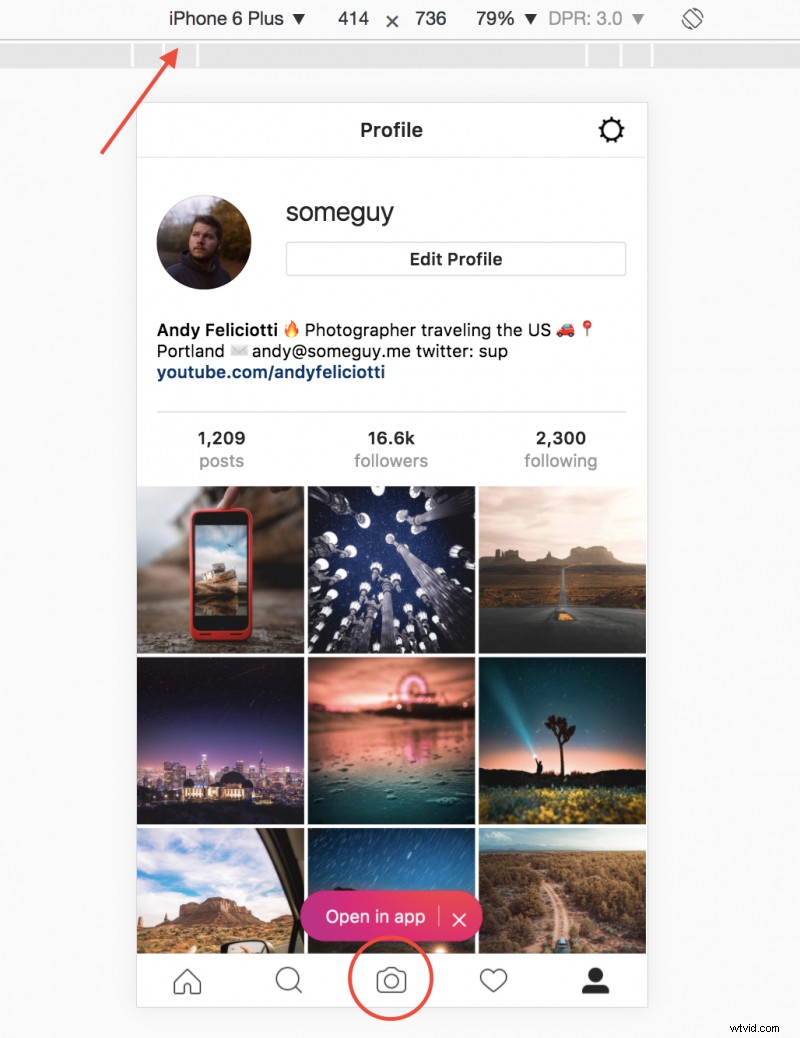
After this is open you can toggle the device toolbar via the Tablet/Mobile button displayed below. This will open the panel to change your user agent.

After this appears you’ll be able to select which device to emulate in chrome. For example sake, I chose the iPhone 6 Plus. After doing this you’ll see the Instagram Mobile site which includes a button to upload at the bottom, just like the app.
Note: if it is not working try to refresh the page after changing the user agent.
Using Safari on Mac
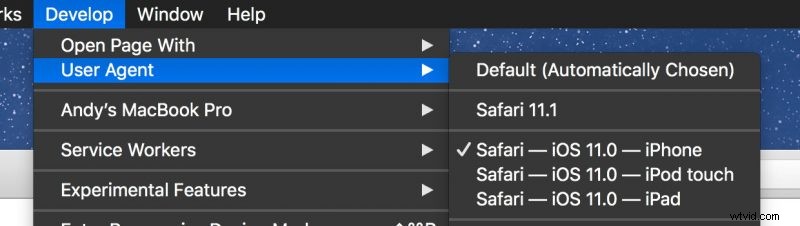
If you want to use the Instagram mobile site in Safari on mac you can change your user agent using the develop menu. You can do this in the preferences via Safari > Preferences > Advanced where you’ll see the option “Show Develop menu in menu bar“. Once this is enabled you can change your user agent in the develop menu and select iPhone. When you visit Instagram this will bring up the mobile site and allow you to upload.
Using the browser you’ll be able to crop your photo and add a caption but most of the features of the full app are missing.
Additionally you can try the Desktop for Instagram Chrome extension or Poster for Mac to access the IG mobile site.
Note about IGTV: You can upload videos to Instagram TV with the desktop version of the site in the IGTV tab of your profile.

Uplet (Mac)
If you have a Mac Uplet has to be the easiest way to upload photos or video to Instagram.
All you need to do is put in your Instagram username and password; then you can bulk post as many photos as you want. It’s as simple as dragging photos onto the Uplet application.

My favorite option in Uplet has to be the ability to select the ‘crop aspect ratio’ (1.91:1 or 4:5). Basically this lets you upload portrait or landscape photos which was a feature added to Instagram in 2015.

After picking a photo or video all you need to do is add a caption! Sadly two features it’s missing are tagging people within the photo and scheduled posts. It’s still a great way to bulk upload to Instagram or even upload one photo from your Mac.
Uplet $19.95
Running Instagram on Desktop (with BlueStacks)
Another option is running the Android Instagram app on your computer. This can be done by running an Android emulator on your Mac or PC with BlueStacks.
It’s the heaviest option since you’ll have to run Android on your computer, so I don’t recommend this option unless you need all of the features.
This is the perfect option if you want a completely native Instagram experience on your computer. Plus you’ll have all of the features of the app including filters, locations, stories, galleries, and account switching.
BlueStacks Free
There are also quite a few other options to post to Instagram from desktop, but above are the best solutions I’ve found.
Again, if you can, I recommend using the Instagram app on your phone. Having access to community features such as commenting and following users is essential to the Instagram experience in my opinion.