Set your horizons straight with these quick, savvy tips for effectively correcting crooked footage in Adobe Premiere Pro.
An age-old problem for both videographers and photographers alike — that tricky, straight-line horizon. While the human eye really does enjoy and is drawn to perfectly straight lines, it can be rather annoying when said straightness is even a little bit off-kilter.
When shooting video against a backdrop that includes a horizon, the safest way to ensure your horizon will be perfectly symmetrical is by using the following:
- Limited movement (especially rotations of the camera)
- Mount a tripod or solid stand (or a perfectly calibrated gimbal)
- Use a level (which certain tripods do include)
However, this isn’t always the case for every video or film shoot. And, even when it is, you’ll be surprised how often you make it to the edit only to find that the horizon still looks just a little bit off. Luckily, however, it’s not that hard of a fix.
Here’s a quick tip breakdown on how to easily fix a crooked horizon by using some of the basic settings in Adobe Premiere Pro.
1) Zoom In
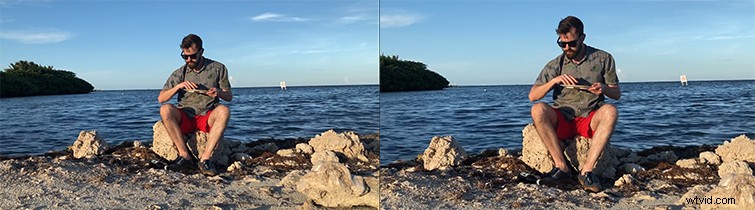
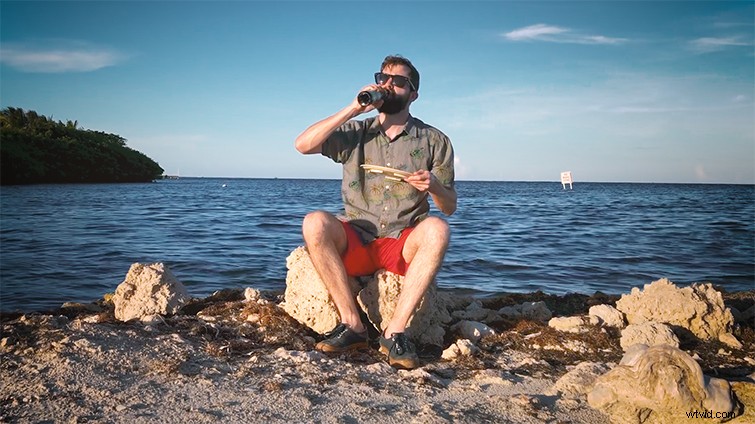
Let’s take a look at a clip from a recent short I shot. This is from a comedic series I’ve been working on called Chris Stares At You While Eating A Plate Of Nachos (yes, that’s the whole concept). We shot this while traveling, so we didn’t have a big setup. We had to use a makeshift stand for the camera, so going in we knew the horizon would be slightly crooked.
However, right off the bat, we tried to compensate and prepare for this by intentionally shooting the scene wider than it needed to be, knowing that we’d eventually have to zoom in once in the edit.
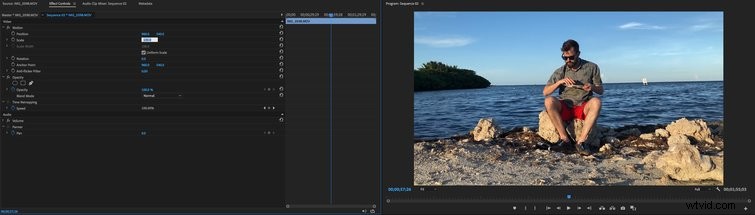
Zooming in will start to give you the room you need in the image to rotate. In Premiere Pro, you simply select the clip you wish to edit and go to the Effects Controls tab in the top left. From there, you can find the Scale option. Without setting any keyframes, just change the scale from 100 percent to something like 110 percent to start (you can adjust it higher later, if needed).
2) Adjust the Rotation
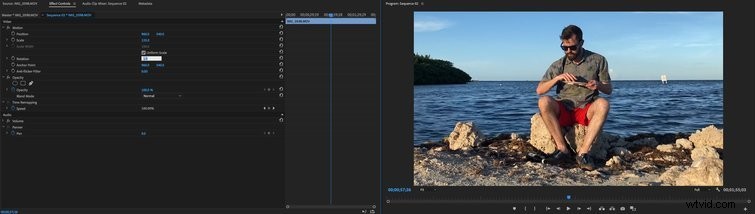
After you’ve given yourself a little room, you can adjust the Rotation controls, which can be found a few lines below the Scale option. Other programs or techniques might give you a bar-line option to trace points to auto-create a line, but I’ve found that in Premiere Pro, this is the quickest way, allowing you to give it a true eye test.
Change the Rotation by a few degrees from 0.0 to 2.0 or -2.0. Using positive numbers will rotate the image to the right, while negative numbers will rotate the image to the left. Once you get it close, you can adjust it minutely by going decibel point by decibel point with 2.1, 2.2, 2.3, etc.
It’s a trial and error process. You can review your image at a higher degree by making the program image larger (just press the “~” key when you have the image selected).
3) Watch out for Corners
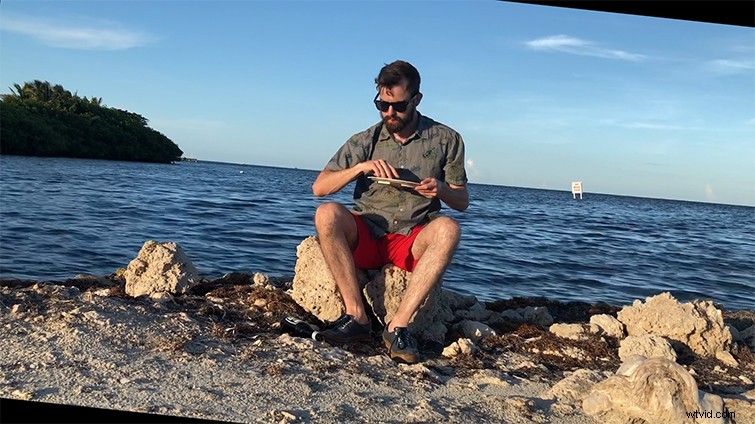
Now, the reason we zoomed in to begin with is because once you start rotating your image, you’ll find that if you go too far, this causes the footage to reveal black bars in the corners. If you see these, it just means you haven’t zoomed in far enough (or you might be overcompensating your rotation).
Once you’ve messed around for a bit and are sure it passes the eye test, you’re done! You can dive into color, effects, and the rest of your edit from there. Cheers!
All images via Chris Stares At You While Eating A Plate Of Nachos.