Awesome transitions can make or break a video. In this tutorial, we’re going to look at seven FCPX transitions that will elevate your next video.
There’s a lot that goes into mastering a non-linear editing software like Final Cut Pro X. Thankfully, there are also tons of easy shortcuts to lighten your load and make your videos even more incredible. One of the best shortcuts is FCPX transitions.
This video tutorial will show you how to create seven unique and useful video transitions in FCPX. Make these transitions your own, and learn where to use them most effectively in your upcoming video projects.
1. Glitch Effect
Best for: Fashion, Travel, and Your Next Zombie Movie
Glitch effects are super popular right now. There are so many plugins you can buy. However, it’s actually fairly simple to create your own. Here are some simple steps to do just that.
- First, select the two clips you want to transition between.
- Using your blade tool, trim back the last three to four frames on each of those clips.
- After you’ve trimmed, place a Bad TV effect onto each.
- Once applied, take your blade tool and cut out each frame from those sections.
- Then, drop whatever effects your heart desires onto the clips, even utilize the transform tool to stretch and distort footage.
- Review your work and refine, as needed.
- Done!
2. Strobe Effect
Best for: Music Videos and Travel
The Strobe effect is super easy to utilize, and is a similar setup to the Glitch effect we just used above.
- Select the two clips you want to transition between.
- Using your blade tool, trim back the last three or four frames of each individual clip.
- You should have about six to eight individual cut-out clips. Now, select every other clip and simply press V to disable the clip.
- With every other clip disabled, you now have your Strobe effect.
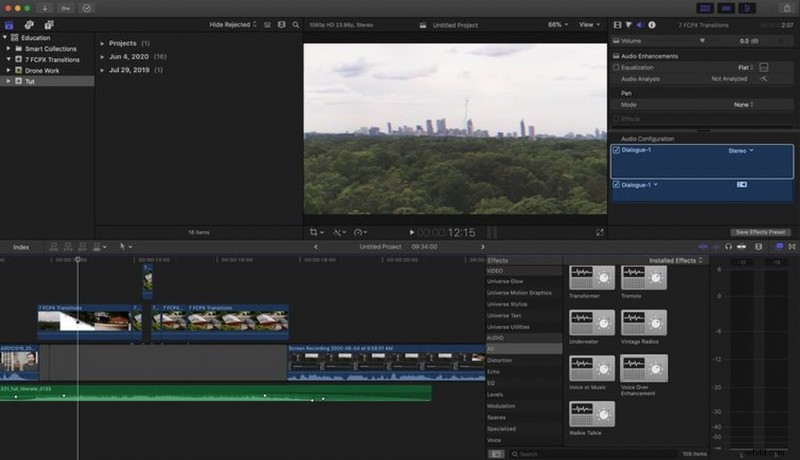
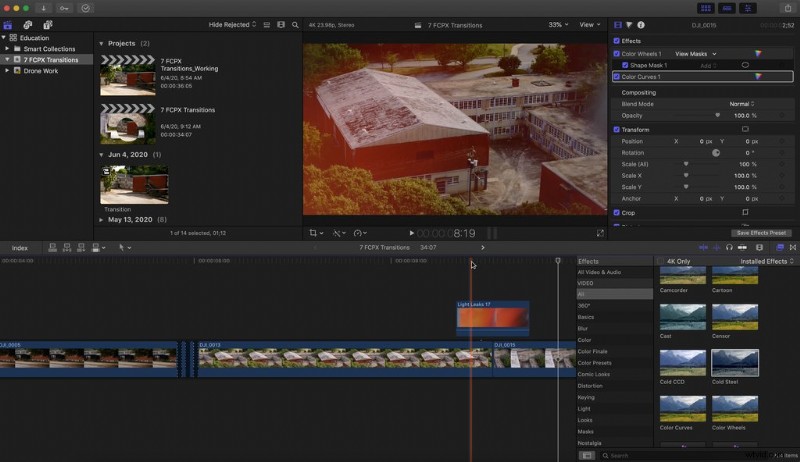
3. Light Leaks
Best for: Art Films and Travel
Light leaks are a very cool and classic effect to amplify your footage. Here are the steps.
- Drop your light leak clip directly above the two clips you want to transition.
- Right-click on your light leak clip and select Show Video Animation.
- Find your opacity channel and simply fade each end of the light leak from 0-100 percent at the middle.
- Done. You now have a pretty sweet light leak transition.
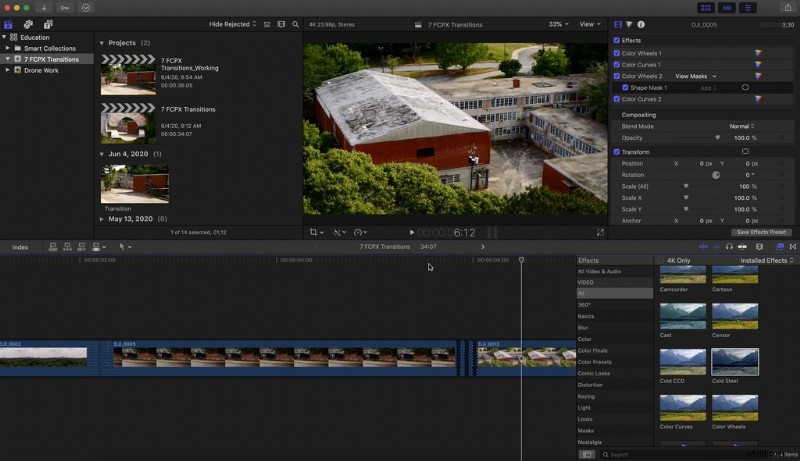
4. Lens Flares
Best for: The Next J.J. Abrams Movie, Music Videos, and Sci-Fi
Who doesn’t love a well-used lens flare for a transition. Here’s how you do it.
- Just like your light leak, drop the lens flare above the two clips you want to transition.
- Select the lens flare clip and head over to your Compositing panel.
- Select Screen from the drop-down menu.
- There you go! Now you’ve got a great lens flare transition.
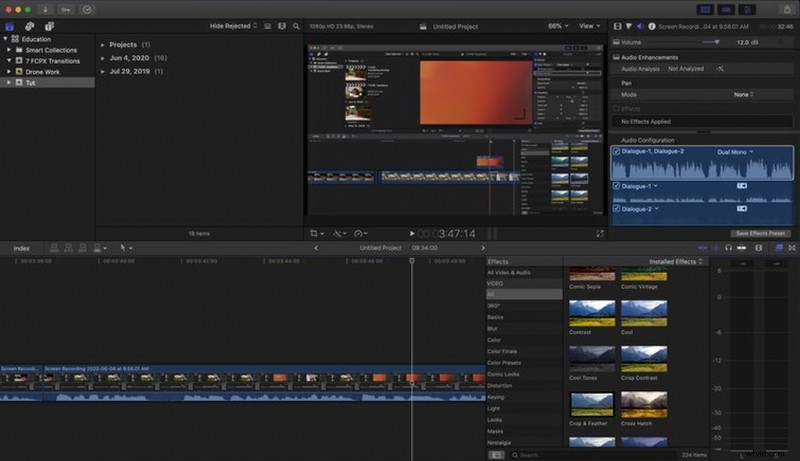
5. Tidal
Best for: Travel and Fun Vibrant
Tidal is a fun transitional pack from Shutterstock Elements. It’s perfect for a travel video or something you want to add some kinetic energy to.
- Drop the transitional element from Tidal that you want to use over two clips.
- Select the element and head over to your Compositing menu. From that drop-down, select Stencil Alpha.
- Now, select your transitional element and your top clip, right-click both, then select Compound Clip. This will combine those two clips together.
- Now, you have your finished clip.
6. Speed Ramp
Best for: Commercial, Corporate, and Travel
Speed ramps are awesome to add a little character to your transitions and are pretty easy to utilize.
- With the blade tool, cut off about 1.5-2 seconds on each of the clips.
- Select each clip and speed up to 8x.
- Now, you’ve got yourself a speed ramp transition.
7. Cross Dissolve
Best for: Literally Anything
Sometimes, all you need is something simple. When that simple moment calls, a cross dissolve is an excellent place to start. Here’s how to do it.
- In your Transitions panel, search for Cross Dissolve.
- Once it pops up, simply drag the effect between the two clips.
- Done.
These seven transitions for FCPX should help you elevate any project you’re working on.
Cover image via Sutipond Somnam.
Learn more about editing your next video with these tips:
- How to Blend Stock Footage into Your Video Projects
- 9 Beginner Tips For Editing Footage in Final Cut Pro X
- 10 Free Vintage Color Presets for Final Cut Pro
- 7 Must-Have Free Final Cut Pro Plugins for Every Editor
- 129 Free Cinematic LUTs from Professional Colorists and Filmmakers