Create retro pixel sequences in After Effects — without having to do it the old-fashioned way of drawing your shapes pixel by pixel.
With the resurgence of Retrowave and Outrun-themed design in today’s popular trends, more people are using the ’80s teal and purple tinted color palettes straight out of Miami Vice. Pixel art is an integral part of the entire ’80s-’90s design sphere, and almost comes hand in hand with the Retrowave aesthetic. Before we had programs like After Effects, you had program each individual pixel to create your own 8-bit designs. Now all you need is a few different effects layered over your assets to get your footage to look like it came straight out of a Gameboy (you know, before we had backlit screens and you had to hold a flashlight in your other hand to see what Pokemon you were about to catch).
Charles Yeager over at PremiumBeat recently made a helpful walkthrough to help you get that pixelated style. So, today we’re going to go step-by-step through the pixelation process. Let’s get started!
First Layer: Posterize Effect
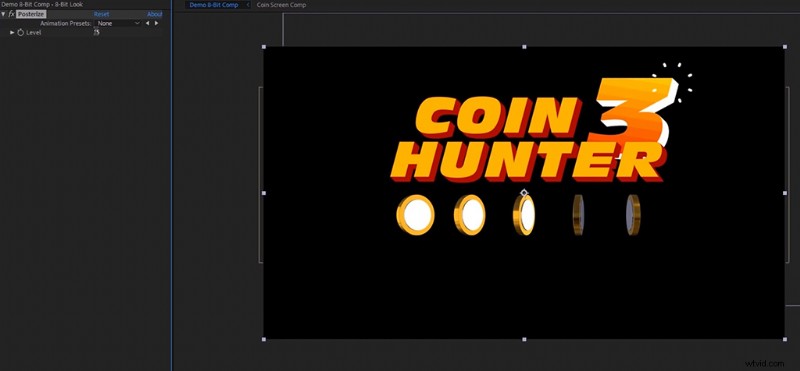
For the first step, import the assets you would like to turn into pixel art. This can be a motion graphic or a title sequence, whatever your project requires. Next, create an adjustment layer over your timeline and add on the Posterize Effect. This will limit the amount of color tones that your object has. For example, if you have a gradient in your graphics, you will now see those slanted lines of different colors that are unique to those 16-bit color video games. Stay around a level of 5 to 15:5 for a more rudimentary “GameBoy” look, or 15 for more of a “Sega Genesis” look.
Second Layer: CC Block Load
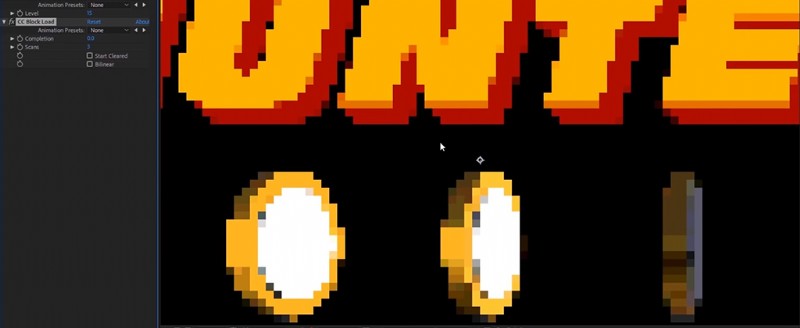
Now to get the whole “pixelated” look, we aren’t going to use the Mosaic effect like you would think. The Mosaic effect can create non-square shapes, which is not the look we are going for. Instead, you are going to use the CC Block Load effect, which will create perfectly square pixels. We’re going to add the CC Block Load effect onto the adjustment layer from the last effect, and turn the Completion setting to 0. Set the Scans value to 3 and uncheck the Start Cleared option. Your motion graphic will now have that retro pixelated look.
Third Layer: Tint
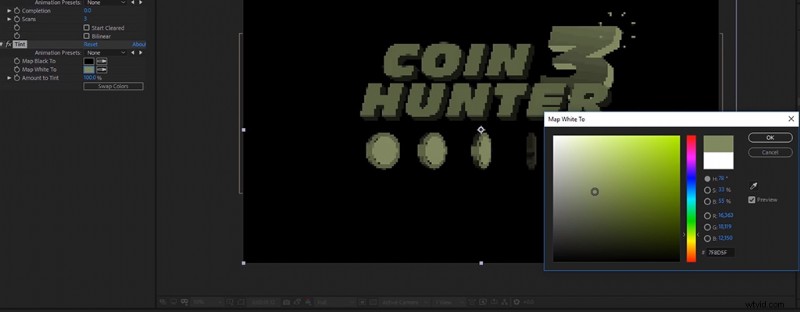
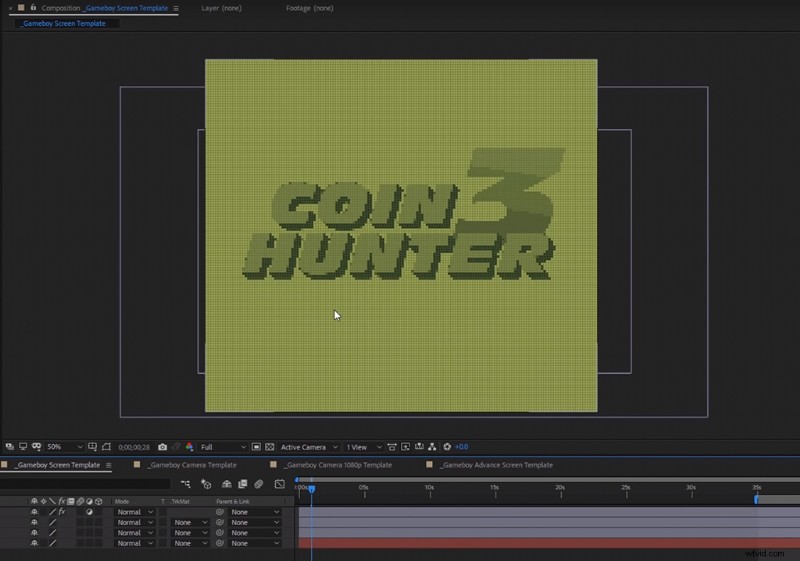
If you’re looking for a monochrome look, use the Tint effect to change the color palette of your composition. Set the Map White To option to a color of your choice. The most “GameBoy” looking one would be a moss green color. This will change your composition’s color to a dull green color palette, matching those tiny tinted screens you remember from your childhood.
Fourth Layer: Grid
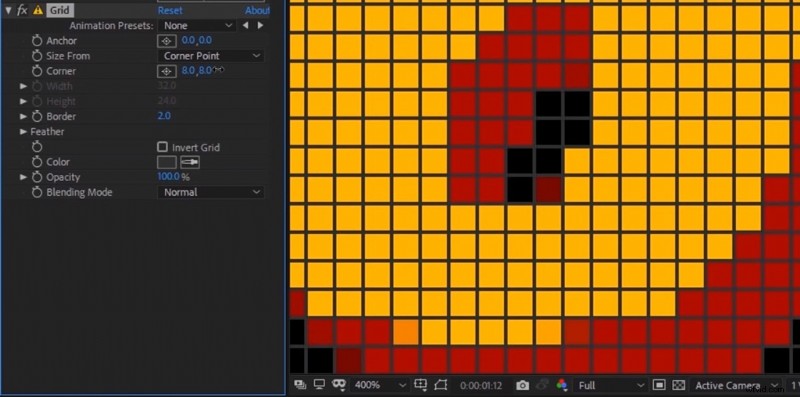
To really create the illusion that you drew these blocks by hand, we are going to have to add some dimension to the CC Block Load effect we just put onto the composition. Without a border on each pixel, it won’t have that specific retro look you want. To add a border, drop the Grid effect onto the adjustment layer, and set the blending mode to Normal. Then select a dark gray for your color, and change the border size to 2. To slim down your grid size to the pixel dimensions, change the Anchor position to (0,0) and the Corner size to (8,8). Now, the grid will be in perfect union with each individual pixel.
Fifth Layer: Posterize Time
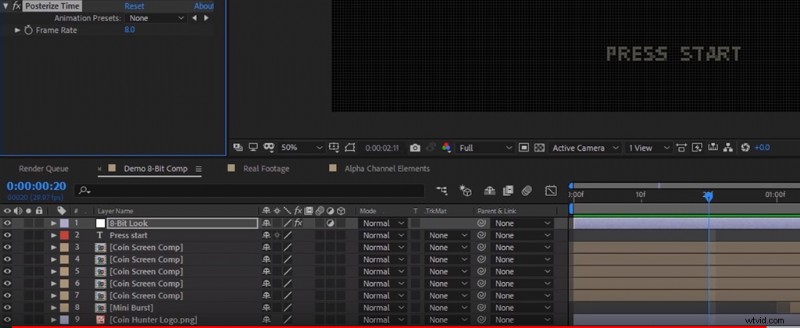
Since most 8-bit video games weren’t displayed in 24 frames per second, neither should your composition. To change up your graphic’s frame rate, add the Posterize Time effect to your adjustment layer, then switch down the frame rate to about 8 fps. Now the motion in your composition will be a bit more blocky, which is exactly what we are going for.
Don’t Have Time? Download the Project File Here
If you don’t have the time to add in all of these effects, Yeager is graciously giving away the project files you need to drag and drop this effect onto any video or motion graphic. Just click the link below to go to the PremiumBeat website, where you will find the download link at the top.
Download Here!
Want more on designing with on-trend vintage styles? Check out these articles:
- How to Make a Digital Collage in Adobe Photoshop CC
- Tutorial Video: How to Use Zine Textures to Make Awesome Designs
- Learn How to Use 20 FREE Photoshop Grunge Brushes
- NEON: Free Animated Text Typeface – 36 FREE Motion Graphic Elements
- Design Trends in the Wild: Back to Yesterday’s Tomorrow