Textures are a great tool for adding style and class to your motion graphics. In this tutorial, learn how to use our FREE texture pack to give your graphics a vintage look.
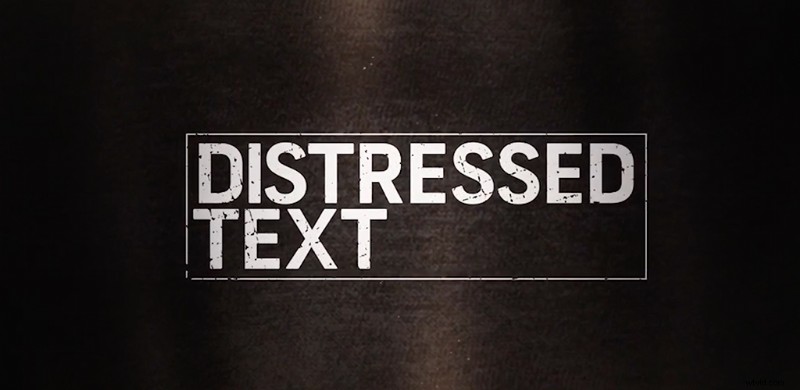
Distressed textures can do a lot more than simply degrade the look of your logos and designs. You can use them to create grunge looks, horror looks, and vintage looks.
Luckily for you, Shutterstock recently released a pack of 50 free distressed textures that you can use in graphic design and motion graphics.
With these textures, you can use nearly any editing or motion graphics software to add depth and style to your text layers or shapes. Watch the video below to see how it’s done in Premiere, Final Cut Pro, and After Effects.
With a little know-how, you can create some movie trailer titles or cool vintage lower thirds in a matter of seconds using these textures.
Want to use these textures in Photoshop or Illustrator? Here’s a tutorial for that:
Premiere Pro

In Premiere, there are a few more aspects to using elements like this than there are in Final Cut or After Effects.
First, you need to nest the element you want to add texture to. To do this, right-click your timeline and select “nest.”
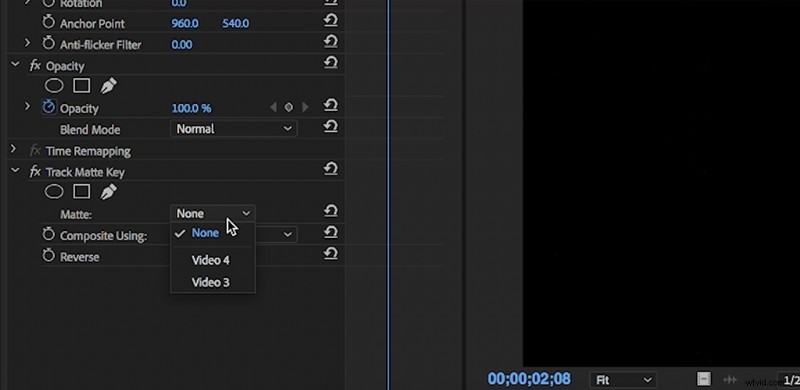
Then, choose your texture, and lay it on the video layer above the nested layer. In the effects panel, find the “Track Matte Key,” and drag it to the nested layer with the vintage element of your choice in it. Then, in the effect, select the video layer that contains your texture element.
Select “Matte Alpha” in the matte dropdown. Then, if desired, hit reverse.
Final Cut Pro
It’s really easy to get a vintage look in Final Cut.
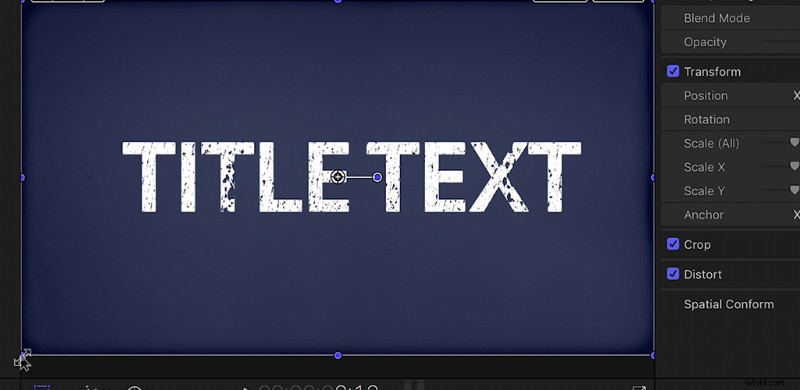
First, take your text element or logo layer (or whatever you want to add texture to), and put it in its own timeline. From there, you can decide which texture element you want to use and throw it on the video layer above your logo or text element.
With your texture layer selected, go over to the compositing tab (in the top-right corner), and from the transfer mode dropdown window, select “Silhouette Alpha.”
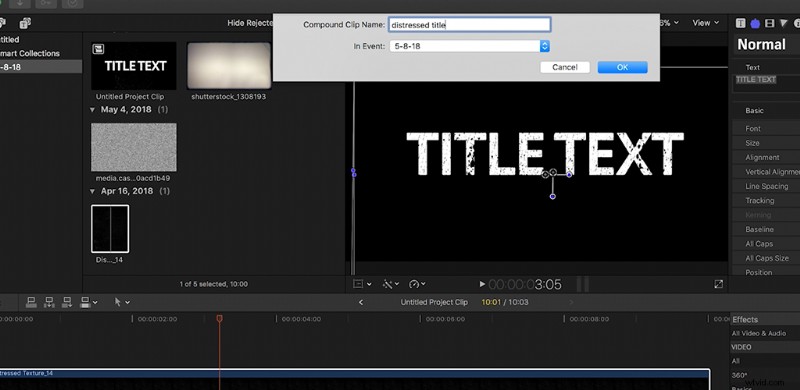
Next, select all of your layers, right-click, and select “New Compound Clip.” Now your text element with the texture is self-contained.
After Effects
In After Effects, the possibilities for textures like these are nearly endless.
Choose your element, and drag it down into your composition on a layer right above whichever object you’d like to add texture to. Then, with your logo or text layer selected, find the Track Matte dropdown (you might need to toggle switches in the bottom left), and select “alpha matte” or “alpha matte inverted,” depending on the effect you’re going for.
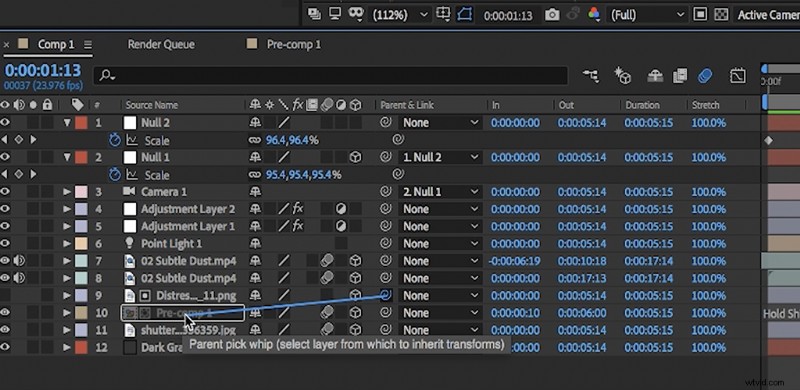
If your composition is 3D or includes any camera movement, you may want to switch your texture layer to a 3D layer or parent it to the text or logo element. That way the texture will move with your design.
Looking for more film and video tutorials? Check these out.
- Video Tutorial: How to Export Projects in After Effects
- Video Tutorial: 5 Quick Tips for Getting Started in After Effects
- Video Tutorial: Cleaning Up Noisy Video in 30 Seconds
- Tutorial: How To Clean Up Noisy Audio In Under A Minute
- How to Use Motion Graphics Templates in Adobe Premiere Pro