Figuring out how to export your first After Effects project can be difficult. Here’s a quick guide on how to get started.
When you first get started in After Effects, the layout can be daunting — it’s so vastly different from any other program out there. After you get your bearings and finally trudge through your first project, you go to File > Export like any other program. Right?
Well, not exactly. After Effects isn’t known for being user-friendly. There’s a bit of a process that you have to go through, but not to worry — that’s exactly what we’re going to show you today. Let’s get started!
Add Your Composition to the Render Queue
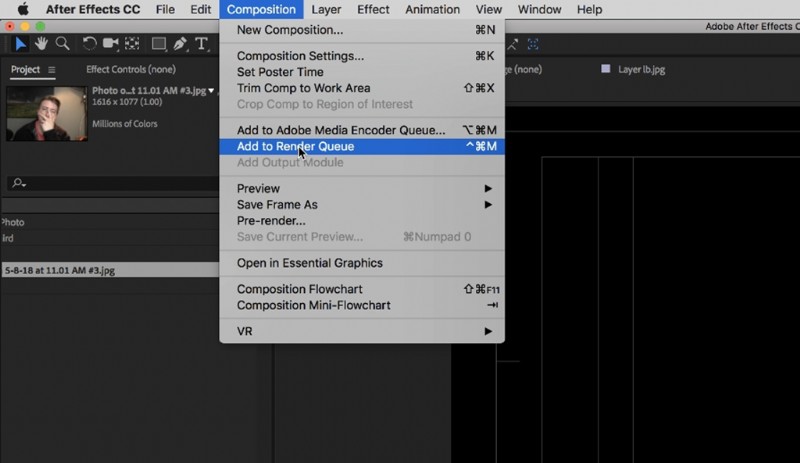
First off, to “render” your video to an exported video, you have to send your composition to the render queue. Think of the render queue as a line for compositions waiting to get exported — that way, if you’re exporting large batches of compositions down the road when you’re working on more complicated things, you can export them all in one swoop.
To add your composition to the render queue, click Composition > Add to Render Queue. This will automatically bring up the render queue and add your composition to it.
Adjust the Settings
When adjusting the settings for your composition, you will have three menus to choose from: Render Settings, Output Module, and Output To.
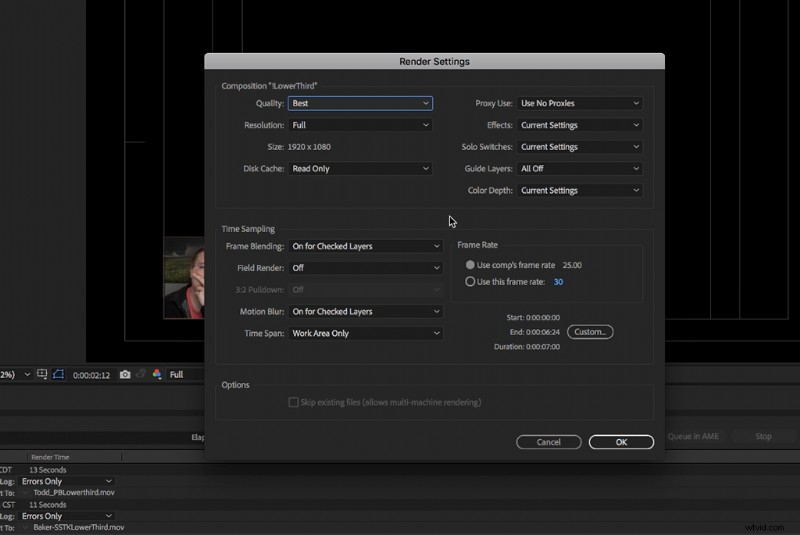
The Render Settings will allow you to adjust the quality and frame rate of your project. If there’s something you need to adjust in these settings, go ahead, but if not, After Effects will automatically adjust the settings to optimize your composition.
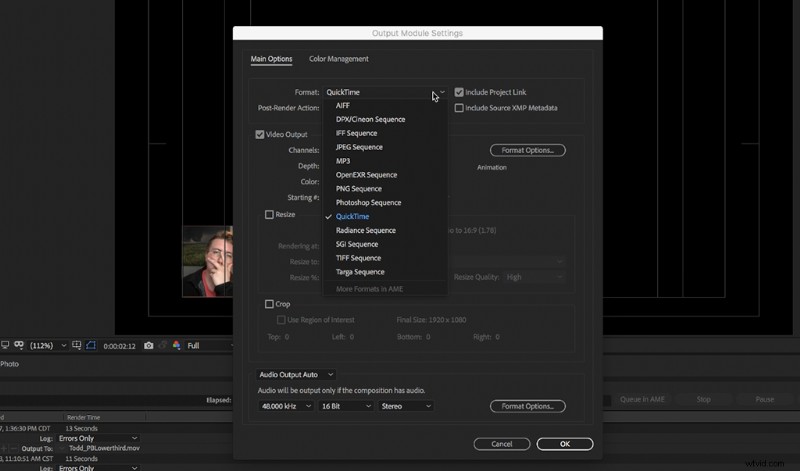
The Output Module is where you can change the codec and the style of your composition. If you need to adjust the codec, just go to “Format Options,” and choose accordingly from the dropdown menu. I recommend keeping the settings in QuickTime, since it is the most accessible format.
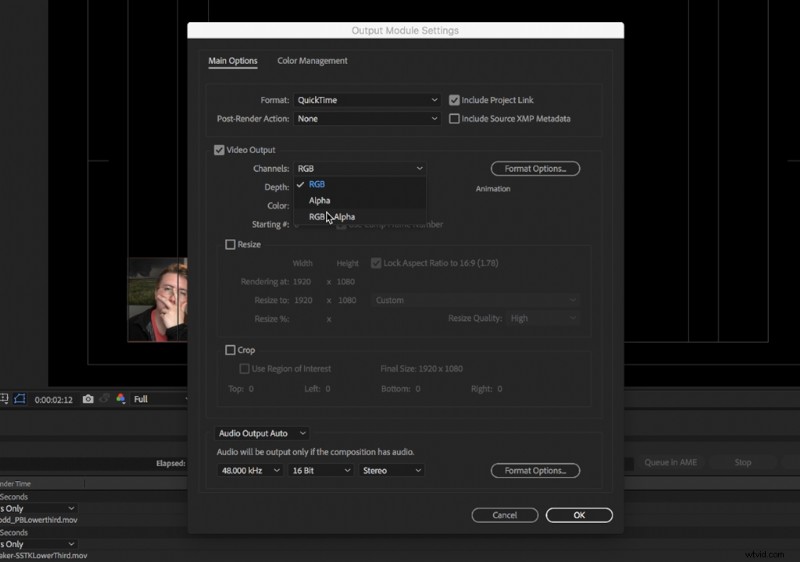
This is also where you will choose between RGB or RGB + Alpha. If you are exporting an animation that is going to stand on its own, such as an animation with a background, then choose RGB. It keeps the background intact. If you’re exporting something that you’re going to place over a video, such as a lower third or a graphic, then choose RGB + Alpha. This will make the background transparent, so when you place it in your NLE, only the graphic itself will be visible.
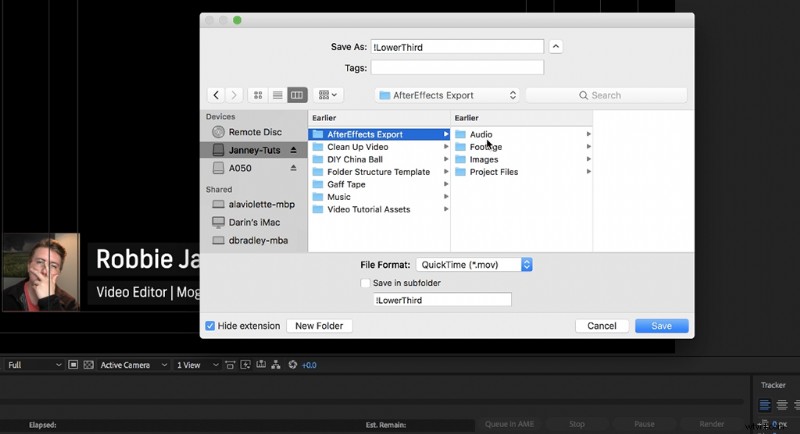
The Output To menu is where you choose the path of your composition once it is rendered. Choose your file placement of choice, and click okay.
Render It Out
Okay, here’s the hardest part (just kidding): click “Render” on the right side of the screen. It will begin to render out your composition, and after you hear the satisfying ding, you’re finished! Double-check the render in your file path to make sure it looks good. When you have that final render, you can place it in any NLE.
If you want to learn more about After Effects, make sure to check out our video about the 5 things you should know about AE.
Looking for more video tutorials? Check these out.
- Video Tutorial: 5 Quick Tips for Getting Started in After Effects
- Video Tutorial: Cleaning Up Noisy Video in 30 Seconds
- Tutorial: How To Clean Up Noisy Audio In Under A Minute
- Gear Recommendation: The Best Mouse For Video Editing
- Camera Lenses 101: When to Choose Wide or Telephoto
Cover image by Vershinin89.