This article discusses how to edit video in After Effects, and recommends another tool and a tutorial on how to use it.
Splitting the videos shouldn’t be a hectic task. Take your raw footage and cut it in After Effects within a few moments. Learn to cut videos on After Effects in 5 simple steps that take less than 5 mins, from start to finish.
Every second counts in your video. You cannot put out long-duration videos and expect the audience to be engaged. Cuts at the right moments without tumbling the simmering narrative.
They can very well decide how your content will be received in the foresight. Therefore, what you need is a video editor that can do the job without a hiccup. An editor that doesn’t shy away from going the extra mile, with the appetite to go beyond the means.
Applications such as Adobe After Effects can split clips and merge them in the manner of your choice. The added bonus feature of differently stacked layers of split video clips makes it easier to manage.
Get to Know – Adobe After Effects
After Effects was developed by a small software company in Rhode Island, primarily for Mac computers. After getting acquired by Adobe, the application grew from strength to strength.
After Effects have two versions, the CC and the CS version. CC is the Create Cloud which is a part of the Adobe suite. On the other hand, CS stands for Creative Suite, which is relatively older, continued till CS6.
When you have the option, go for the CC version, which has many improvements and feature updates.
PROS
- Create fake camera handheld movements
- Keyboard shortcut to split the video clips
- Python Scripting support for advanced automation and capabilities
- Create 2D and 3D animations, VFX quickly with ease.
CONS
- Not ideal for beginners
- Expensive; subscription-based plans are not the best in business.
How to cut video via FilmForth
When you don’t want to lighten your pocket with an expensive video editor, FilmForth comes into the picture. Cut videos within seconds and edit them separately. Backed by the friendly user interface and a structured placement of tools, FilmForth has room to impress. Here’s a video tutorial to help you cut the video.
Prerequisites for splitting videos through FilmForth
Install FilmForth from the Microsoft store. The app developers do not recommend installing it from any other source.

Step 1. Create A New Project
Launch Filmforth and create a new project. You do that by clicking on the New Project button.
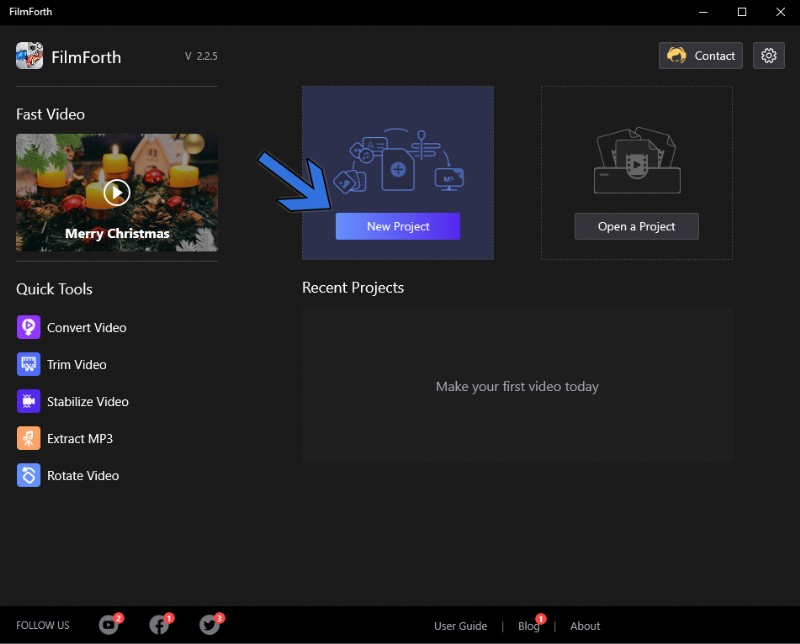
FilmForth New Project
Import a video by using the drag and drop feature. Alternatively, the Add Video/Photo Clips do not disappoint either.
Step 2. Split the Video
Then, click the Edit button at the bottom to summon more editing tools. Select the video from the timeline, and move the yellow seeker line to the point in the video you wish to cut.
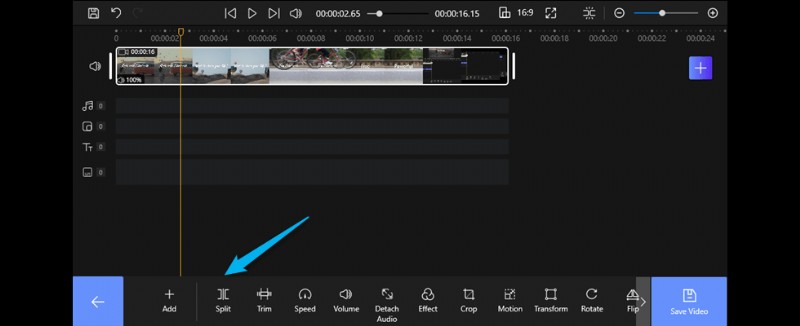
Spilt Video With FilmForth
Click on the Split button given in the tool’s dashboard. It will cut the clip into two parts.
The video is cut into two parts, as visible in the screenshot below. You can further cut into smaller clips by using the split tool.
Do remember that the splits can be undone using the undo button or the shortcut (Ctrl+Z).

Cut Video Via FilmForth
Step 3. Exported Video Cips
Once you’re satisfied, click the blue button in the lower right corner to save the video. The interface will pop out and let you choose the video resolution and quality of the recorded video, as well as the number of frames, and you can also set the sound settings. FilmForth provides you with an additional option, the decision to remove the video watermark is up to you.
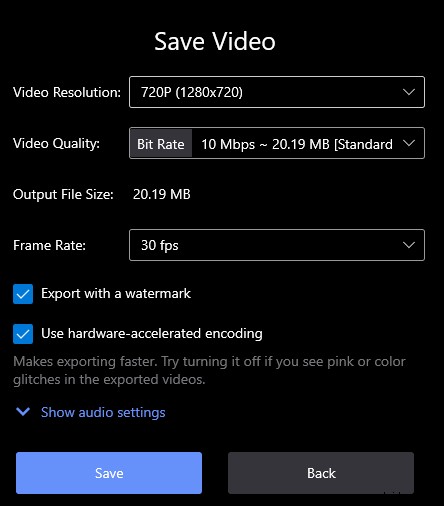
Exported the Cut Video
How do you edit a video with Adobe After Effects?
Step 1. Import the Video to Create A Project
Our first and foremost job is to create a new project. You can do that through the keyboard shortcut Ctrl+alt+N. Alternatively, you can go to Files > New > New Project for doing the same.
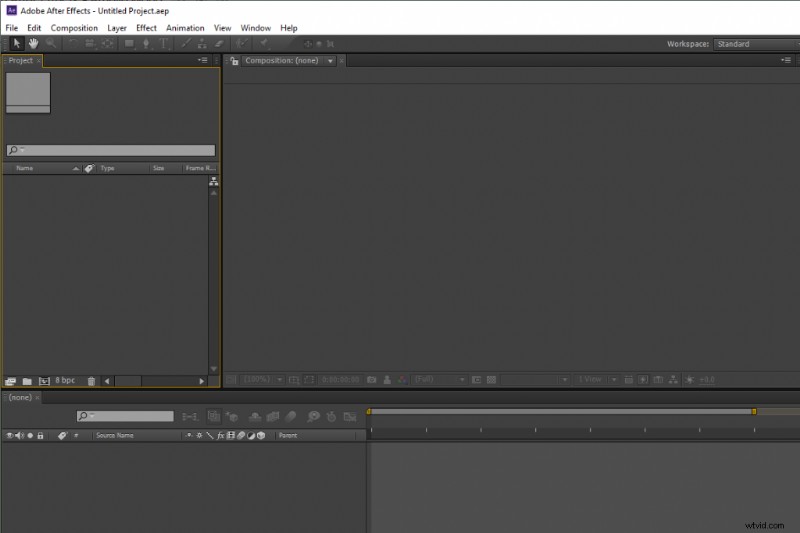
How to Cut Videos in After Effects
Next in line is importing the video. Drag and drop your video anywhere, apart from the composition section.
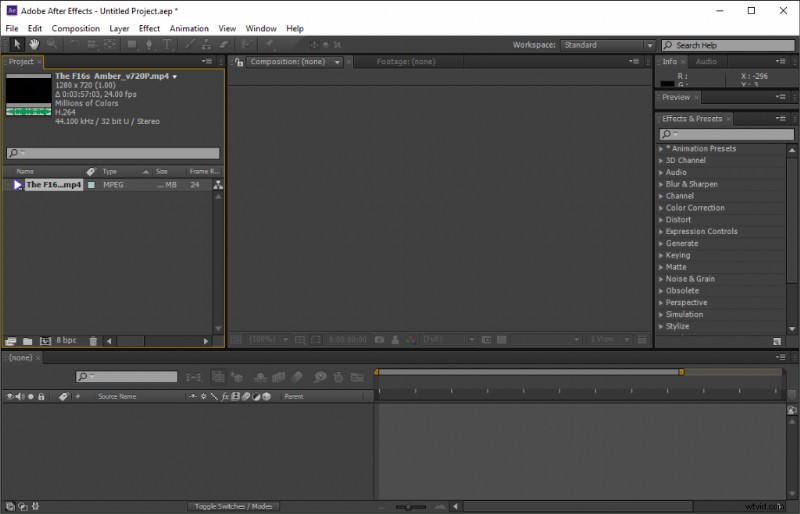
Import Video After Effect
You can also take advantage of the keyboard shortcut Ctrl+I to import all supported video files.
Step 2. Start to cut Video
Then, we drag the video into the timeline from the project section.
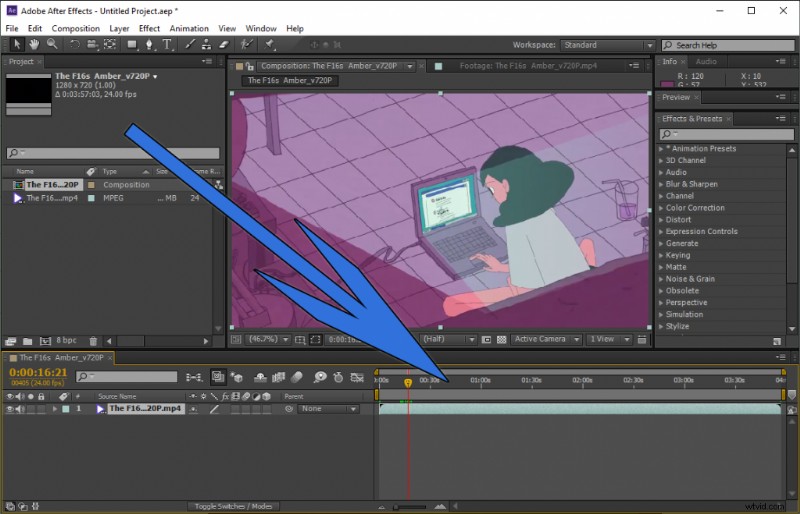
Add Video Timeline After Effects
Let us get to the reason why we are here. Head to the point in the video which you want to cut with the help of the seeker bar.
The easier way is through a keyboard shortcut. Once you have positioned the seeker bar, press Ctrl+Shift+D on your keyboard to cut the video instantly.
This comes in handy when you have to make multiple cuts in the video. You cannot go to the Edit > Split Layer for splitting the video manually every time. As you can see, the split parts of the video will appear in the different columns for better handling.
Split Video After Effects Timeline
You can split the clip into as many parts as you want. The splits can be undone as well by pressing Ctrl+Z on the keyboard after selecting a particular clip.
Step 3. Exported the Video
Once you’re done clipping, you can export the finished video from the Export menu. If you want to customize the settings and save the file name in the path, you can select “Add to Render Queue” to edit the file.
Conclusion
Adobe After Effects is a powerful application that does so much more than the simple cutting of videos. It does cost a considerable amount of money in the form of a yearly subscription package.
Frankly, that’s an overkill for just splitting or cutting the videos. On the other hand, there is a free video editor who goes by the name of FilmForth. It can cut the videos as well, without burning a hole in your pocket, easy to crop a video.
Perform similar projects on both the software and decide based on which of the two suits your style of editing.
More Related Articles
- How to Extract MP3 from MP4 for Free
- How to Change Video Background via Video Background Removers
- How to Change Video Volume in Windows 10
- How to Add Text to Video Online