You have recorded a video using your phone or any camera for that matter, the videos seem okay except for a few seconds where you lost a little bit of focus. Perhaps, you have a video which seems perfect except it contains an advertisement embedded into it and you wish that you could just do away with these parts and leave yourself with a perfect clip. Or you have a video which is simply too big and would like to split it. Well, the beauty is that you can do all this. Welcome to the world of video trimming and cutting. With current technologies where video trimming is as almost easy as winking, everyone is becoming a perfect photographer and you too can. Movavi video editor is an application available for both Mac and PC that enables you, among other capabilities, to split and trim your, video files in any popular format be it. AVI, mp4, MPEG or FLV so as to remove parts you don’t want. You can also do this for mp3 files and get perfect ringtones for your phone. In this “how to” I will take you through to do exactly this.
How to Cut Videos in Movavi Video Editor
1.Create your project
Open Movavi video editor like you would do any application then create a new project by selecting “Create project in full feature mode”. This is the project that will contain all the files and settings for your job. It enables you to save and resume your job at any time.
2.Add your video files
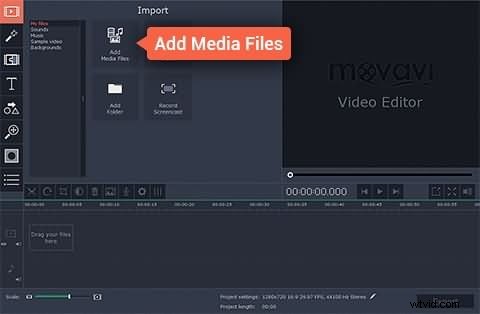
The next step is to add the video file that you are going to be working on. You do this by clicking Add media file button, which will open a dialog prompting you to select the file(s) you want to add. The file you add will appear in the timeline pane at the lower part of the application’s window ready to be played with.
3.Edit your video

After the file you want to work with has been added, you can now cut the video. With Movavi video editor, you can cut the beginning or the ending part of a video, or cut the video into half, or cut an unwanted part at the middle of a video. We do this by dragging the red marker along the video to find the exact spot to start the editing. You can also play the video on the preview window to locate the exact frame.
If you want to cut a video into two, just drag the red marker to the point you want to cut and then click split. In this case, your video is split into two segments, and you can cut, paste or delete one part as you like.
To cut and remove the beginning or end of a video, put the red marker to the starting point (the point inside the video), click split and then select the fragment of the video you want to delete and click Delete.
To delete a part of your video, first put the red marker where you want to start cut, click split then move the marker again to the end of the fragment you want to cut and click split again. Now you can select the piece in the middle and cut it, or delete it.
4.Save file
To save the changes, and the effect that you’ve added export your project to a new video file by clicking the “Export” button then selecting the appropriate tab in the resulting window, fill in the settings e.g. filename, quality etc. and click start to process of exporting.
Best Recommendation
Wondershare Filmora is an alternative to Movavi and may be a better option because it adds a couple of other features. The steps for cutting videos in Filmora are similar to those in Filmora but with additional capabilities explained below:
1. Scene detection
Scene detection is a feature that makes working with large video files easier. It captures several different positions of your video making the process of navigating your video seamless. To use this feature, first add your video, then right click on the video on the item tray and hit “Scene detection” option. On the scene detection window, click on “detect” button to capture parts of your video file, and finally click on apply.
2. Instant cutter for action camera shots
If your videos are shot with action cameras like GoPro in the format H.264 MP4/MOV or H.264 MTS/M2TS or just any other files with these formats, there is some good news for you. You don’t have to re-encode your videos to edit them, just import your files into Filmora for quick trimming and merging. To do this, select “Instant Cutter” which is located under the ACTION-CAM-TOOL option on the interface of Filmora.