Video editors cutting projects like documentaries will find a variety of video formats, file types, codecs, frame rates, and resolutions in any given project. Sometimes, you may be lucky enough that everything falls into the timeline perfectly, but odds are that some type of problem will arise in the editing bay.
To avoid this, one of the first decisions you should make regards the sequence settings, particularly the frame rate, dimensions, and NTSC or PAL. There is no magic sequence setting that works for everything. You’ll need to base these decisions on the final deliverable — the file that will actually play online, on television, in theaters, etc.
For example, if you’re cutting a video for a site like YouTube, then you should look at the format with the majority of the footage. Let’s say an interview is in HD 1080p at 30fps, you have two 4K establishing shots filmed at 60fps, B-roll from a DVD provided by the interviewee, and some still images. Thats enough information for us to figure out how to start. Since the interview will be the base of the entire project and play throughout the whole film, we want our sequence settings set to 1920 x 1080 at 30fps. You can transcode the 4K establishing shots to 30fps and then crop or scale them down in the timeline. Then you can use some time-remapping to get the footage to look right, whether you need slow motion or not.
Once you have your sequence settings in place, the rest of these tips should be a breeze.
Using 4:3 Footage in a Widescreen 16:9 Project

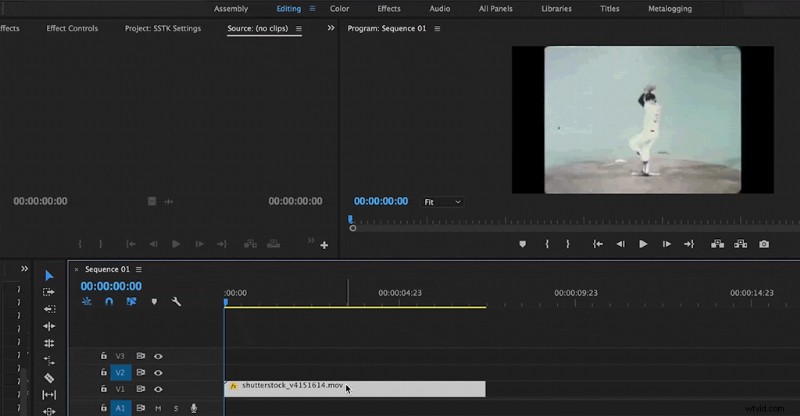
This technique has become a standard in television broadcasts, especially on sports channels featuring archival game footage. Rather than leaving the sides of the frame black or filling the canvas with cropped footage, editors create a duplicate layer, scale it up, and soften it to work as a moving background. It’s much less jarring for viewers to see this intermixed with regular 16:9 footage.
Here is one way to easily pull this off using some archival baseball footage from Shutterstock.
Step One: Scale the clip, while maintaining as much quality as possible.
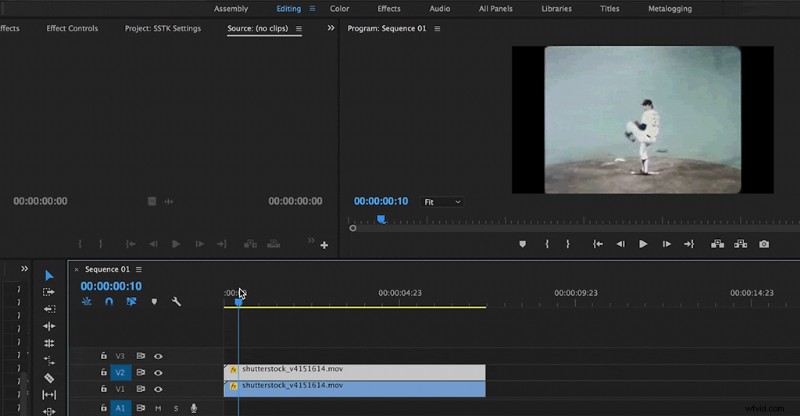
Step Two: Duplicate the layer and stack the clips in the timeline.
Step Three: Scale up the background layer.
Step Four: Turn down the opacity.
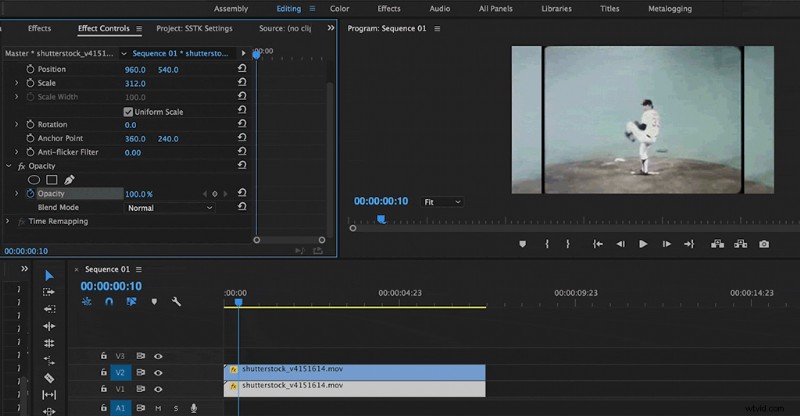
Step Five: If the clip uses color footage, you may want to consider making it black and white.
Resize or Crop 4K Footage for 1080p Timelines
You have a few options for working with 4K footage. You can easily scale down footage to the size of the sequence. For that, you’ll just need to lower the scale.
Another option is to crop the footage to your liking — this is a trick to make a single camera interview look like a two-camera production. You can also combine the two techniques to cover rough edits. Cut back and forth between scaled and cropped footage to remove any unnecessary pauses.
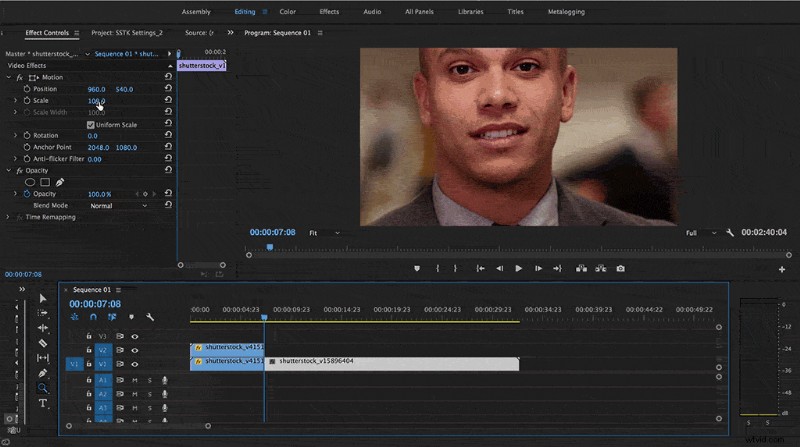
Below, you’ll see the first interview clip used 4K footage scaled down to 50%, while the second interview clip is scaled down to 75% and repositioned to look more natural.

When you add the clip the the timeline, just make sure you have your sequence settings at 1080p. The clip may or may not resize automatically, depending on your project settings. Adjust the overall scale to make the clip fit the timeline. For cropping 4K footage, you can generally get away with scaling the clip up about 25 percent before you start losing quality.
Adding Movement to Still Images
Made famous by documentary filmmaker Ken Burns, adding a pan and zoom effect to create movement in still images helps drastically enhance storytelling. It also keeps viewers’ eyes engaged and focused on the video.
We recently covered this topic in more depth here.
Looking for more on video editing? Check out these posts.
- A Guide to Frame Rates
- Enhance Still Images in your Documentary
- Common Video Editing Mistakes to Avoid
- 12 Video Editing Tips for Cutting a Documentary
- The Art of Choosing Documentary Music
- How to Use Stock Footage to Create Establishing Shots