Placing text behind moving or static objects can instantly elevate your video’s visual appeal. Whether you’re crafting an engaging intro or a polished opening, mastering this technique in Filmora will give your content a professional edge.

In this article
- What Are the Benefits of Adding Text Behind Objects in Videos?
- What Will You Need to Add Text Behind Videos?
- Step‑by‑Step Guide to Add Text Behind Videos
Part 1. What Are the Benefits of Adding Text Behind Objects in Videos?
Quality video content is essential for attracting and retaining a large audience, whether you run a YouTube channel or are just starting out. Incorporating text behind objects offers several strategic advantages:
Create a Striking Visual
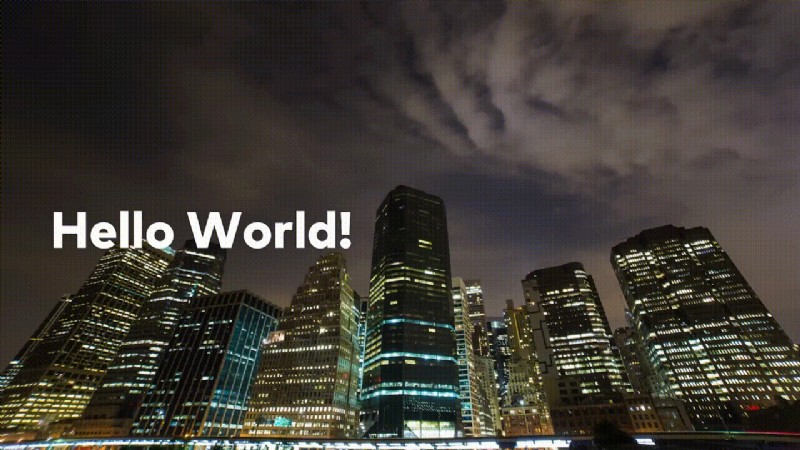
When text appears behind an object—such as a silhouette or a towering skyscraper—it creates a dynamic, eye‑catching illusion. The text moves in sync with the background, giving your video a polished, cinematic feel.
Demonstrate Creative Storytelling
Innovation is the cornerstone of audience growth. Adding text behind objects is a simple yet powerful way to showcase creativity, whether you’re designing an intro, a title card, or a key message.
Grow a Loyal Viewership
Regular content creators need fresh editing techniques to keep viewers engaged. A text‑behind‑object effect can add a fresh twist to intros and hook viewers, signaling that you’re consistently investing effort into quality production.
Part 2. What Will You Need to Add Text Behind Videos?
Before diving into the editing workflow, ensure you have the following prerequisites:
1. A Static Object in the Footage
Effectively layering text behind an object requires the object to remain stationary. If the object moves unpredictably, the illusion will break, leading to a jarring visual.
2. Wondershare Filmora Video Editor
Filmora offers an intuitive interface and powerful masking tools, making it an ideal choice for both beginners and experienced editors. With its drag‑and‑drop workflow, you can achieve professional results in minutes.
Part 3. Step‑by‑Step Guide to Add Text Behind Videos
Below are two scenarios: adding text behind a static object and adding text behind a high‑contrast, clean background. Each example follows the same core principles but tailors the masking approach to the footage type.
- A static video with an object that can be easily masked.
- A video with high contrast and a clean background.
Add Text Behind a Static Video
We’ll walk through the process using a stationary object. Scroll down for the detailed steps.
Step 1 – Download Filmora
Begin by installing the free version of Wondershare Filmora on your PC or Mac:
- Download the installer from Filmora’s official website.
- Run the setup and follow the on‑screen prompts to install.
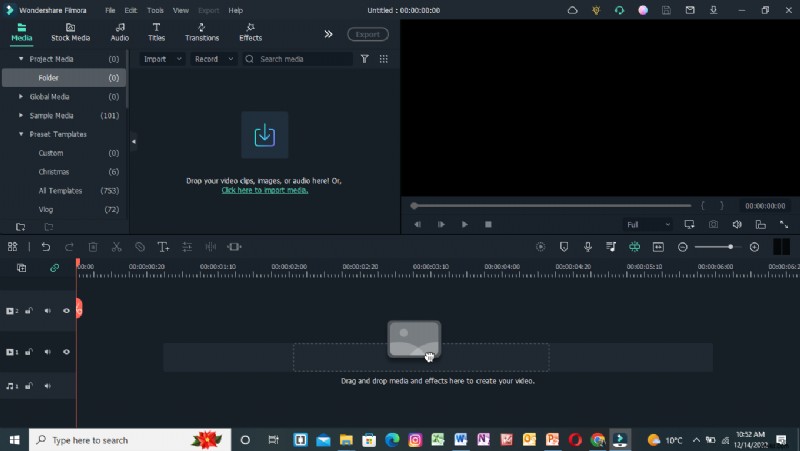
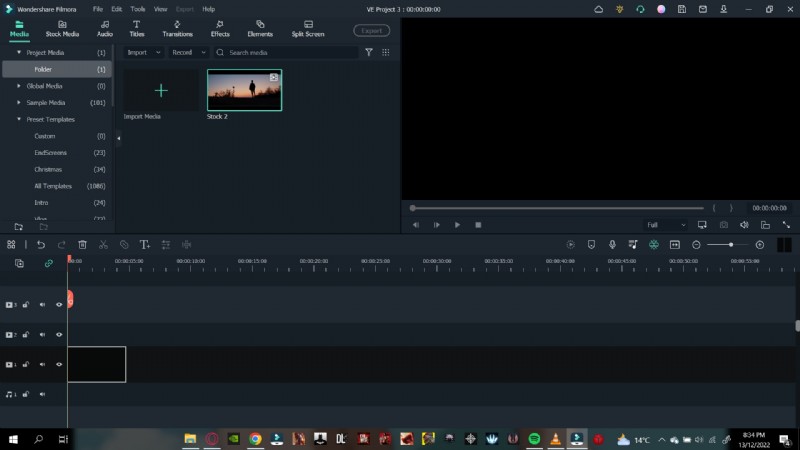
Step 2 – Import the Video to the Timeline
With Filmora open, add your footage to the editing workspace:
- Click Import in the media library.
- Drag the video from the library to the timeline.
Adding the clip to the timeline creates a dedicated workspace for all subsequent edits.
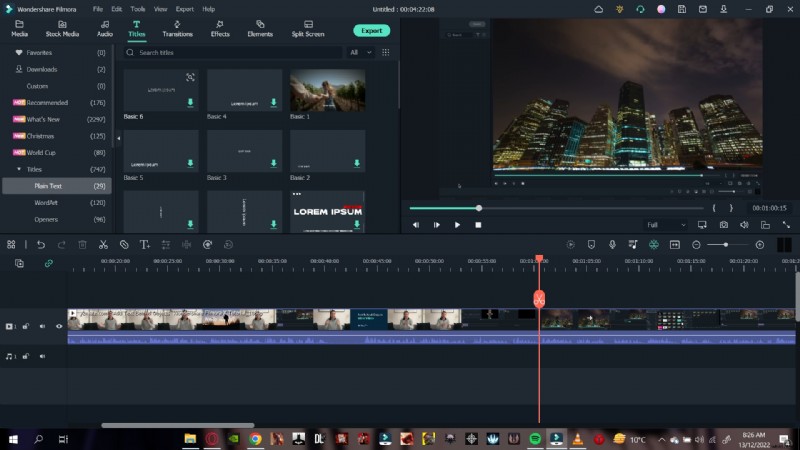
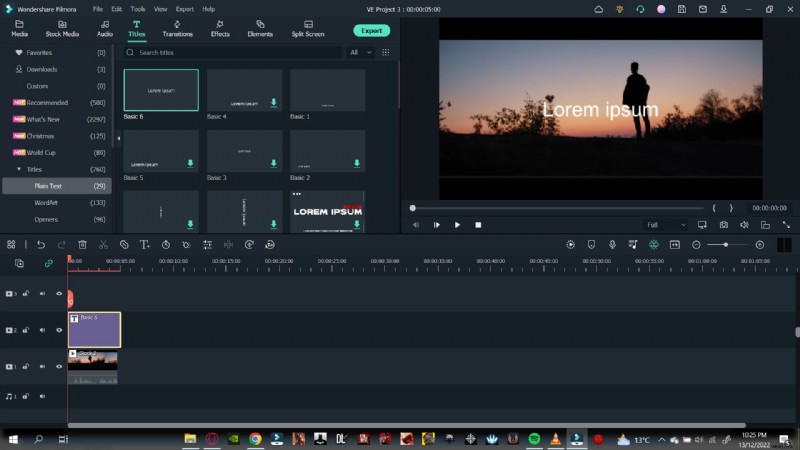
Step 3 – Add the Text Tile
Next, place a text overlay that will later appear behind the object:
- Click the Titles icon above the media library.
- Navigate to Plain Text and choose a style (e.g., Basic 6).
- Drag the chosen title onto the timeline, ensuring its duration matches the video length.
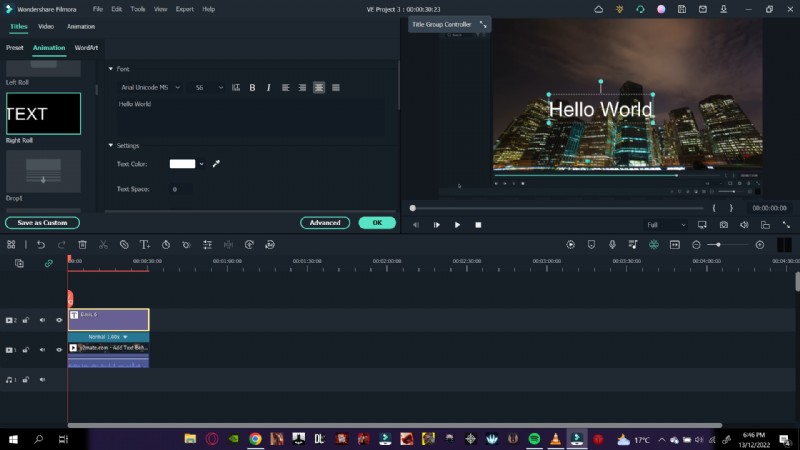
Step 4 – Edit the Text
Customize the content of your text tile:
- Double‑click the title on the timeline to open the text editor.
- Type your message, such as “Hello, World.”
- Choose a font and adjust size, color, and style as desired.

Step 5 – Animate the Text
Animate the title so it moves into place behind the object:
- Double‑click the title to access the animation tab.
- Select an entrance effect (e.g., Right Roll).
- Confirm with OK.
Step 6 – Mask the Object
Now, isolate the object so the text appears behind it:
- Overlay the same footage above the text track.
- Hide the lower track temporarily for clarity.
- Open the Effects panel and search for Image Mask.
- Drag the Image Mask onto the overlay clip.
- Double‑click the clip to open the mask settings.
- Choose a shape that matches the object (e.g., a vertical rectangle for a building).
- Adjust the X, Y, and width values to align the mask precisely over the object.
- Click OK and unhide the lower track.
Playback the sequence to confirm that the text now appears behind the stationary object.
Add Text Behind a High‑Contrast, Clean Background
When your footage has a high‑contrast background, you can still achieve the behind‑object effect, but the workflow differs slightly.
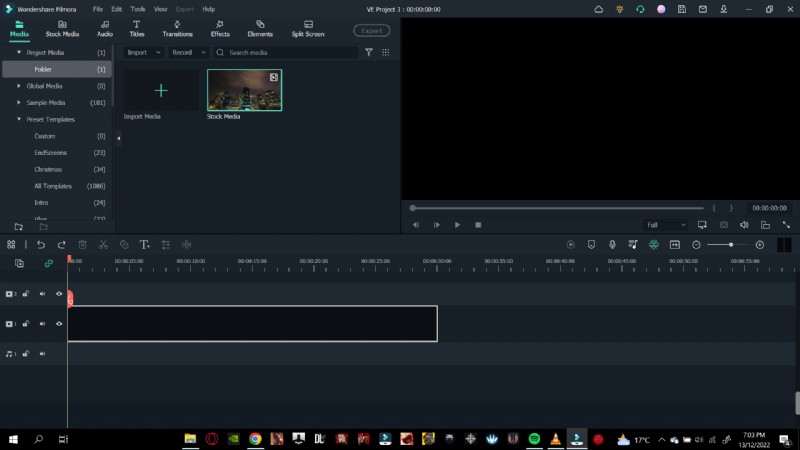
Step 1 – Import the Video
- Drag the clip into the timeline.
Step 2 – Add the Text Tile
- Access Titles → Plain Text and pick a style.
- Drag the title above the video track.
- Double‑click to enter text (e.g., “Hello world.”) and select a font.
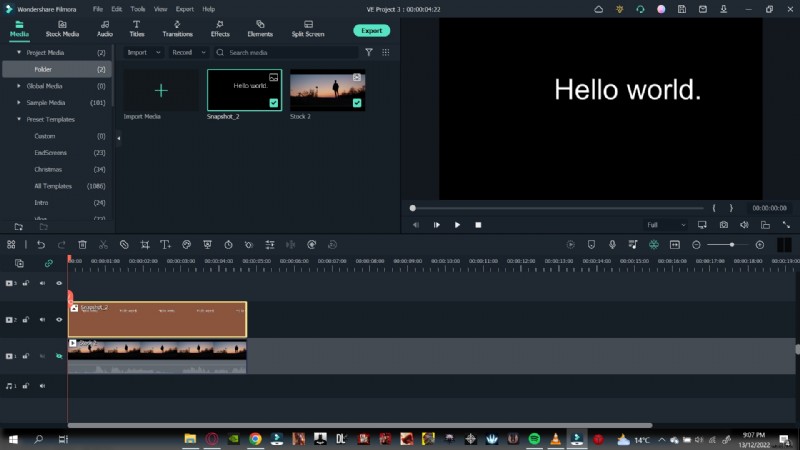
Step 3 – Take a Snapshot
- Hide the original video track.
- In the preview window, click the camera icon to capture a screenshot of the text overlay.
- Save the snapshot to the media library.
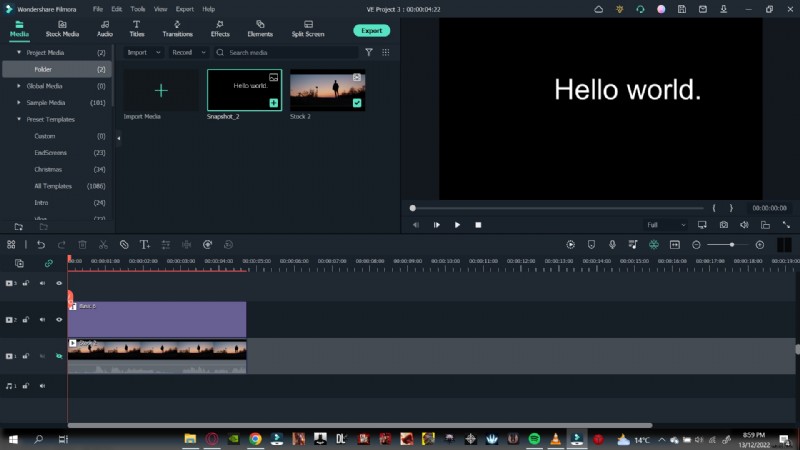
Step 4 – Add the Snapshot
- Delete the original text tile.
- Drag the snapshot onto the timeline above the video.
- Adjust its length to match the video duration.
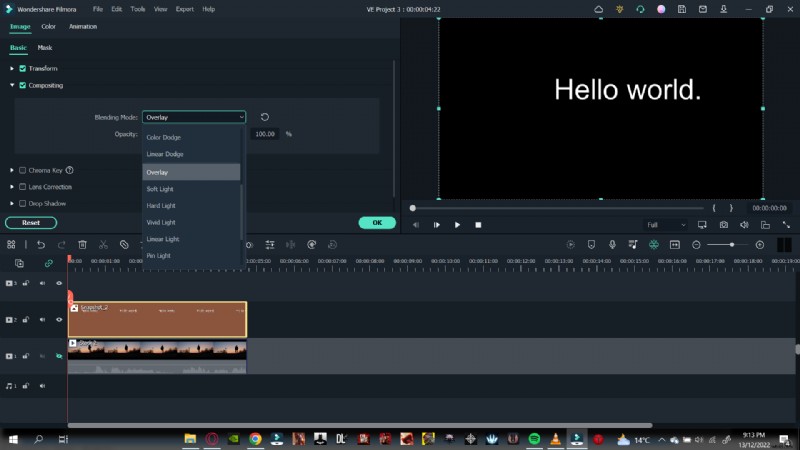
Step 5 – Change the Snapshot Blending Mode
- Double‑click the snapshot to open its properties.
- Navigate to the Compositing tab.
- Change the blending mode from Normal to Overlay.
- Confirm with OK.
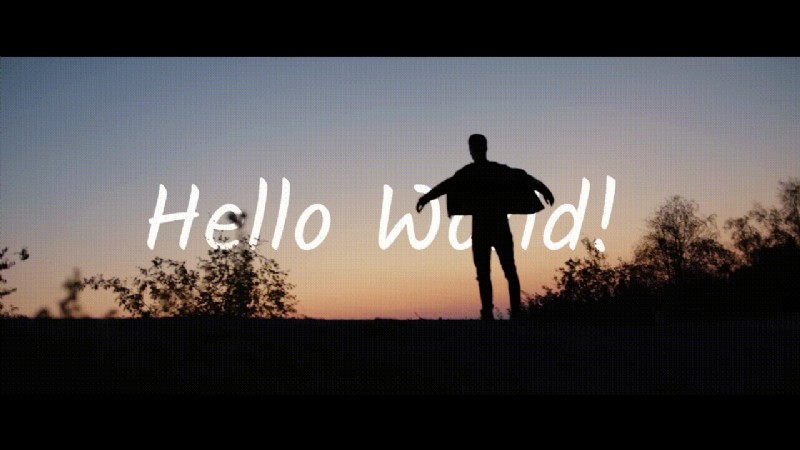
Step 6 – Finalize and Play
- Unhide the original video track.
- Play the timeline from the beginning to see the text rendered behind the foreground object.
With these steps, you can seamlessly integrate text behind both static objects and high‑contrast scenes, adding depth and professionalism to your videos.
Conclusion
In today’s crowded media landscape, standing out requires continual innovation. Mastering the text‑behind‑object technique empowers you to create striking intros, enhance storytelling, and grow a dedicated audience. By following this guide, you’ll elevate your video production skills and keep viewers coming back for more.