Slow‑motion and speed‑up effects are staples on social media, whether you record footage in slow‑motion mode or tweak it during post‑production. For comedic moments, rapid cuts add humor, while short‑form content often requires compressed pacing to fit platform limits. A versatile video editor is essential for these adjustments.
DaVinci Resolve has earned a reputation as a full‑featured editing suite that handles cutting, color grading, visual effects, and audio. It also offers robust tools for changing video speed, though its interface can feel dense for newcomers. In this guide we’ll walk you through speeding up footage in DaVinci Resolve, outline its pros and cons, and introduce a more beginner‑friendly alternative.
In this article
- Part 1. Common scenarios that call for speed adjustments
- Part 2. Speeding up video with DaVinci Resolve
- Part 3. Pros and cons of DaVinci Resolve’s speed tools
- Part 4. A simpler alternative: Wondershare Filmora
- Part 5. Speed editing on the go with Filmora Mobile
- Part 6. DaVinci Resolve vs. Filmora: a quick comparison
Part 1. Common scenarios that call for speed adjustments
Below are the most frequent use cases where altering video speed can improve engagement:
- Long, unremarkable segments – Compressing slow sections keeps viewers from losing interest.
- Humorous footage – Speeding up actions can amplify comedic timing, especially when paired with playful audio.
- Short‑form content – Platforms like Stories and Reels favor brief clips; speeding up can meet duration limits while preserving key moments.
- Timelapse creation – Whether shooting with a timelapse mode or post‑processing, speeding up allows hours of activity to fit into seconds.
Part 2. Speeding up video with DaVinci Resolve
DaVinci Resolve offers several methods to adjust clip speed. You can apply a uniform percentage change, craft uneven speed ramps, or fine‑tune motion with retime curves. Below is a step‑by‑step walkthrough for version 17.
Method 1. Change Clip Speed option
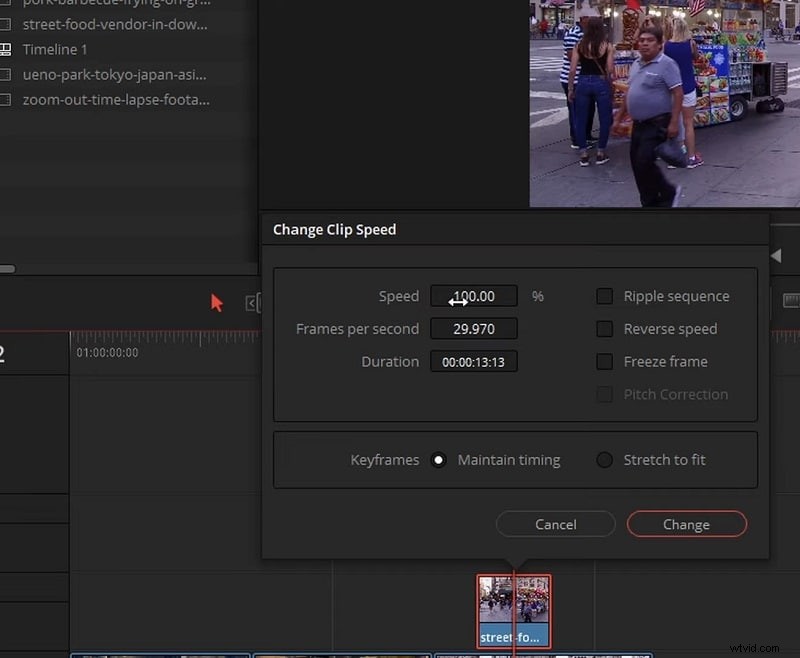
This straightforward approach lets you set an exact speed percentage. Values above 100% speed up the clip; values below 100% slow it down.
Step 1: Place the clip on the timeline, right‑click it, and choose Change Clip Speed….
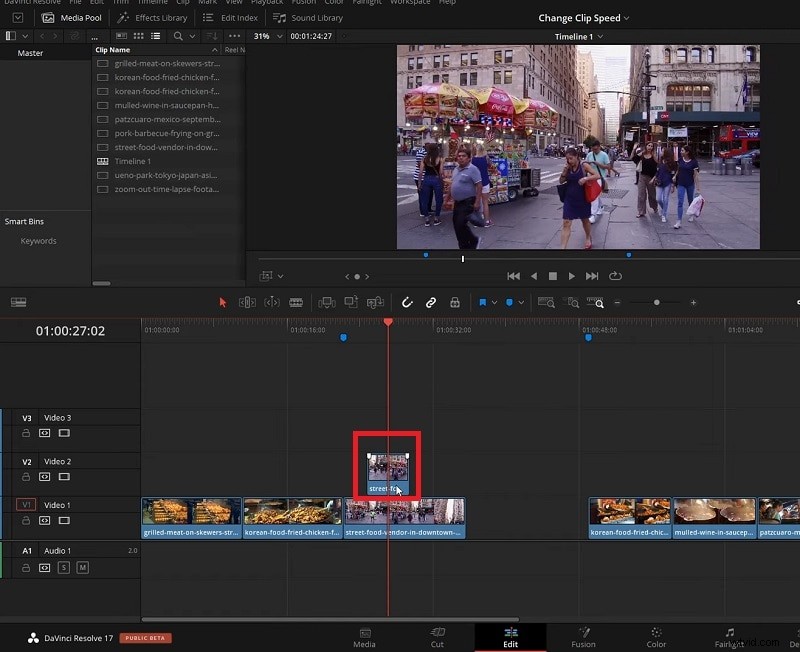
Step 2: In the dialog, enter the desired speed percentage (e.g., 200% to double the pace).
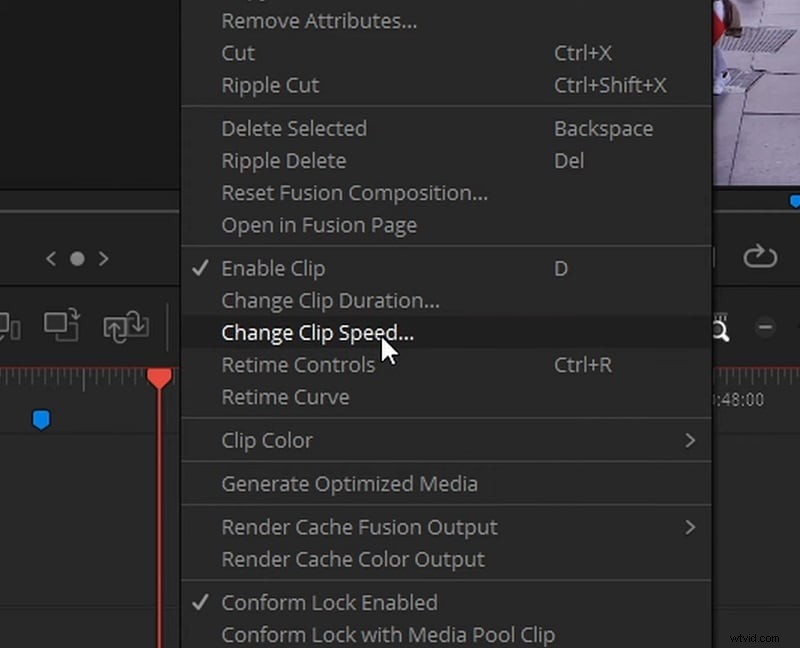
Step 3: Click Change to apply the adjustment.
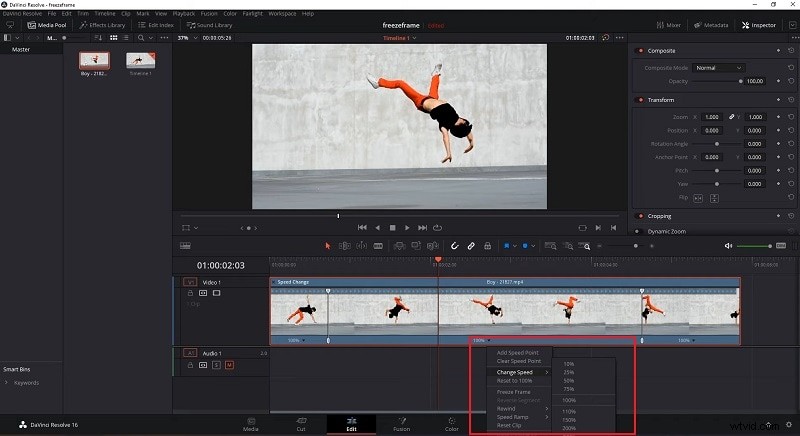
Method 2. Speed Ramping
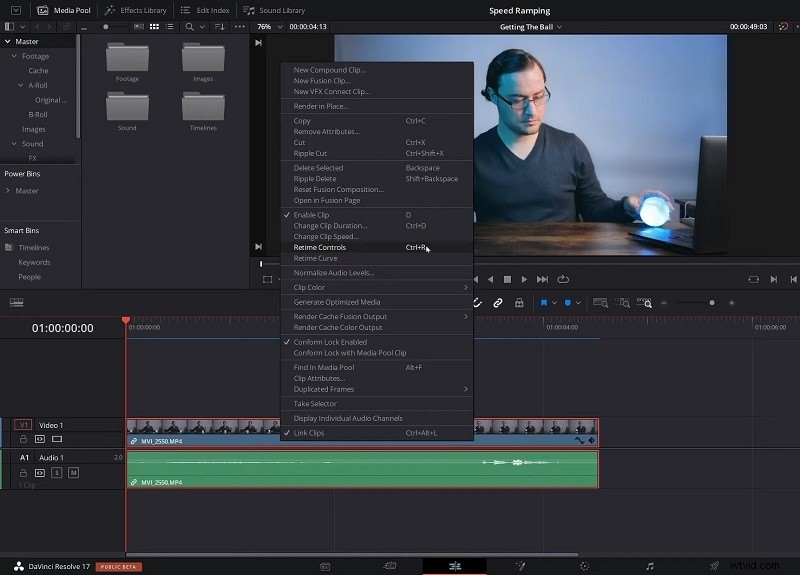
Speed ramping lets you vary motion across a clip, creating smooth transitions between slow and fast sections. Retime controls enable the placement of speed points along the timeline.
Step 1: Right‑click the clip, select Retime Controls.
Step 2: Move the playhead to a desired location, click the 100% arrow, and choose Add Speed Point. Repeat for additional points.
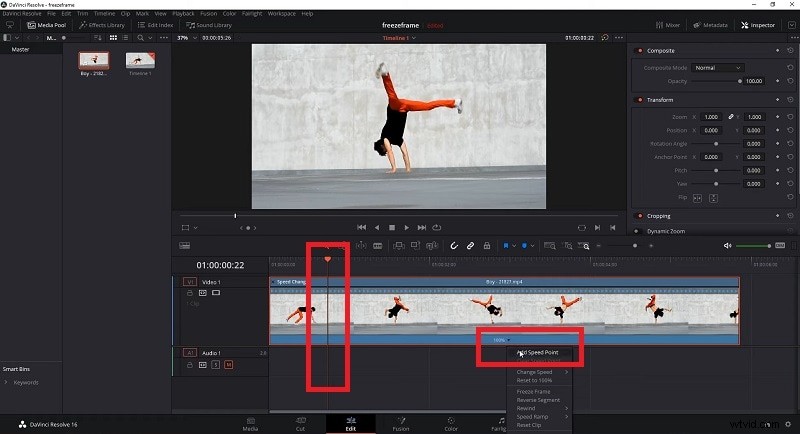
Step 3: Between speed points, click the 100% arrow again, select Change Speed, and choose a preset or custom value. The clip’s speed will adjust accordingly.
Part 3. Pros and cons
Every professional tool balances power with complexity. Here’s a quick look at DaVinci Resolve’s speed‑adjustment capabilities.
- Pros
- Instant global speed changes
- Targeted speed ramps for selective sections
- Customizable retime curves for nuanced motion
- Optical Flow support for smoother interpolation
- Cons
- Feature overload can be confusing for beginners
- Non‑optimal settings may produce jitter
- Some functions require advanced knowledge
- Reports of crashes when applying multiple speed changes simultaneously
These drawbacks contribute to a steep learning curve, prompting many creators to seek a more approachable editor.
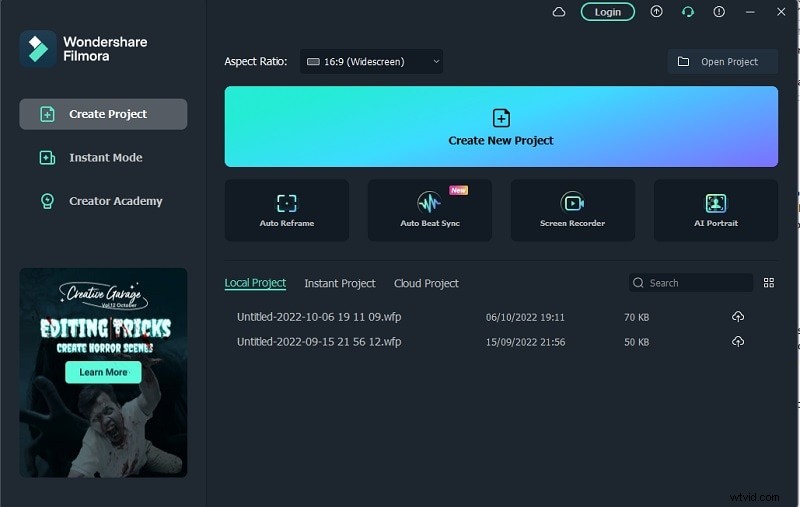
Part 4. A simpler alternative: Wondershare Filmora
If you prefer a cleaner interface without sacrificing functionality, Wondershare Filmora is an excellent choice. It offers all core editing tools plus a streamlined speed‑adjustment workflow.
Filmora provides uniform speed presets, a customizable uniform speed slider, and an intuitive speed‑ramping graph—all designed to prevent motion artifacts and keep the process quick.
Here’s how to adjust speed in Filmora:
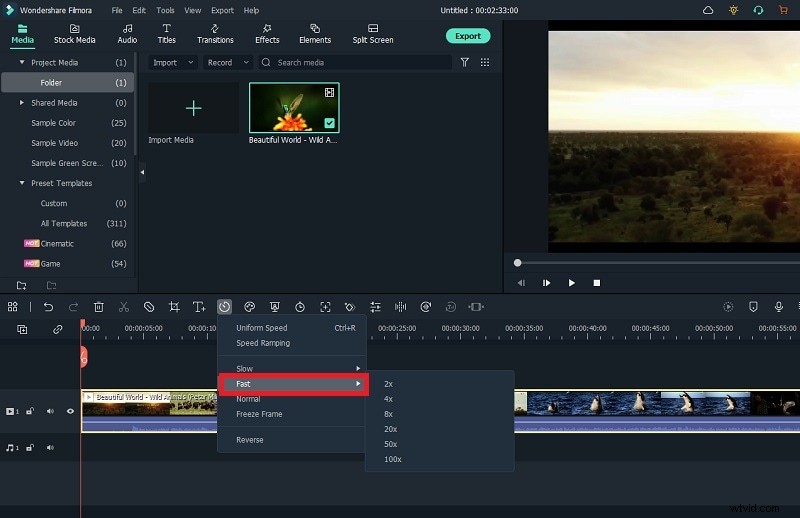
Method 1. Use Speed Presets
For a fast, one‑click change, choose from pre‑set speeds.
Step 1: Launch Filmora, start a new project, and drag your video to the timeline.
Step 2: Click the Speed icon on the timeline toolbar.
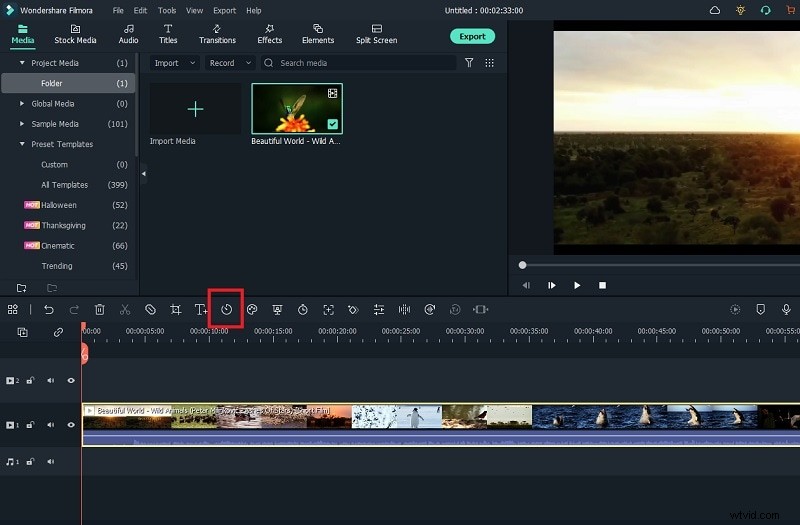
Step 3: Select a Fast or Slow preset, then export the finished clip.
Method 2. Set Uniform Speed
For precise control, use the Uniform Speed slider.
Step 1: Click the Speed icon and choose Uniform Speed.
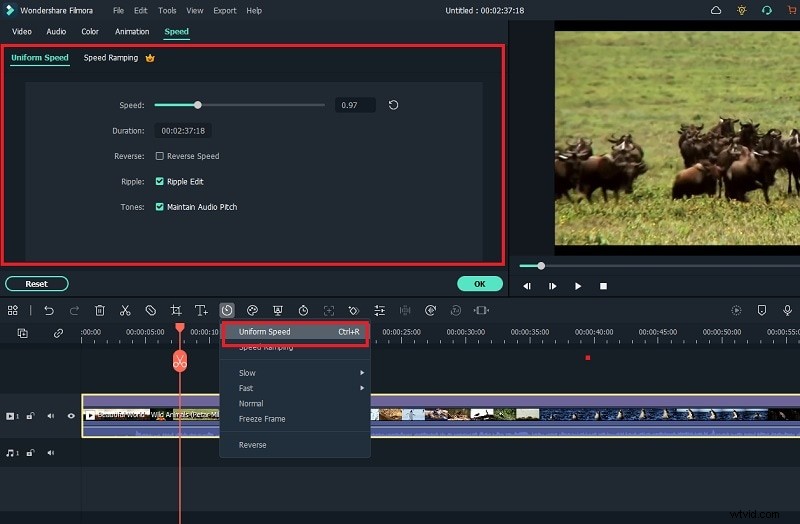
Step 2: Adjust the slider to the desired multiplier (0.01X‑100X).
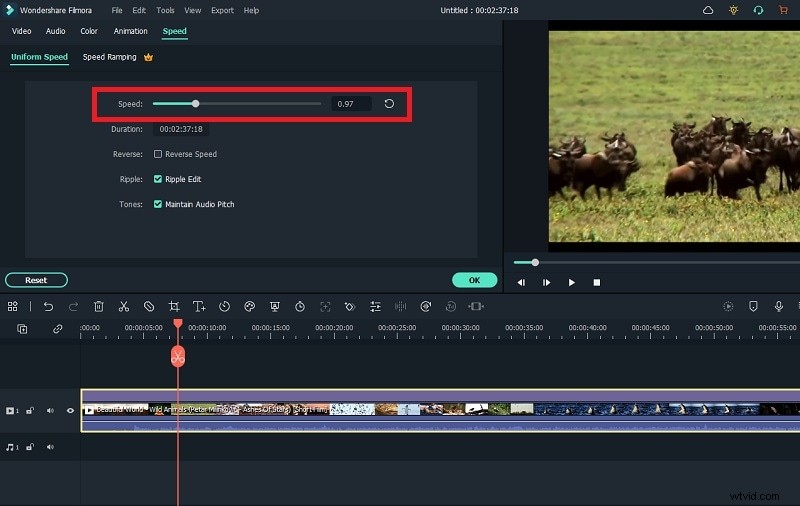
Step 3: Confirm with OK and export.
Method 3. Speed Ramping with Graph
Filmora’s speed‑ramping tool displays a graph you can edit to create custom motion curves.
Step 1: Select Speed Ramping from the Speed menu.
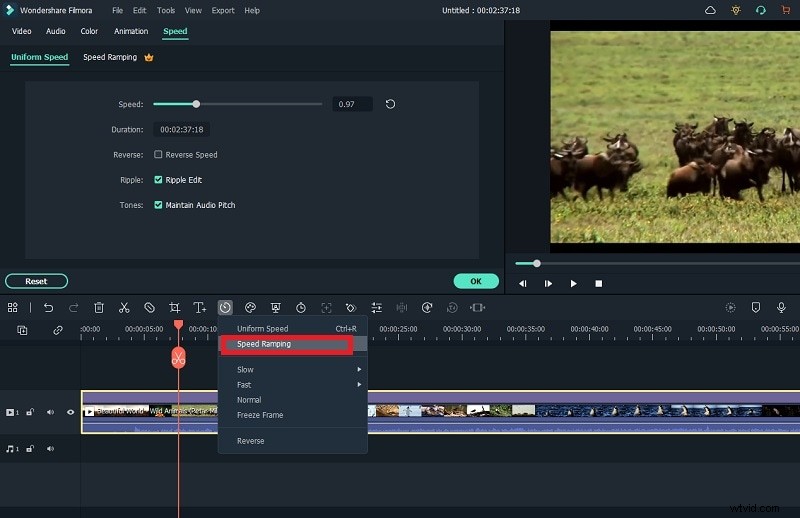
Step 2: Choose a preset or click Customize to modify the graph directly.
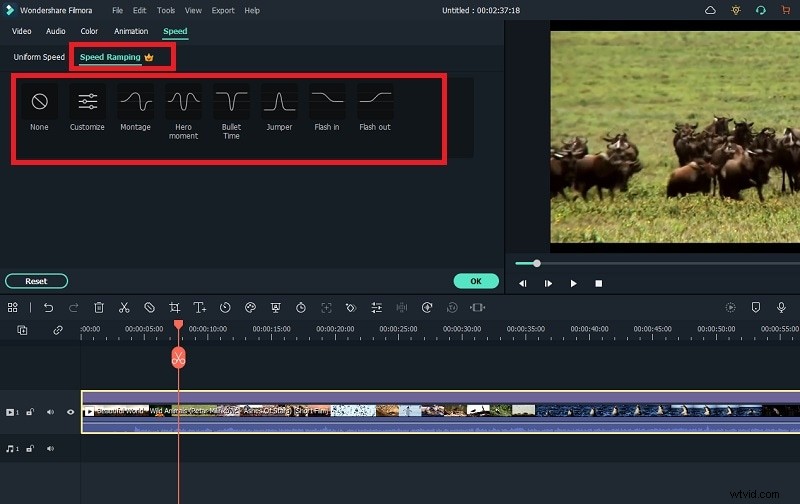
Step 3: Apply changes and export the video.
Part 5. Speed editing on the go with Filmora Mobile
Filmora Mobile offers a lightweight, touch‑friendly interface for quick speed tweaks on smartphones.
Step 1: Import your video by tapping New Project or the + icon.
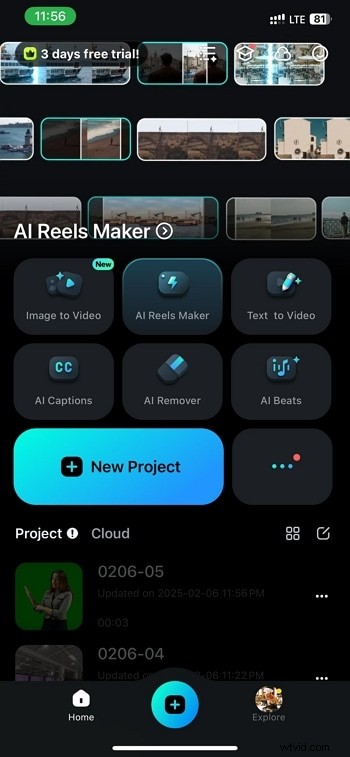
Step 2: Open the Trim tool and select Speed from the toolbar.


Step 3: Slide to adjust speed; right for faster, left for slower.

Step 4: Preview and export once satisfied.

Part 6. DaVinci Resolve vs. Filmora
| Parameters | DaVinci Resolve | Filmora |
| Change Video Speed Options | Too Many | Appropriate |
| Video Speed Presets | Limited | Ample |
| Ease of Speed Change | Slightly Complicated | Very Easy |
| Export Options | Limited | Ample |
| Application Stability | Less stable | Highly stable |
| Average Rating | 3/5 | 4.5/5 |
| Pricing | High | Reasonable |
| Best For | Advanced video editors | Beginners and advanced video editors |
Conclusion
DaVinci Resolve’s speed‑ramping features give seasoned editors powerful control, but the tool’s complexity can be daunting for novices. For those seeking a smoother learning curve, Wondershare Filmora delivers an intuitive interface without compromising on speed‑editing capabilities. Whether you choose a desktop or mobile solution, mastering video speed adjustments will enhance the pacing and impact of your content.