Video editing is a pivotal stage in any production, turning raw footage into a polished, engaging story. Whether you’re trimming excess, merging scenes, or refining clips, mastering these techniques ensures your final video captivates viewers from start to finish.
In this article
- How Trimming and Merging Enhance Video Projects
- Wondershare Filmora – The All‑In‑One Editing Solution
- Step‑by‑Step Guide: Cropping and Trimming in Filmora
- Manual vs. Automated Merging Techniques in Filmora
- Key Takeaways
Part 1: How Trimming and Merging Enhance Video Projects
Trimming and merging are fundamental editing skills that elevate the narrative, pacing, and professionalism of any video. Here’s how each technique benefits creators:
Trimming Videos
- Remove Unnecessary Content – Eliminate mistakes, irrelevant footage, or idle pauses to keep the story tight.
- Adjust Pacing – Shorten slow sections or cut lengthy segments, creating a dynamic flow that retains viewer interest.
- Highlight Key Moments – Craft highlight reels by selecting the best portions from longer takes.
- Meet Platform Limits – Ensure your video complies with time restrictions on social media without losing essential information.
Merging Videos
- Combine Multiple Clips – Seamlessly stitch footage from different sources into one coherent narrative.
- Create Montages – Use a collage of scenes for music videos, compilations, or visual storytelling.
- Smooth Transitions – Maintain a fluid viewing experience by eliminating abrupt cuts between shots.
- Strengthen Storytelling – Weave together diverse clips to convey ideas, emotions, and messages more effectively.
Part 2: Wondershare Filmora – The All‑In‑One Editing Solution
Wondershare Filmora is designed for everyone—from beginners to seasoned editors. It offers an intuitive interface, a rich library of effects, and powerful tools like trimming, merging, and advanced color grading—all while supporting 4K export.
Key Features
- Extensive library of free media assets, overlays, transitions, and stickers.
- Keyframe animation for precise control over effects and motion.
- Virtual green‑screen functionality for professional VFX integration.
Part 3: Step‑by‑Step Guide – Cropping and Trimming in Filmora
Below is a concise walkthrough for cropping and trimming videos using Filmora’s user‑friendly tools.
Filmora Tutorial – Basic Editing
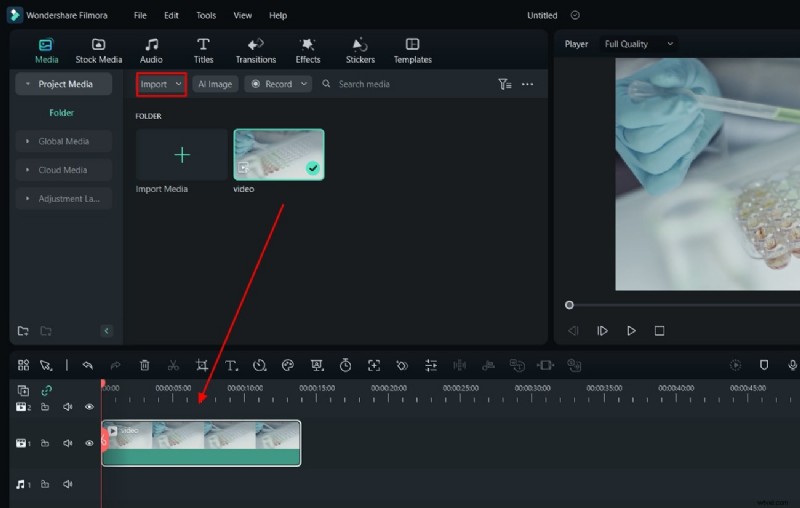
Step 1 – Import Your Video
Open Filmora and start a new project. Drag your video file into the media library, then drop it onto the timeline.

Step 2 – Access the Crop & Zoom Tool
In the timeline, click the Crop button next to Split (or press Alt + C). This opens the Crop & Zoom window.

Step 3 – Adjust the Crop Area
Drag the edges of the crop frame to frame your desired portion. If you need a specific aspect ratio, input custom dimensions in the provided fields.
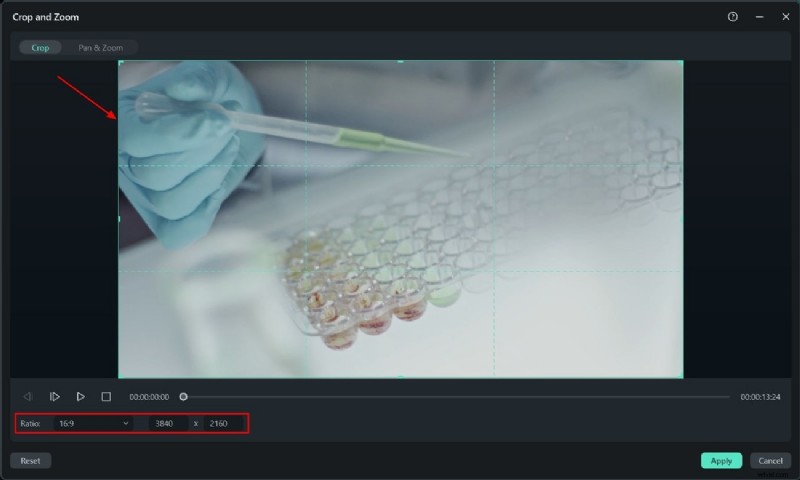
Step 4 – Apply and Export
Click Apply to confirm the crop. Then, use the Export button to save your edited video.

Trimming Methods
Method 1 – Trim by Layer Edges
- Place the video on the timeline and locate its left or right edge.
- Drag the edge to trim the clip to your preferred length.
- Export the trimmed video.

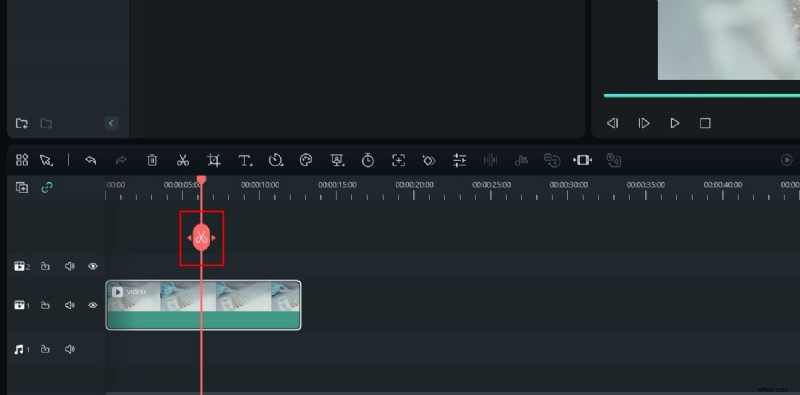
Method 2 – Trim Using Playhead Slider
- Position the playhead at the desired cut point.
- Click the Scissor icon to split the clip.
- Delete the unwanted segment and export the result.
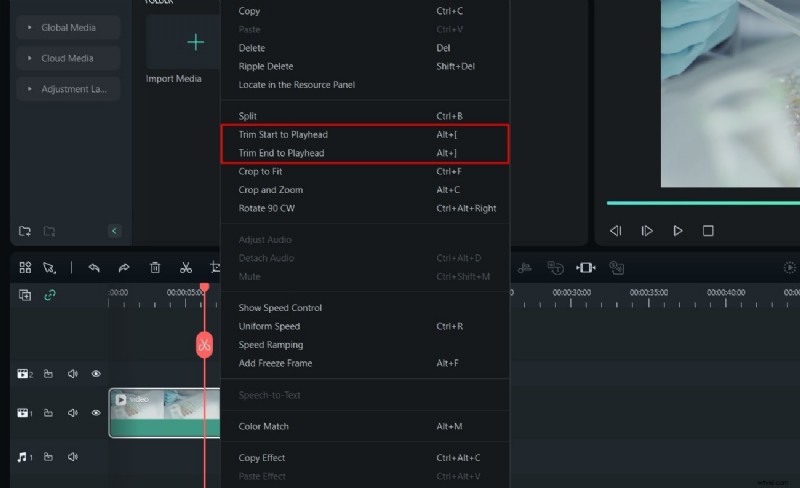
Method 3 – Trim via Context Menu
- Right‑click the video on the timeline and choose Trim Start to Playhead or Trim End to Playhead.
Method 4 – Shortcut Keys
Use Alt + [ to trim from the beginning to the playhead, and Alt + ] to trim from the playhead to the end.
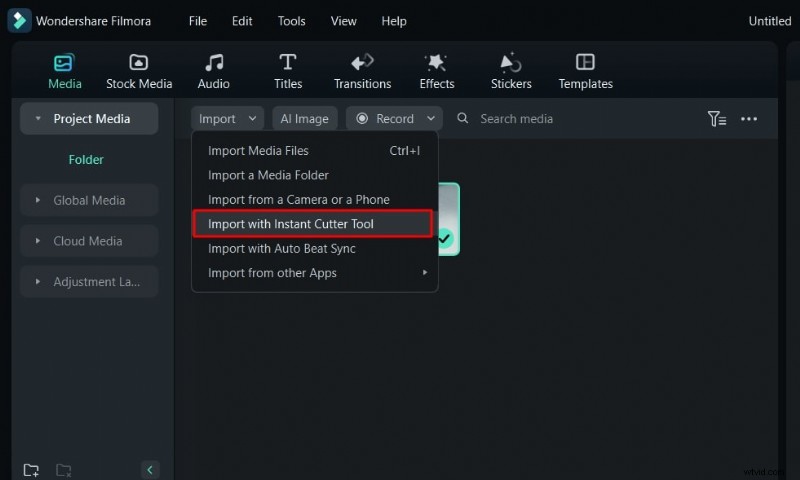
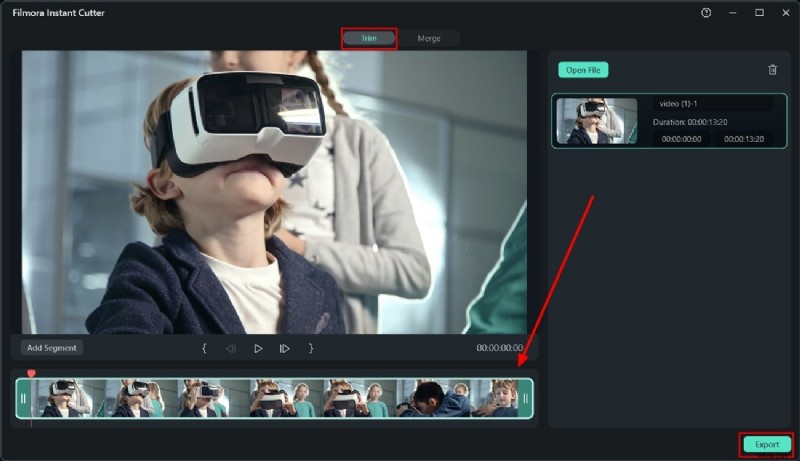
Method 5 – Instant Cutter Tool
- Open the Instant Cutter from the Media menu.
- Select your file, adjust the sliders to define the trim region, and click Export to add the trimmed clip to your project.
Part 4: Manual vs. Automated Merging Techniques
Whether you prefer a hands‑on approach or an automated workflow, Filmora supports both.
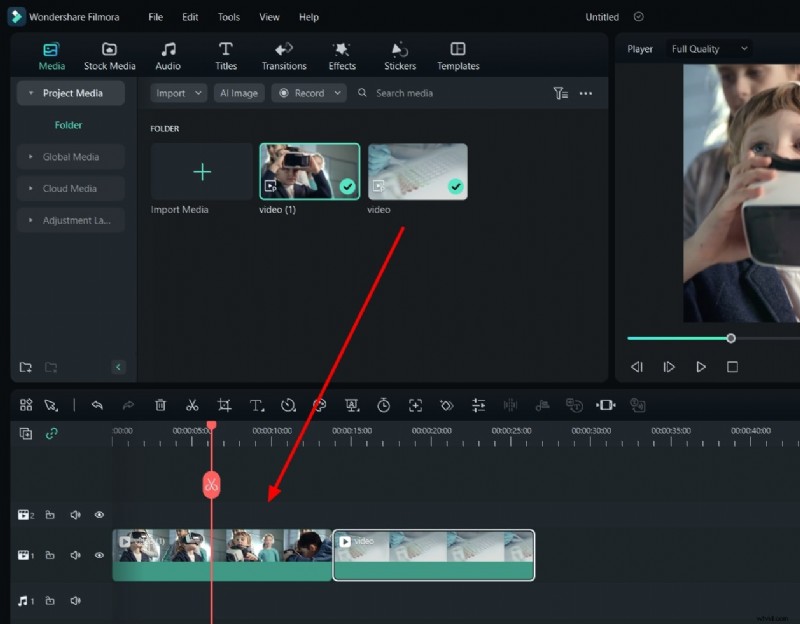
Manual Merging
- Launch Filmora and import your clips via the Import button.
- Drag each clip onto the timeline in the desired sequence.
- Trim or extend clips as needed, then export the combined file.

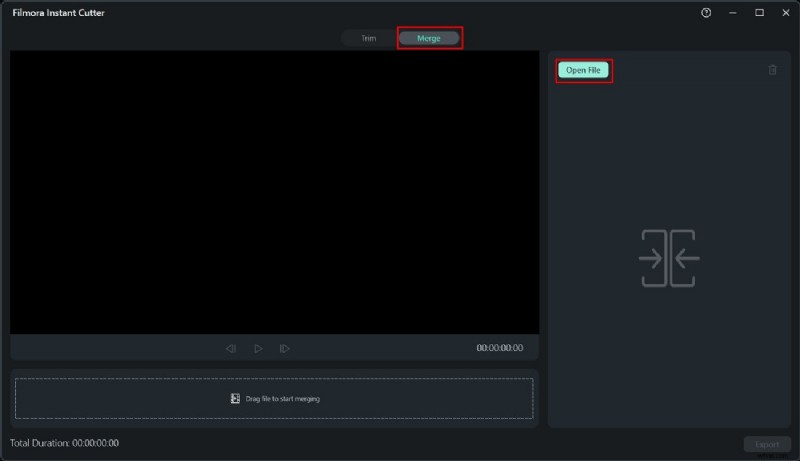
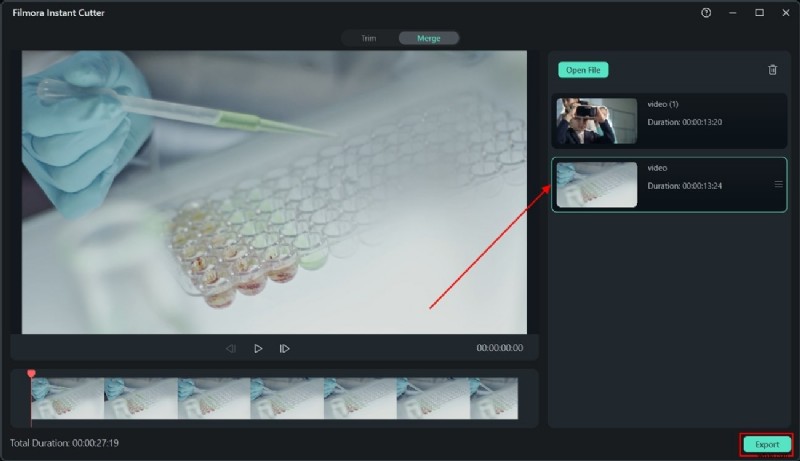
Automated Merging with Instant Cutter
- From the Import menu, choose Import with Instant Cutter Tool.
- In the new window, click Merge and select the clips to combine.
- After merging, click Export to transfer the final video back to the main interface.

Conclusion
Video editing transforms raw footage into a compelling narrative. Filmora’s robust suite—trimming, cropping, merging, and AI‑powered enhancements—empowers creators to deliver polished, professional videos with minimal effort.
If you’re looking to crop YouTube videos or streamline your post‑production workflow, Filmora provides the tools and simplicity you need.