Video editing transforms raw footage into compelling narratives. By refining visuals and tightening the storyline, editors can elevate both aesthetic quality and viewer engagement. Mastering the basics—importing media and adjusting clips—provides a solid foundation for advanced post‑production techniques.
In this article
- Part 1: How to Assemble Video Clips for a Polished Production
- Part 2: Why Wondershare Filmora is a Video Editing Powerhouse
- Part 3: Importing Video Clips in Filmora – Methods & Tips
- Part 4: Using Adjustment Layers for Seamless Color & Effect Control
- Conclusion
Part 1: How to Assemble Video Clips for a Polished Production
Video Clip Editor
Wondershare Filmora offers intuitive tools for importing and fine‑tuning clips to create a cohesive final product.
Whether crafting YouTube videos, social media reels, or longer projects, a clear integration strategy is essential. Below are professional guidelines to ensure your footage flows seamlessly.
1. Establish a Clear Narrative
Define the core message of your video—story, tutorial, promotional content, or documentary. A well‑articulated narrative directs clip selection and sequencing.
2. Plan the Storyboard or Structure
Sketch a storyboard or outline to visualize the progression of scenes. This aids in organizing clips and confirms the logical order of content.
3. Start with a Strong Opening
Capture attention immediately by selecting an engaging opening shot or sequence. A powerful start sets tone and encourages viewers to stay.
4. Maintain Visual Continuity
Ensure consistency across clips by matching lighting, color palette, composition, and camera angles. Smooth transitions further enhance the viewing experience.
5. Vary Shot Types and Perspectives
Incorporate a mix of wide, medium, and close‑up shots, and experiment with unique angles to keep the visual narrative dynamic.
6. Consider Shot Length and Pacing
Balance longer, contemplative shots with shorter, energetic ones to control rhythm and sustain viewer interest.
7. Use Transitions Wisely
Choose appropriate transitions—cuts, fades, dissolves—to connect scenes while signaling time or location changes. Avoid excessive flashy effects that may distract.
8. Sync Video with Audio
Align dialogue, music, and sound effects precisely with visual cues to reinforce narrative coherence and emotional impact.
9. Enhance with Visual Effects or Graphics
Add tasteful effects, graphics, or text overlays that reinforce storytelling or convey supplemental information.
10. End Strong
Conclude with a memorable shot or sequence that summarizes the message or delivers a clear call‑to‑action.
11. Smooth Transitions Between Scenes
Employ matching action or complementary visuals to create seamless scene changes, enhancing overall flow.
12. Test and Refine
Review the edited video, solicit feedback, and adjust pacing, sequencing, or elements to polish the final product.
Part 2: Why Wondershare Filmora is a Video Editing Powerhouse
Wondershare Filmora delivers a robust, user‑friendly editing environment suitable for creators at all skill levels. The platform includes a library of templates, presets, and AI‑powered features such as automated audio ducking and music selection. Whether you’re working with short clips or longer footage, Filmora offers tools that simplify complex tasks while preserving creative control.
Part 3: Importing Video Clips in Filmora – Methods & Tips
Below are eight practical approaches to bring media into Filmora, covering everything from single files to cloud storage.
Filmora Tutorial – Import And Organize Media Files
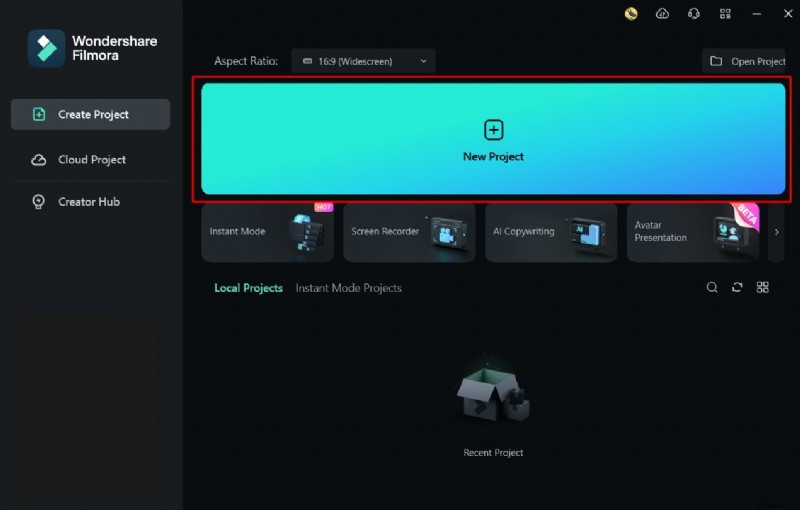
Step 1: Launch Wondershare Filmora and Create a New Project
Open Filmora, click New Project, and prepare your workspace.
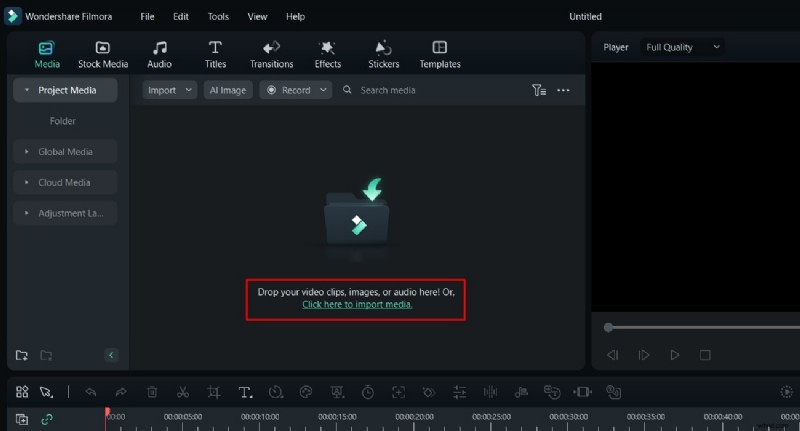
Step 2: Select the Import Option
Click Click here to import media and choose the desired files.
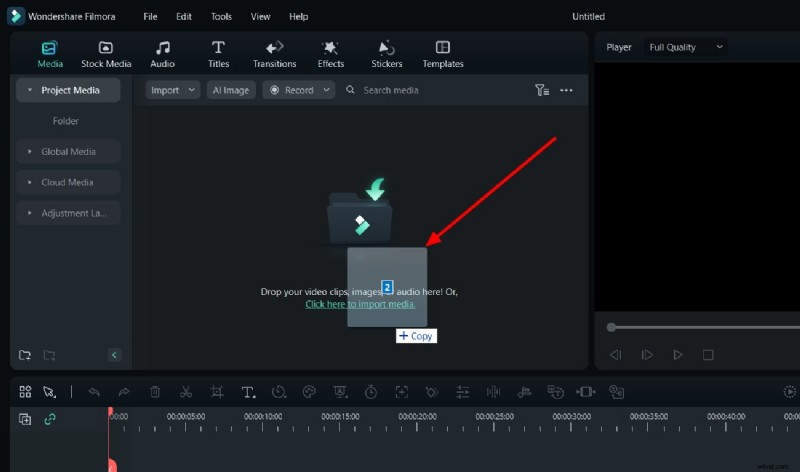
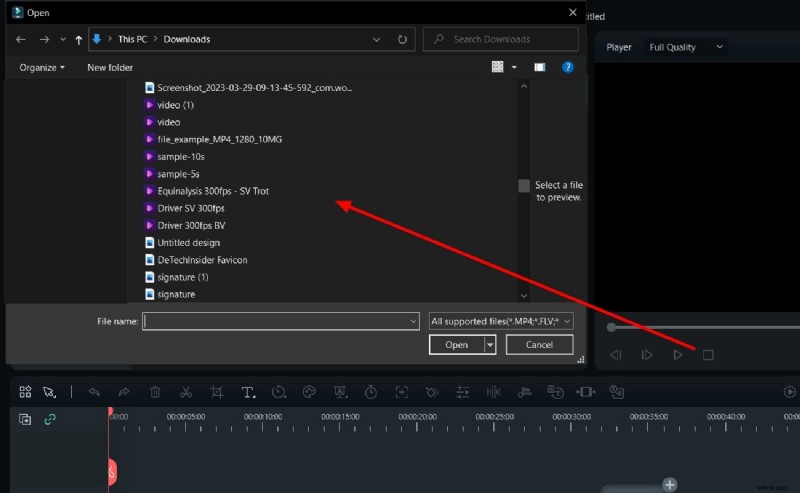
Step 3: Import Files by Drag and Drop
Drag media files directly into the Media Import panel.
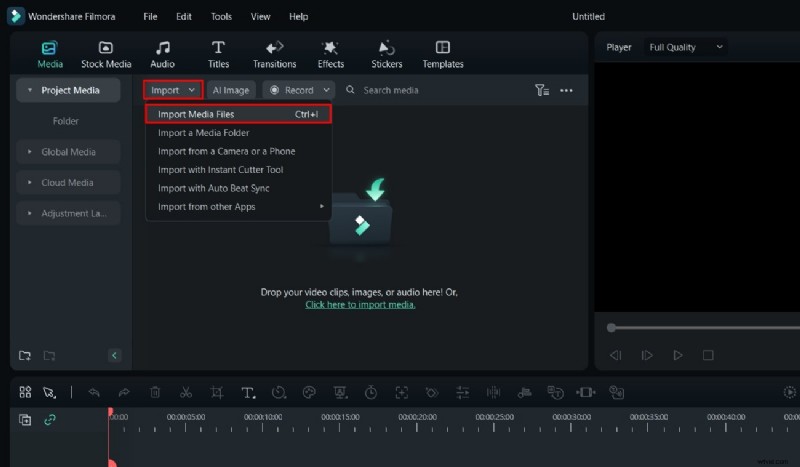
Step 4: Import From the Drop‑Down Menu
Use the Import drop‑down, select Import Media Files, and browse to add content.
Step 5: Use Shortcut Keys
Press Ctrl + I to open the import window quickly.
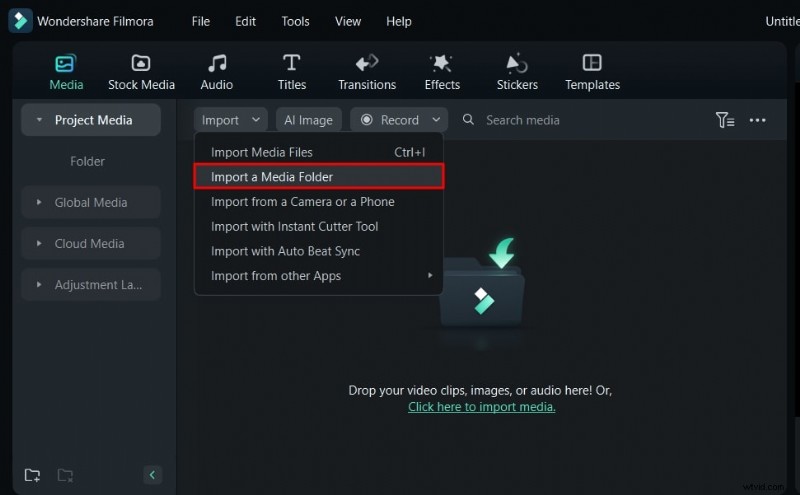
Step 6: Import a Media Folder
Select Import a Media Folder from the drop‑down and choose a folder.
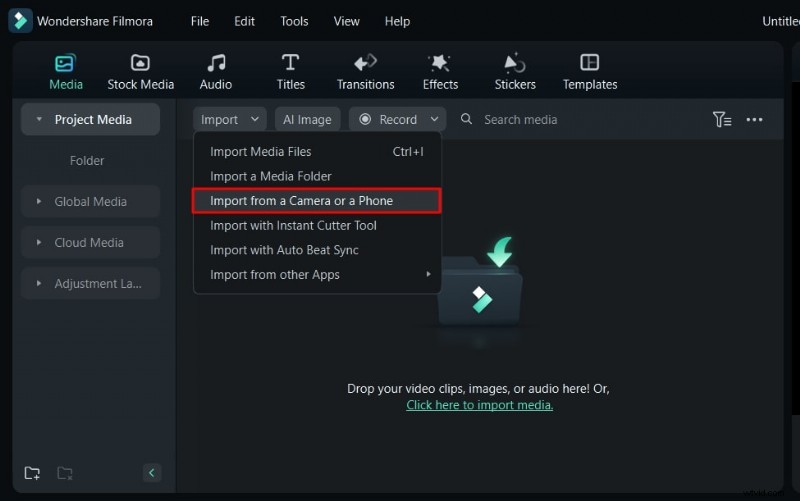
Step 7: Import From a Device
Connect a camera or phone, then use Import from a Camera or a Phone to transfer media directly.
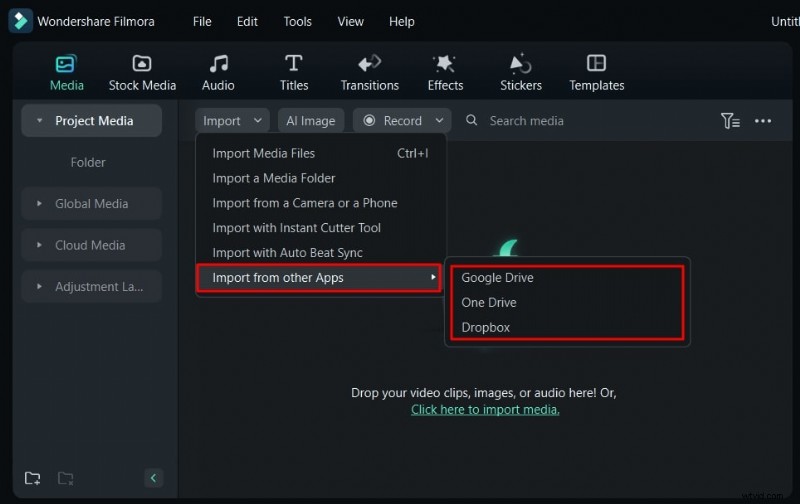
Step 8: Import From Cloud Storage
Choose Import from other Apps in the drop‑down, link your cloud account, and import files seamlessly.
Part 4: Using Adjustment Layers for Seamless Color & Effect Control
Filmora’s Adjustment Layer allows editors to apply changes globally without altering original footage.
Filmora Tutorial – Adjustment Layers
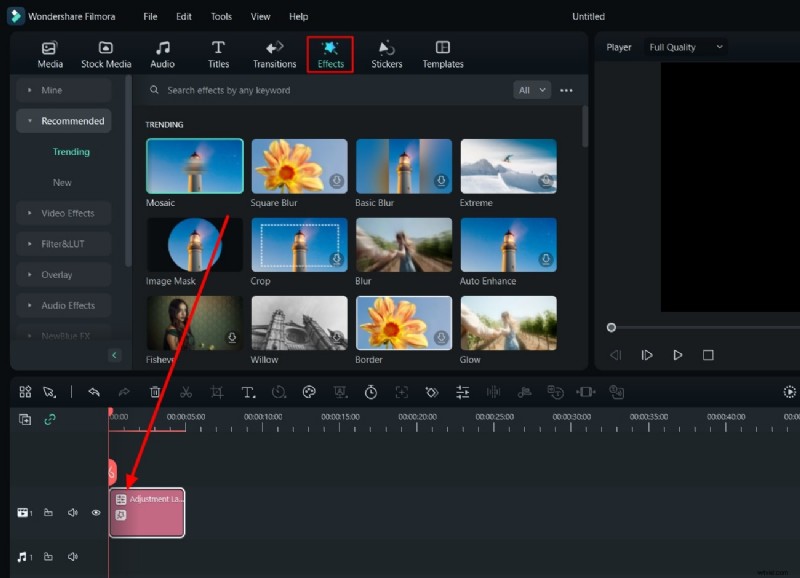
Step 1: Add an Adjustment Layer
After importing clips, open the Media panel, select the Adjustment Layer tab, drag the layer onto the timeline above your footage.

Step 2: Apply Effects to the Adjustment Layer
With the layer selected, open the Effects panel and drag desired effects onto the adjustment layer.
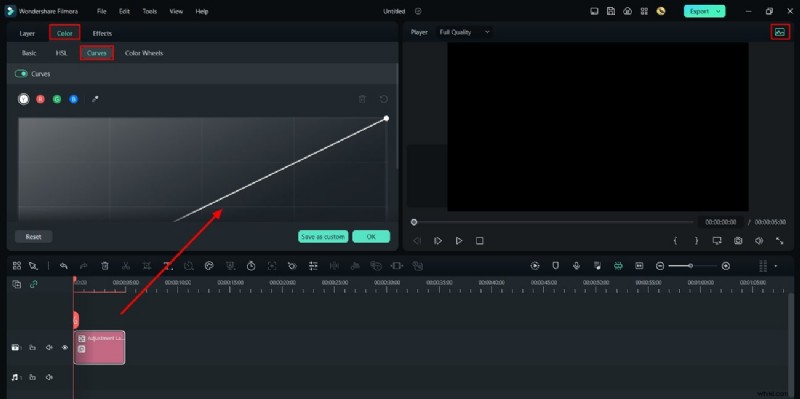
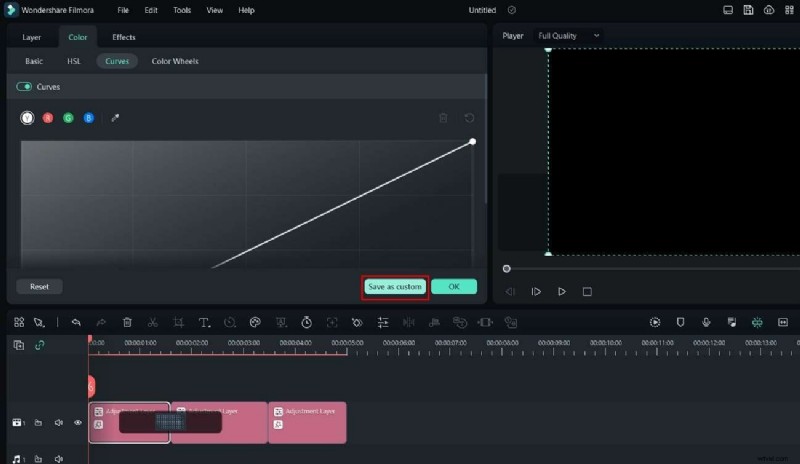
Step 3: Color Correct the Adjustment Layer
Use the Histogram icon in the preview area to adjust curves, then navigate to the Color tab and fine‑tune via Curves.
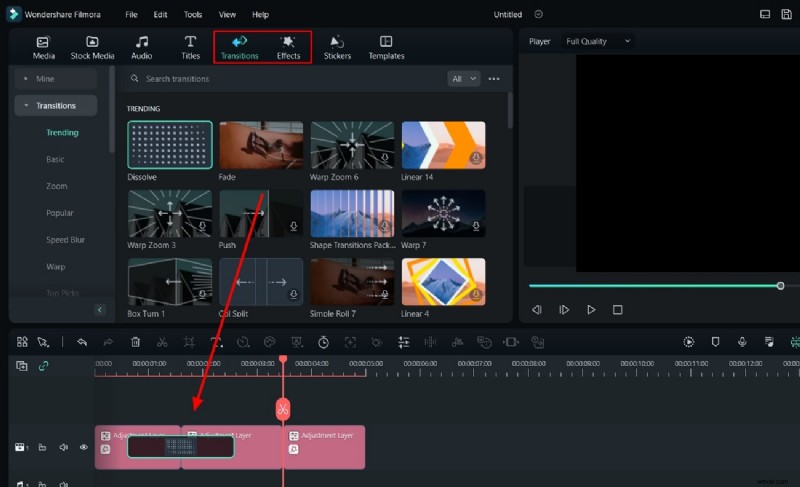
Step 4: Add Multiple Adjustment Layers
To apply different effects at varying durations, split the adjustment layer using the playhead slider and insert new layers. Add transitions between clips for added polish.
Step 5: Save as a Preset
Click Save as Custom in the right panel to preserve the adjustment layer as a reusable preset.
Conclusion
Video editing is a disciplined craft that blends technical skill with creative vision. By mastering the fundamentals—importing and adjusting clips in Wondershare Filmora—editors can lay the groundwork for sophisticated post‑production workflows. Start small, iterate, and let each project refine your expertise.