Video scaling and background configuration are critical to visual quality and audience engagement. This guide explains how to master these settings using Wondershare Filmora, a professional‑grade editor that offers intuitive controls and powerful tools for every skill level.
In this article
- Why aspect ratios matter in video production
- The role of backgrounds in storytelling
- How to change the aspect ratio in Filmora
- How to adjust background settings in Filmora
- Key takeaways
Why Aspect Ratios Matter in Video Production
Aspect ratio defines the relationship between a video's width and height. It shapes how viewers perceive the scene, ensures platform compatibility, and supports brand consistency. For example, 16:9 is the default for HD and YouTube, while 9:16 is optimal for TikTok and Instagram Stories.
Visual Experience
Choosing the right ratio influences the emotional tone and visual balance of your footage. A widescreen format can emphasize landscapes, whereas a square or vertical format can create intimacy or focus on individual subjects.
Platform Compatibility
Each social‑media channel recommends a specific ratio to avoid letterboxing or cropping. Adhering to these guidelines guarantees your content looks crisp and intentional on every device.
Brand Consistency
Consistent aspect ratios across all videos reinforce brand identity. It allows audiences to instantly recognize your content regardless of the platform.
Post‑Production Flexibility
Editing software lets you change the ratio in the final stages without re‑capturing footage. This flexibility is essential for adapting to new formats or distribution channels.
How to Change the Aspect Ratio in Filmora
Filmora’s interface is designed for speed and precision. Follow these steps to resize your footage and export it in the desired format.
Step 1 – Import Your Footage
Launch Filmora, click New Project, then drag your video file into the Media Library. Drop the clip onto the Timeline to begin editing.
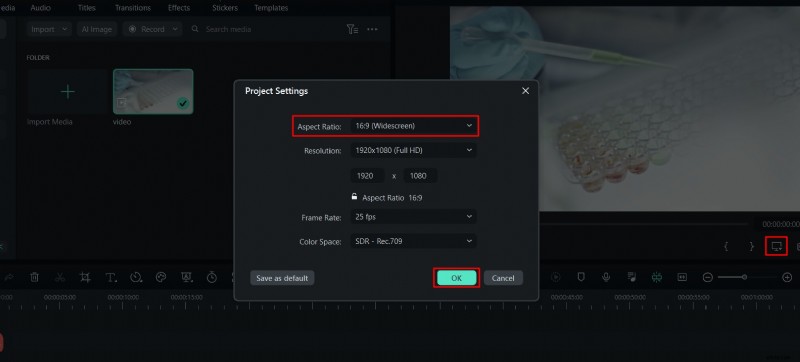
Step 2 – Adjust the Ratio
Open the Project Settings panel on the right. Select Aspect Ratio from the dropdown and choose a preset (e.g., 16:9, 9:16, 1:1) or enter custom values.
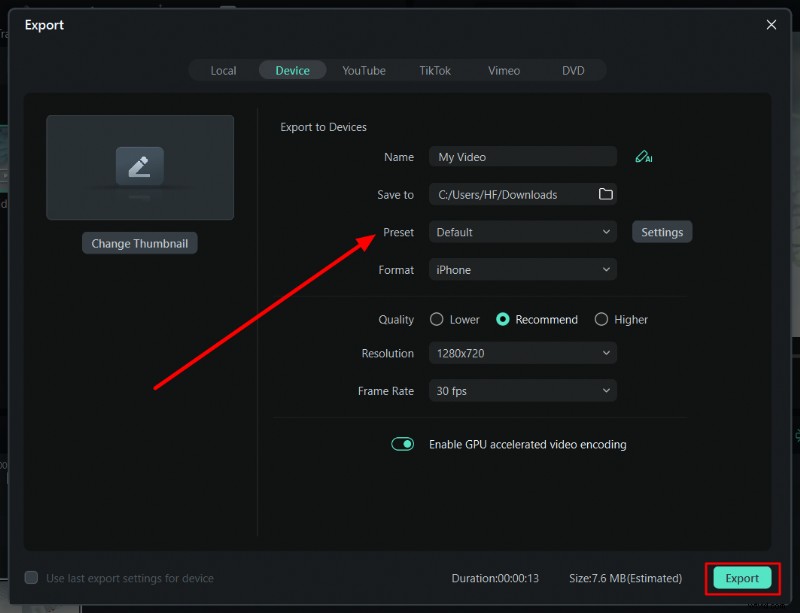
Step 3 – Export the Video
Click Export and select the desired preset or adjust Resolution, Frame Rate, and Format. Then click Export to save the file to your device.

How to Adjust Background Settings in Filmora
Background removal and replacement enhance storytelling by placing subjects in contextually relevant environments. Filmora offers non‑destructive, layer‑based editing to simplify this process.
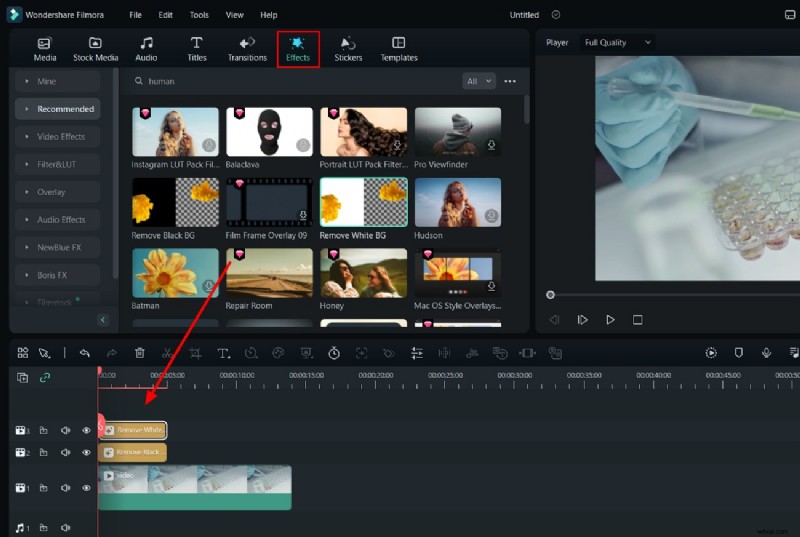
Step 1 – Apply Background Removal
After importing your clip, navigate to the Effects tab. Search for “Background Removal” and drag the effect onto your video in the Timeline.
Step 2 – Fine‑Tune the Effect
Adjust the mask edges, opacity, and frame length to match your footage. This step ensures a clean cut‑out without halo artifacts.
Step 3 – Export the Final Video
When satisfied, click Export. In the export dialog, set the Name, Format, Resolution, and Frame Rate before confirming.
Key Takeaways
Mastering aspect ratios and background settings in Filmora not only improves visual appeal but also aligns your videos with platform standards and brand identity. By following the steps above, you can create polished, professional content that resonates with audiences across all channels.