Introduction
Fade‑in and fade‑out transitions are essential tools for creating seamless visual and audio storytelling in Adobe Premiere Pro. Whether you’re blending two clips, softening a title sequence, or tapering background music, mastering these effects will elevate the professionalism of your edits.
Part 1: Video Fade‑In / Fade‑Out Transitions
Premiere Pro offers a variety of video transitions, but the most widely used for fading is the Film Dissolve effect. This transition gracefully blends the end of one clip into the beginning of the next, or fades a clip to black or any chosen background color.
Step 1 – Locate the Effect
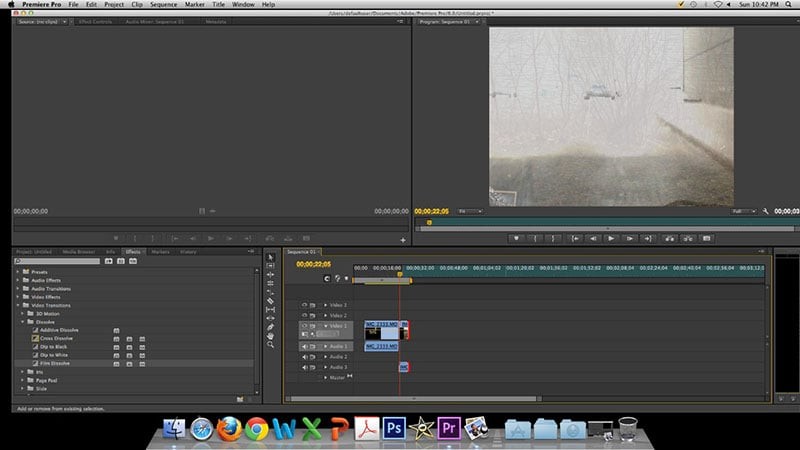
Navigate to Window > Effects. Expand Video Transitions > Dissolve and drag Film Dissolve onto the timeline. Place it at the start of a clip for a fade‑in or at the end for a fade‑out.
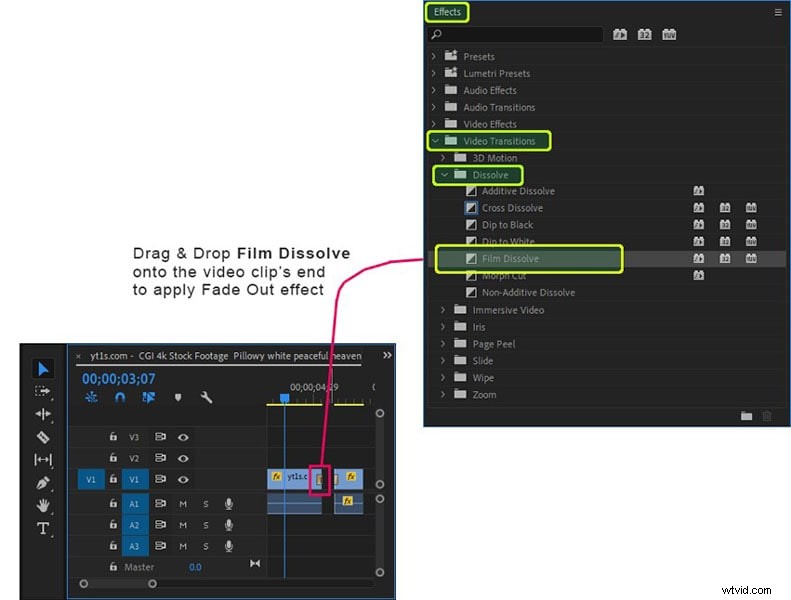
Step 2 – Adjust the Transition Length
Click the transition icon on the timeline. Drag its edges to extend or shorten the fade duration. A shorter fade feels snappier, while a longer fade adds subtlety.
Part 2: Audio Cross‑Fade Techniques
Smooth audio transitions prevent abrupt cuts that can distract viewers. Premiere Pro offers three built‑in audio cross‑fade types: Constant Gain, Constant Power, and Exponential Fade. The Constant Power cross‑fade is generally the most natural for most projects.
How to Apply a Cross‑Fade
Open the Effects panel, go to Audio Transitions > Crossfade, and drag your chosen cross‑fade onto the timeline between the two audio clips.
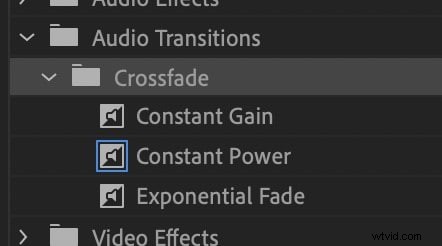
Constant Power (Recommended)
Creates a smooth, logarithmic volume transition that feels natural to the ear. It gradually reduces volume on the first clip while increasing it on the second.

Constant Gain & Exponential Fade
Constant Gain offers a linear volume change, which can be useful for very quick cuts. Exponential Fade provides the opposite logarithmic curve, useful when you want a more pronounced fade‑out.
Part 3: Advanced Tips & Alternatives
While Premiere Pro’s built‑in tools are robust, many editors complement them with third‑party plugins or use alternative software for quick tasks. Wondershare Filmora, for example, provides an intuitive Dissolve transition set with customizable colors and keyframing capabilities.
Using Filmora’s Dissolve Transitions
Filmora offers a wide array of dissolve effects such as Dispersion Blur, Ripple, and Swirl. These can be accessed under the Transitions panel and offer instant results for beginners.

Conclusion
Mastering fade‑in and fade‑out transitions—both visual and audio—ensures your videos flow smoothly and maintain viewer engagement. By using Premiere Pro’s Film Dissolve and the Constant Power audio cross‑fade, you’ll create polished edits that feel professional and intentional.