For newcomers, Adobe After Effects can feel intimidating. Even a basic operation like splitting a clip often feels daunting due to the software’s extensive feature set. Mastering these tools requires time and practice, but once you’re comfortable with the fundamentals, you’ll find the process surprisingly straightforward.
In this guide we walk you through every step to split clips in After Effects, share essential keyboard shortcuts, and present a lightweight alternative for rapid edits.
Table of Contents
- Understanding Adobe After Effects
- How to Split a Clip in After Effects
- Keyboard Shortcuts for Quick Splitting
- Quick Alternative: Wondershare Filmora
Part 1. Understanding Adobe After Effects
Adobe After Effects is the industry standard for motion graphics and visual effects. Its powerful toolkit allows designers and editors to create high‑quality, visually stunning content across film, television, and web.

Unlike conventional video editors, After Effects does not feature a traditional “cut” tool. Instead, clips are organized into layers on the timeline. Splitting a clip simply divides a layer into two separate layers, enabling precise control over each segment.
Splitting clips is invaluable when you need to apply distinct effects to different parts of a sequence or adjust timing for narrative pacing.
Pricing
After Effects is subscription‑based. You can purchase it as a standalone app for $22.99/month* or include it in the Adobe Creative Cloud bundle, which grants access to over 20 Creative Cloud apps for $59.99/month*.
*Prices vary by country and promotional offers.
Part 2. How to Split a Clip in After Effects
Once you’re in the After Effects interface, remember that the timeline is layer‑centric: each layer contains a single clip. Splitting a clip will create two separate layers.
The process is consistent across media types—whether you’re working with video, audio, still images, or solid layers. Below are two practical methods.
Method 1: Using the Time Indicator
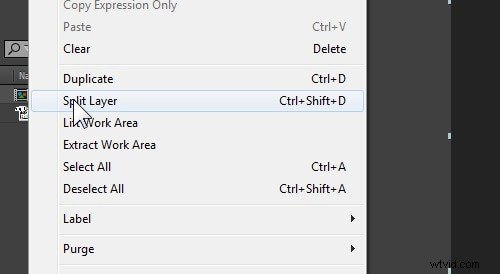
1️⃣ Position the Time Indicator – Drag the vertical line to the frame where you want the split or type the exact timecode.
2️⃣ Execute the Split – Go to Edit > Split Layer or press Ctrl+Shift+D (Windows) / Cmd+Shift+D (Mac). The layer now divides into two.
Method 2: Trimming Manually
1️⃣ Duplicate the Layer – Use Ctrl+D (Windows) / Cmd+D (Mac).
2️⃣ Adjust Start and End Points – Drag the layer edges in the timeline to the desired positions.
3️⃣ Shortcut Trims – For the start of a clip: Alt+[ (Windows) / Option+[ (Mac); for the end: Alt+] (Windows) / Option+] (Mac).

Part 3. Keyboard Shortcuts for Splitting Videos in After Effects
| Action | Windows | Mac |
| Split a layer | Ctrl+Shift+D | Cmd+Shift+D |
| New project | Ctrl+Alt+N | Cmd+Opt+N |
| New composition | Ctrl+N | Cmd+N |
| Set work area start/end to current time | B or N | B or N |
| Trim composition to work area | Ctrl+Shift+X | Cmd+Shift+X |
| Go to specific time | Alt+Shift+J | Opt+Shift+J |
| Go to beginning of composition/layer/footage | Home or Ctrl+Alt+← | Home or Cmd+Opt+← |
| Import single file/sequence | Ctrl+I | Cmd+I |
| Import multiple files/sequences | Ctrl+Alt+I | Cmd+Opt+I |
Part 4. Quick Alternative: Wondershare Filmora
If you’re looking for a faster, more intuitive way to split clips without navigating After Effects’ complex workflow, Wondershare Filmora is a solid choice. It offers a streamlined interface with a dedicated split button and “Quick Split Mode.”
While Filmora lacks the advanced motion‑graphics capabilities of After Effects, it excels at routine editing tasks and provides a range of built‑in effects, transitions, and AI tools like auto‑denoise and text‑to‑video.
How to Split Clips in Filmora
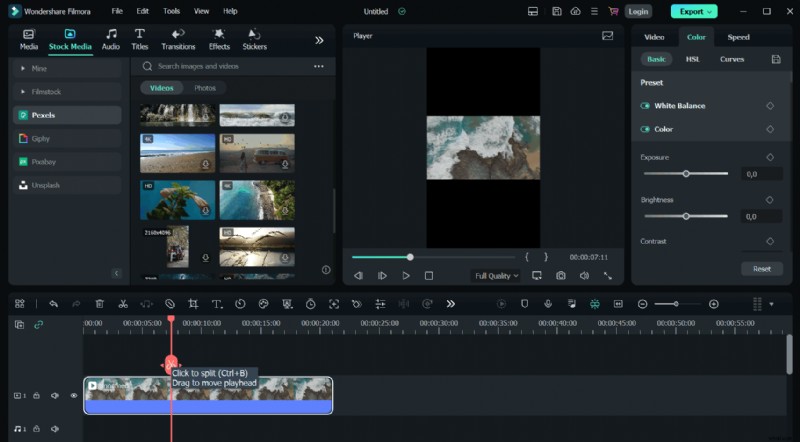
Step 1: Use the Split Button
Place the playhead where you want the cut, then click the scissor icon (or press Ctrl+B / Cmd+B). Enable the button via File > Preferences > Editing if it’s hidden.
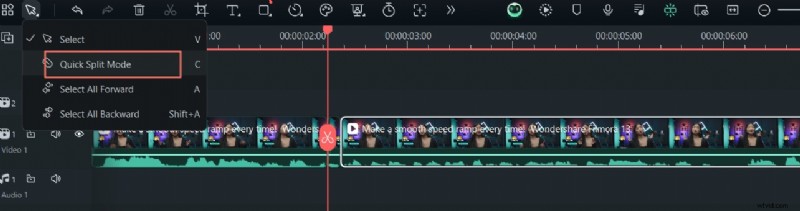
Step 2: Activate Quick Split Mode
Switch the cursor to Quick Split Mode to transform it into a razor tool. As you hover over the timeline, the clip preview updates in real time; click to split without moving the playhead.
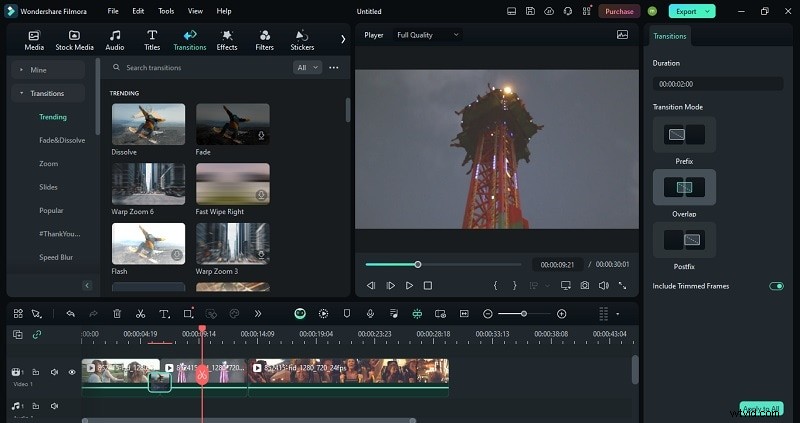
Step 3: Add Transitions
Enhance flow by dragging transitions from the Transitions tab between clips. Place them overlapped, before, or after segments as needed.
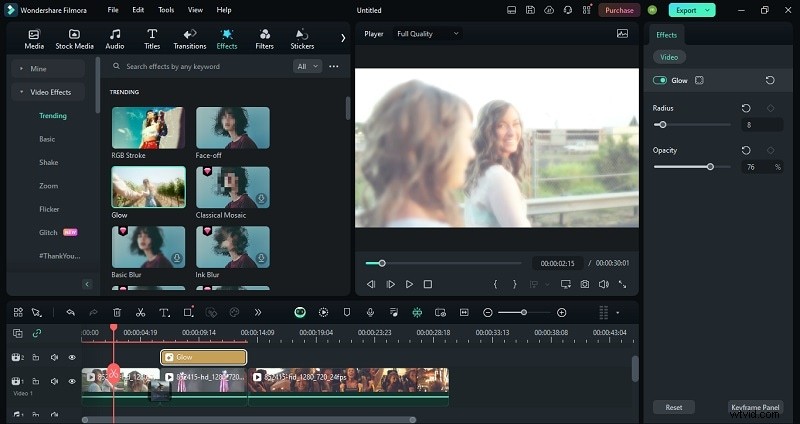
Step 4: Apply Distinct Effects
Drag effects from the Effects tab onto individual clips. Adjust opacity, radius, or layer timing to customize each segment.
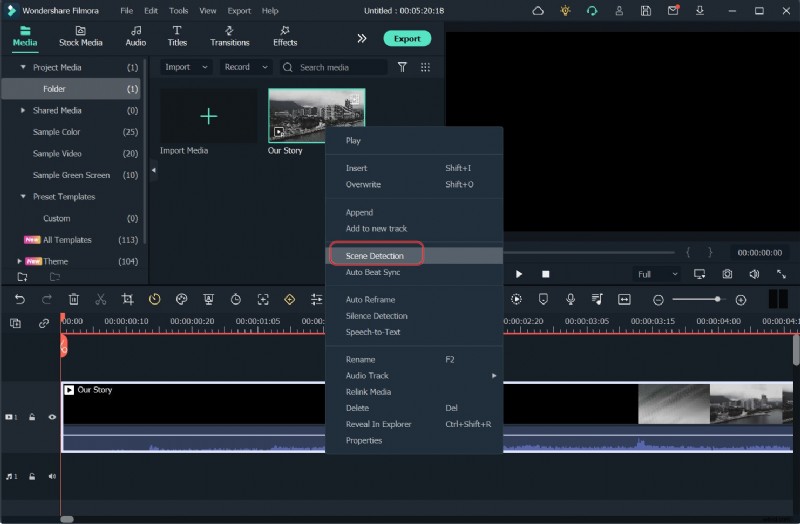
Automated Splitting with Scene Detection
Filmora’s scene detection automatically segments a video when a scene change is identified.
- Import your footage.
- Right‑click and choose Scene Detection to open the interface.
- Click Detect to let Filmora split the video. Review each clip before adding to the timeline.
- Remove unwanted sections or add desired clips, then export.

Conclusion
While the “How do you split a clip in After Effects?” process may seem complex at first, mastering the basics outlined here will give you confidence and flexibility for any project. If speed and simplicity are your priorities, Filmora offers an excellent, user‑friendly alternative.
With these techniques, you can edit efficiently—whether you’re working in After Effects’ robust environment or Filmora’s streamlined interface.

