If you’re looking to elevate your social‑media footage, understanding how to overlay images and videos in iMovie is essential. This guide walks you through every overlay style, step‑by‑step, for both Mac and iOS, and shows you why Filmora is the next logical upgrade for professionals.
Overlaying footage lets you layer B‑roll, reference previous clips, or create engaging split‑screen scenes—all without leaving your timeline. Let’s dive into the four core overlay techniques Apple offers and how you can implement them.
In this article
- iMovie Video Overlay Options
- Creating Overlay Videos in iMovie on Mac
- Creating Overlay Videos in iMovie on iPad/iPhone
- Robust Alternatives for Video Overlays (including AI tools)
Part 1: iMovie Video Overlay Options
iMovie’s overlay features are surprisingly versatile for a beginner‑friendly editor. Here’s a quick look at each style and when to use it.
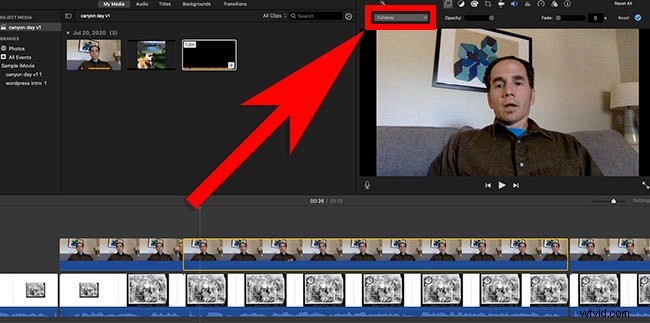
Cutaway
With a Cutaway, a secondary clip appears over the primary one while the original audio continues. It’s ideal for seamless scene transitions or adding contextual footage.
Green/Blue Screen (Chroma Key)
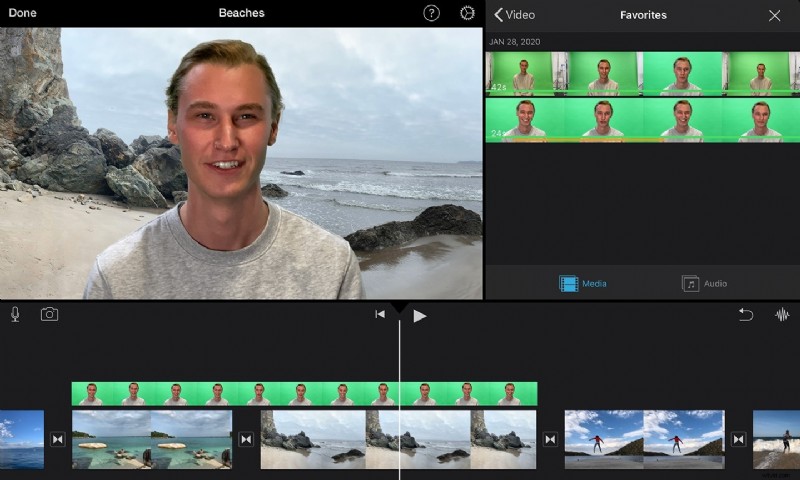
Whether you shoot on a chroma backdrop or have a green‑screen clip, iMovie’s built‑in Chroma Key removes the background, letting you place the subject over any backdrop. It’s perfect for special effects or location swaps.
Split Screen
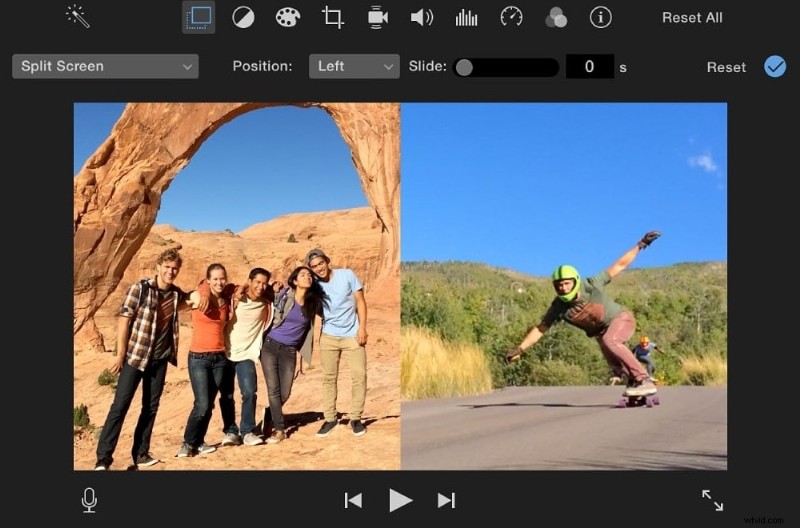
Show two or more clips side‑by‑side with Split Screen. Default settings split the frame evenly, but you can resize each pane to match your creative vision.
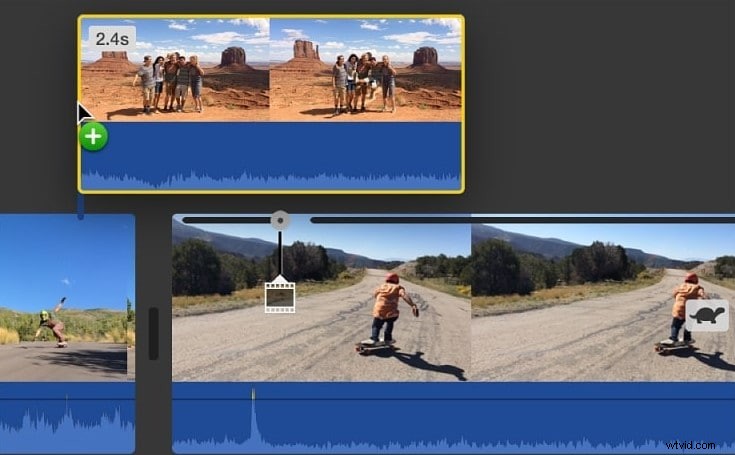
Picture‑in‑Picture (PIP)
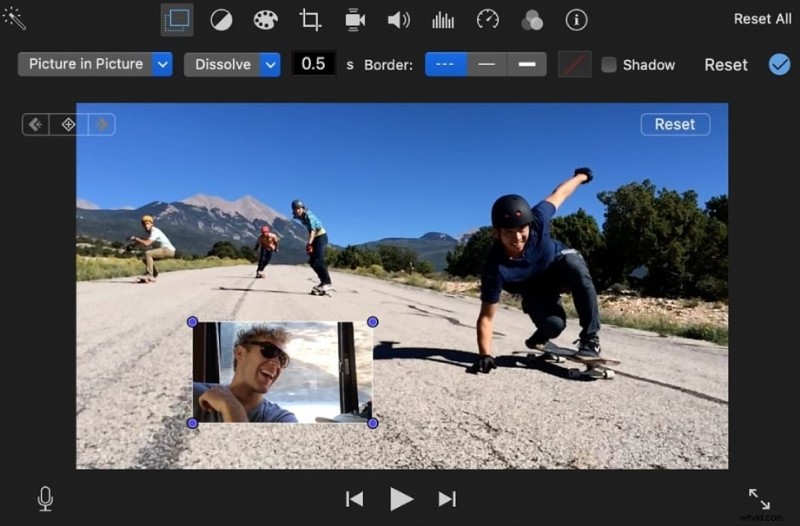
PIP lets you overlay a smaller video or image over the main clip. It’s a staple for tutorials, reaction videos, or any scenario where you want to keep the primary footage front‑and‑center while adding a secondary element.
Part 2: How to Create Overlay Videos in iMovie on Mac
Follow these steps to layer images or videos in your Mac project.
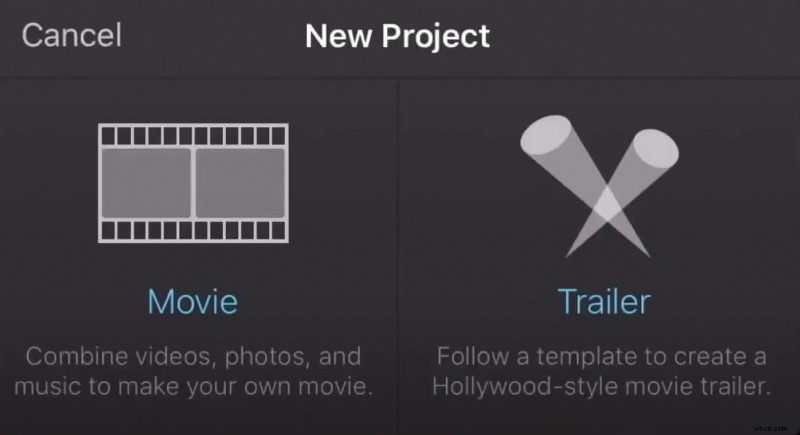
Step 1: Open iMovie and start a new project.
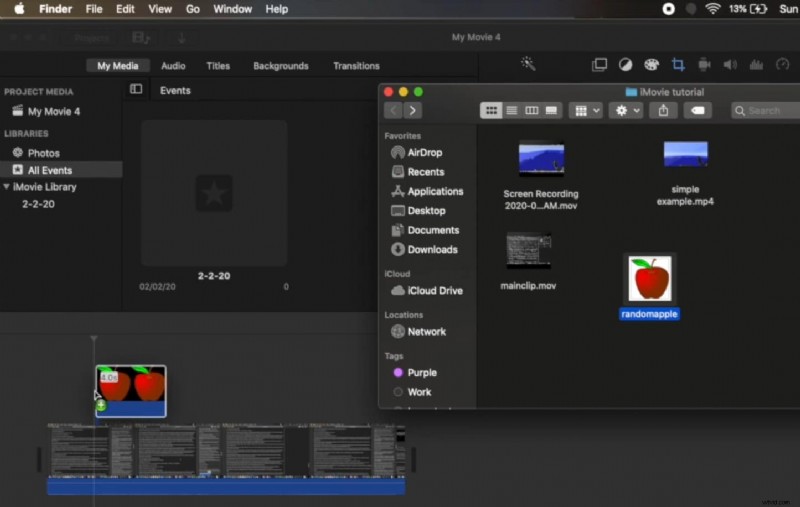
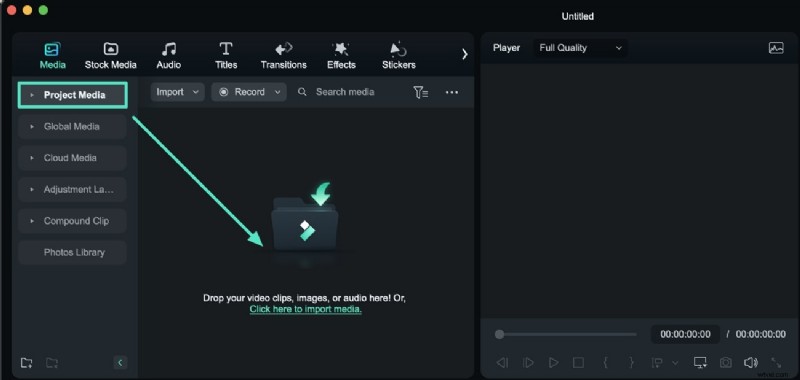
Step 2: Import the media you want to use. You can drag files directly from Finder into the Project Library.
Step 3: Drag your primary clip onto the timeline.
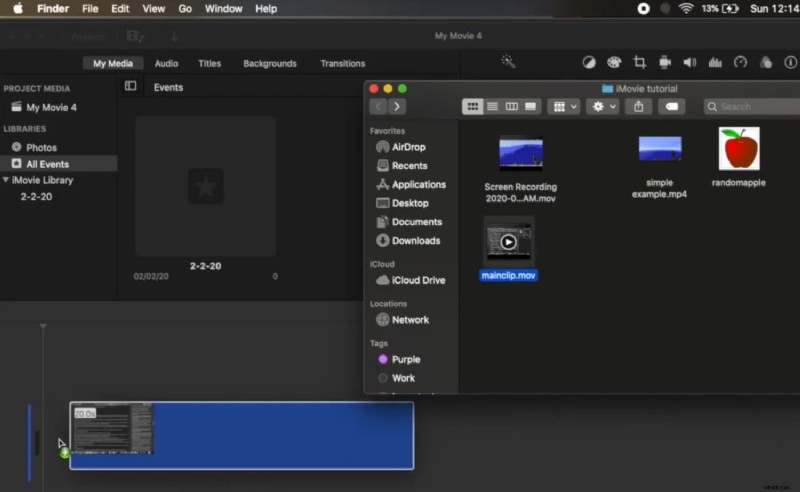
Step 4: Drag the overlay clip or image and drop it above the primary clip in the timeline.
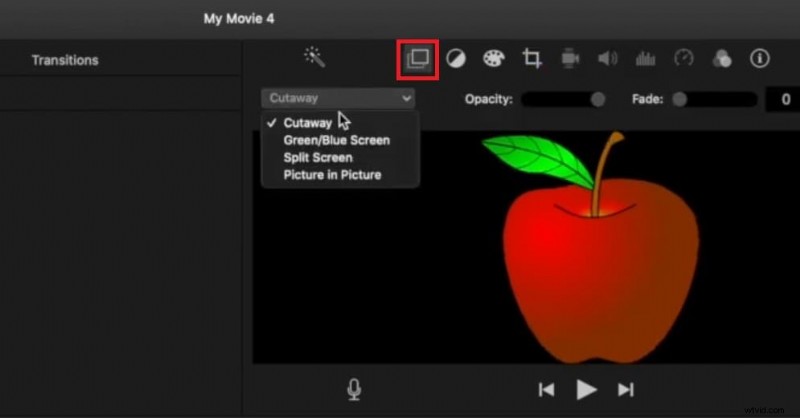
Step 5: Click the overlay icon above the preview and choose your overlay type (Cutaway, PIP, Split Screen, or Chroma Key). Adjust the overlay’s duration by dragging its edges.
Note: While you can resize the overlay clip’s duration, the Chroma Key overlay will always match the primary clip’s length.
Part 3: How to Create Overlay Videos in iMovie on iPad/iPhone
iMovie’s mobile version offers the same overlay capabilities with a touch‑friendly interface.
Step 1: Launch iMovie and create a new movie.
Step 2: Select a clip or photo for the primary element and tap Create Movie.
Step 3: Inside the editor, tap + to add a second clip or photo.
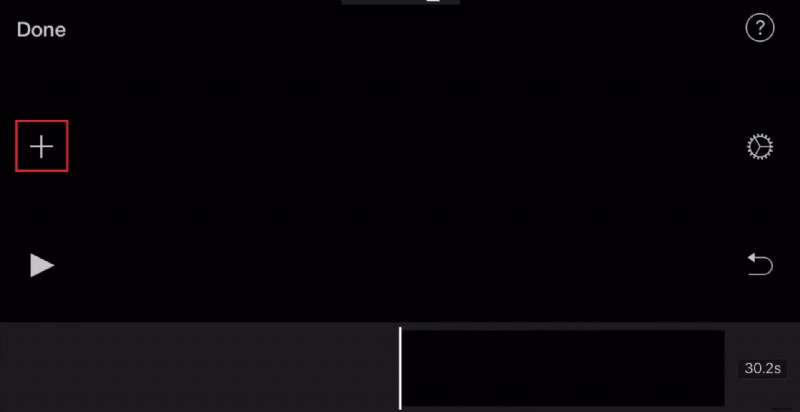
Step 4: Choose the overlay style by tapping the ••• button on the secondary clip and selecting Cutaway, PIP, Split Screen, or Chroma Key.
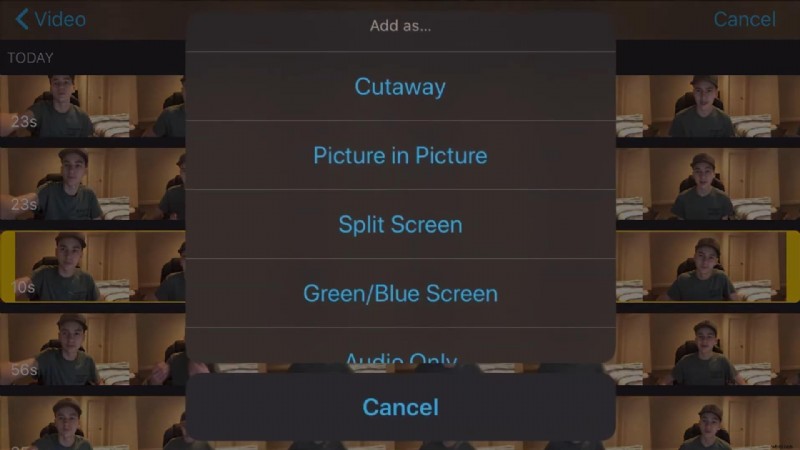
From here, you can reposition PIP windows, adjust Split Screen ratios, or trim Cutaway durations directly on the timeline.
Part 4: Robust Alternatives for Video Overlays (Including AI Tools)

While iMovie covers the basics, many creators need advanced features—like custom PIP sizing, multi‑pane split screens, and AI‑driven background removal—without the $300 price tag of Final Cut Pro. Filmora fills this gap with a rich set of overlay tools and an intuitive interface.
Why Filmora?
- Advanced overlay options (PIP, Split Screen, Chroma Key)
- AI Portrait Cutout removes backgrounds automatically
- Extensive library of transitions, effects, and templates
- Cross‑platform support (Mac, Windows, Android, iOS)
Overlay Workflow in Filmora
Here’s a quick rundown of the Filmora overlay process.
Step 1: Launch Filmora and click New Project.
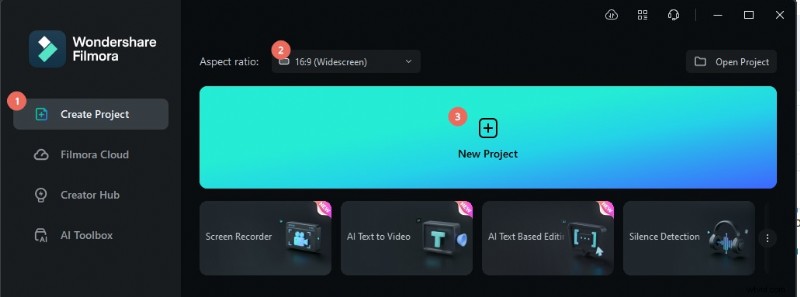
Step 2: Import your media files.
Step 3: Drag the primary clip to the timeline, then drop the overlay clip on a separate track.
Step 4: For PIP, select the overlay clip, resize it in the preview, and adjust its position. For split screens, open the Templates tab, choose Split Screen, and pick your layout.
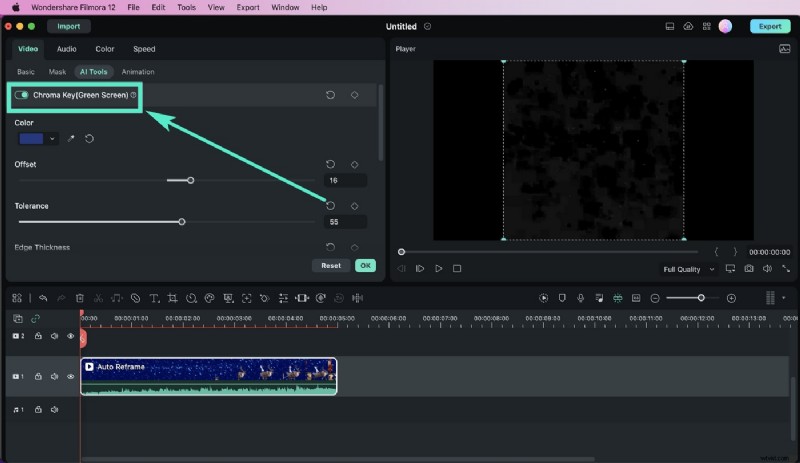
Step 5: Use the Chroma Key or AI Portrait Cutout under Video > AI Tools to remove backgrounds automatically.
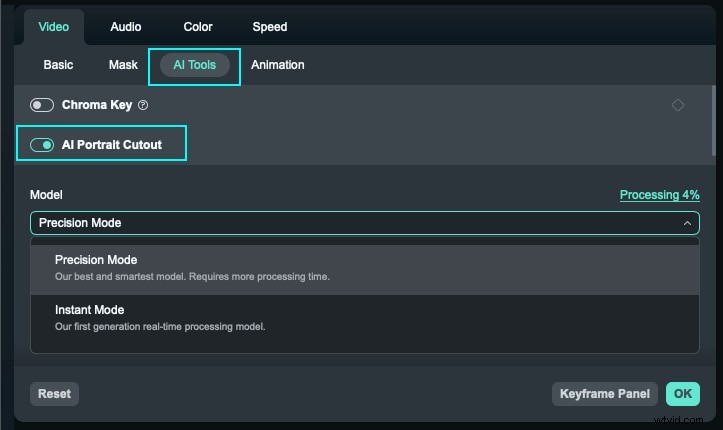
Filmora’s AI tools streamline the overlay process, making it a top choice for both novices and seasoned editors.
Conclusion
Video overlays unlock a new level of storytelling—whether you’re adding B‑roll, highlighting parallel actions, or integrating branded graphics. Apple’s iMovie provides four essential overlay types—Cutaway, Green/Blue Screen, Split Screen, and PIP—sufficient for most beginners.
For those seeking deeper control, more customizable templates, or AI‑powered background removal, Filmora offers a richer feature set without the steep learning curve of professional suites.

