Want to elevate your videos with polished text overlays? This guide walks you through adding titles, subtitles, and captions in iMovie across iPhone, iPad, and Mac, ensuring your projects look professional and engaging.
Adding Text in iMovie on iPhone and iPad
Download iMovie from the Apple App Store and launch the app. Follow these steps to insert text quickly:
- Import the video you wish to edit.
- Tap the T icon in the toolbar to open the text library.
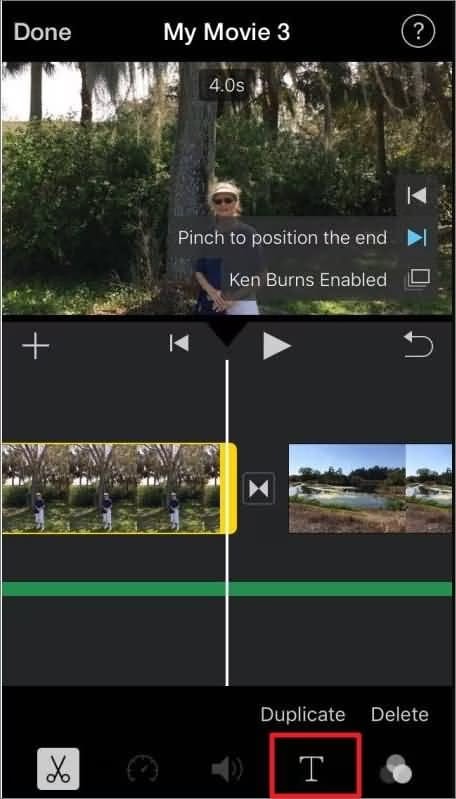
- Select a style or font that fits your project.
- Tap Done to apply the text and save your edits.
That’s all you need to add text on iPhone and iPad. If you’re a Mac user, continue below.
Adding Text in iMovie on Mac
iMovie for macOS supports full‑resolution editing, including 4K at 60 fps, and offers a robust text editor. To add text:
- Open iMovie on your Mac.
- Import your video file via the Import Media button.
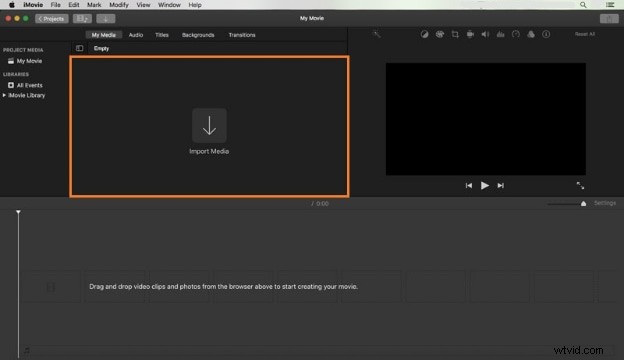
- Drag the clip to the timeline.
- Click the Titles tab to browse templates, then drag your chosen template onto the timeline.
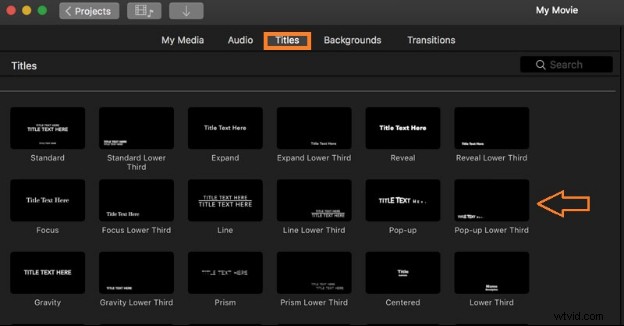
- Edit the placeholder text, font, size, and color in the preview window.
- Preview the result and export your finished video.

Precision Text Placement in iMovie
iMovie’s built‑in tools allow you to control when text appears in the timeline, but they do not offer fine‑grained frame‑level positioning. On macOS, you can only drag the text clip along the timeline. On iOS, you can nudge the text within the viewer, but options remain limited.
If your project demands precise placement or advanced animation, consider one of the following workarounds:
- Use a dedicated graphics app like Canva to design text as an image, then import it into iMovie via picture‑in‑picture.
- Switch to a more feature‑rich editor such as Wondershare Filmora, which offers extensive text positioning controls.
Enhance Your Text with Wondershare Filmora
Filmora is a cross‑platform editor that delivers advanced text features beyond what iMovie offers. Key benefits include:
- Automatic Caption Generation – AI‑driven subtitles in 23+ languages, synchronized with audio.
- Speech‑to‑Text (STT) – Accurate transcription of spoken content.
- Customizable Templates – Choose from a library of animated titles and captions.
- Dynamic Captions – Subtitles that adjust to speech pace and volume.
- Export options for .SRT files and multiple video formats.
While Filmora is a paid solution, its advanced text controls can significantly improve the professionalism of your videos.
Filmora vs. iMovie for Text Editing
iMovie is free, intuitive, and tightly integrated with Apple devices, making it ideal for casual creators or quick edits. Filmora, however, shines when you need deeper customization, precise positioning, or automated captions. Choose based on your workflow, budget, and the level of polish required.
Adding Text in Filmora – Step‑by‑Step
Below is a concise guide to adding text in Filmora, covering both manual and automatic methods.
- Launch Filmora and start a new project. Import your media and drag it onto the timeline.
- Right‑click the clip and select Speech‑to‑Text to auto‑generate subtitles. Enable Automatic Active Words for dynamic captions.
- Open the Titles library, choose a template, and drag it onto the timeline. Use Apply to All to style every caption uniformly.
- Adjust font, color, and size in the Basic settings. Click Export to render the video.
For custom titles:
- Import media via the Import Media button.
- Select the Title tab, drag a desired effect onto the timeline, and position it over the video.
- Double‑click the title on the timeline to edit the text, font, and color.
- Export or upload directly to Vimeo or YouTube.
Final Thoughts
Whether you’re adding simple subtitles or crafting animated titles, iMovie provides a straightforward, free solution for Apple users. For advanced text placement, dynamic captions, or multi‑language subtitles, Filmora offers the tools you need.
Start enhancing your videos today—your audience will notice the difference.
Get started with Filmora for free on Windows 7 or later (64‑bit) or macOS 10.14 or later.