
Transitions are a fundamental tool for smooth storytelling in video editing. They soften the jump between scenes, guiding viewers through your narrative with ease.
In this article we’ll cover how to apply transitions in Adobe Premiere Pro and then introduce a more intuitive workflow with Wondershare Filmora, including its AI‑powered editing features.
In this article
- Adding Transitions in Premiere Pro
- Using Filmora for an Intuitive Alternative
- Leveraging Filmora’s AI Features
Step‑by‑Step: Adding Transitions in Adobe Premiere Pro
Open Premiere Pro, create a new project, and place two media clips on the timeline.
There are several ways to insert transitions; we’ll cover the most common methods.
Method 1 – Default Transition
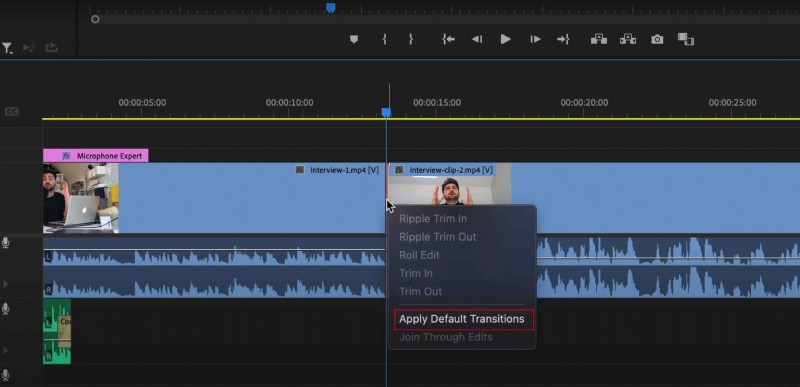
Right‑click the edit point between two clips and choose Apply Default Transitions. This applies a quick cross‑fade by default.
Method 2 – Manual Selection
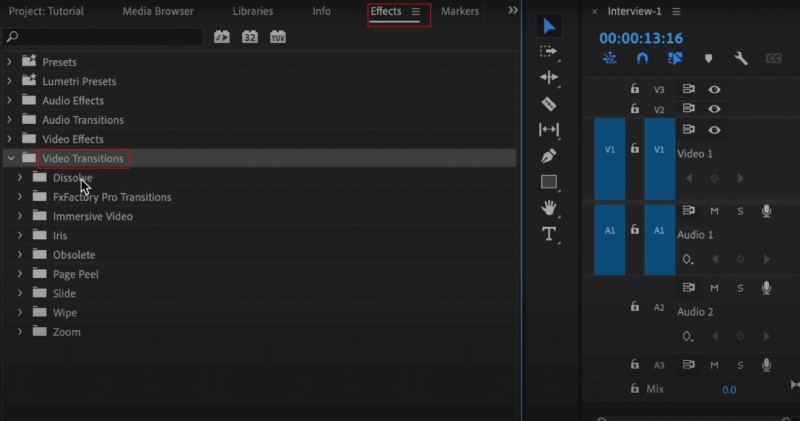
1. Click Effects in the lower‑left panel and open the Video Transitions folder.
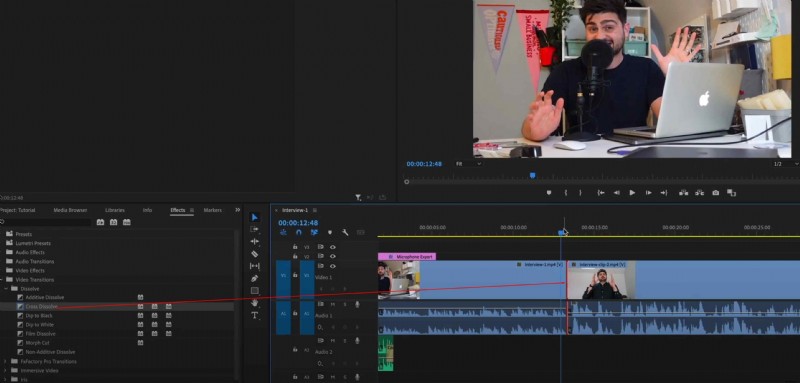
2. Drag a desired transition onto the edit point in the timeline.
Both methods yield clean, professional results, but exploring the full range of Premiere Pro’s transitions can be time‑consuming.
Discover a More Intuitive Alternative: Wondershare Filmora

Filmora is gaining traction for its user‑friendly interface and extensive built‑in effects. Professionals praise its shortcuts, while beginners appreciate its ease of use.
Adding transitions in Filmora is as simple as:
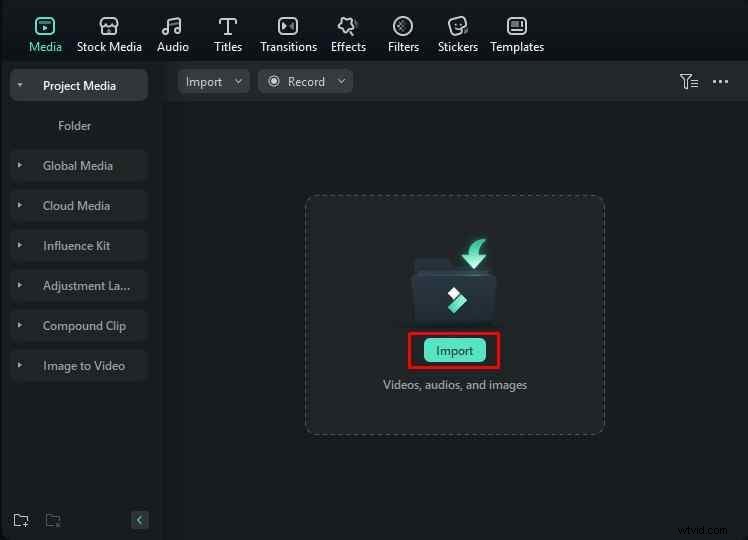
1. Import your media via the Import button.
2. Drag clips to the timeline.

3. Open the Transitions panel, choose an effect, and drop it between clips.

Filmora offers a richer library of standard and creative transitions, searchable directly within the panel.
Filmora’s Powerful AI Features
Beyond transitions, Filmora delivers AI tools that streamline music creation, audio enhancement, and overall video quality.
Generate Royalty‑Free Background Music in Minutes
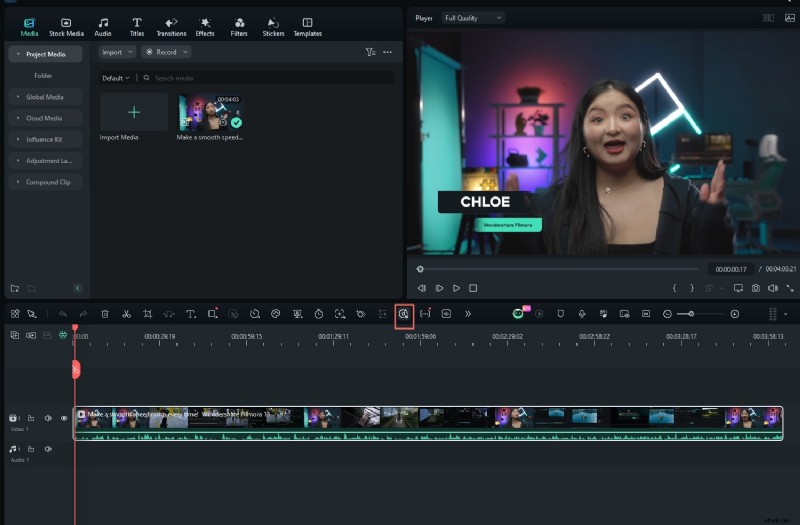
When a clip is selected, click the Smart BGM Generation button, then Create. Filmora analyzes the footage and composes a unique soundtrack automatically.

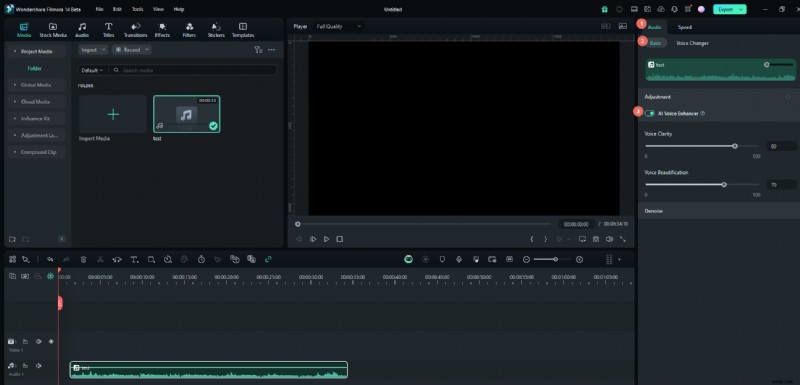
Enhance Dialogue with AI Voice Enhancer
Navigate to Audio > Basic and enable AI Voice Enhancer. Adjust the clarity and beautification sliders to improve speech quality.
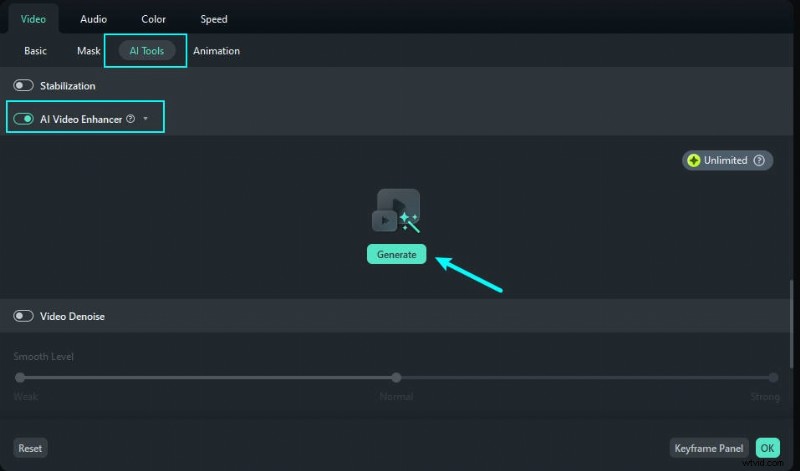
Improve Overall Video Quality with AI Video Enhancer
Right‑click a clip, select AI Tools > AI Video Enhancer, and hit Generate. The software enhances resolution, clarity, and frame rate.
Conclusion
While adding transitions in Premiere Pro is straightforward, mastering the entire suite can be daunting. Filmora offers comparable functionality with a more accessible workflow and engaging AI features, making it an excellent choice for editors of all skill levels.