Adding a voiceover can be a great way to add another dimension to your videos and movies. Rather than the ad hoc audio that generally comes with recordings, you can add a pre-planned voiceover, recorded in high quality to add interest to your publication.
If you are making videos for sales purposes, adding the voiceover after the video has been made gives you more time to think about what you want to say. It means you can work off a script or can re-record parts where things didn't go to plan.
Even in home movies, it can be great to have an explainer or to add some commentary to your movie, and thankfully there are software options out there that allow you to do this.
Adobe Rush has a basic voiceover recording function, including a very basic editing system. However, as an alternative to this, we also want to introduce you to Filmora from Wondershare, which has a much more functional editing process and results in much higher quality audio.
You may also like: Best Free Software to Record Discord Audio and How to Use >>
Adding a voiceover in Adobe Rush
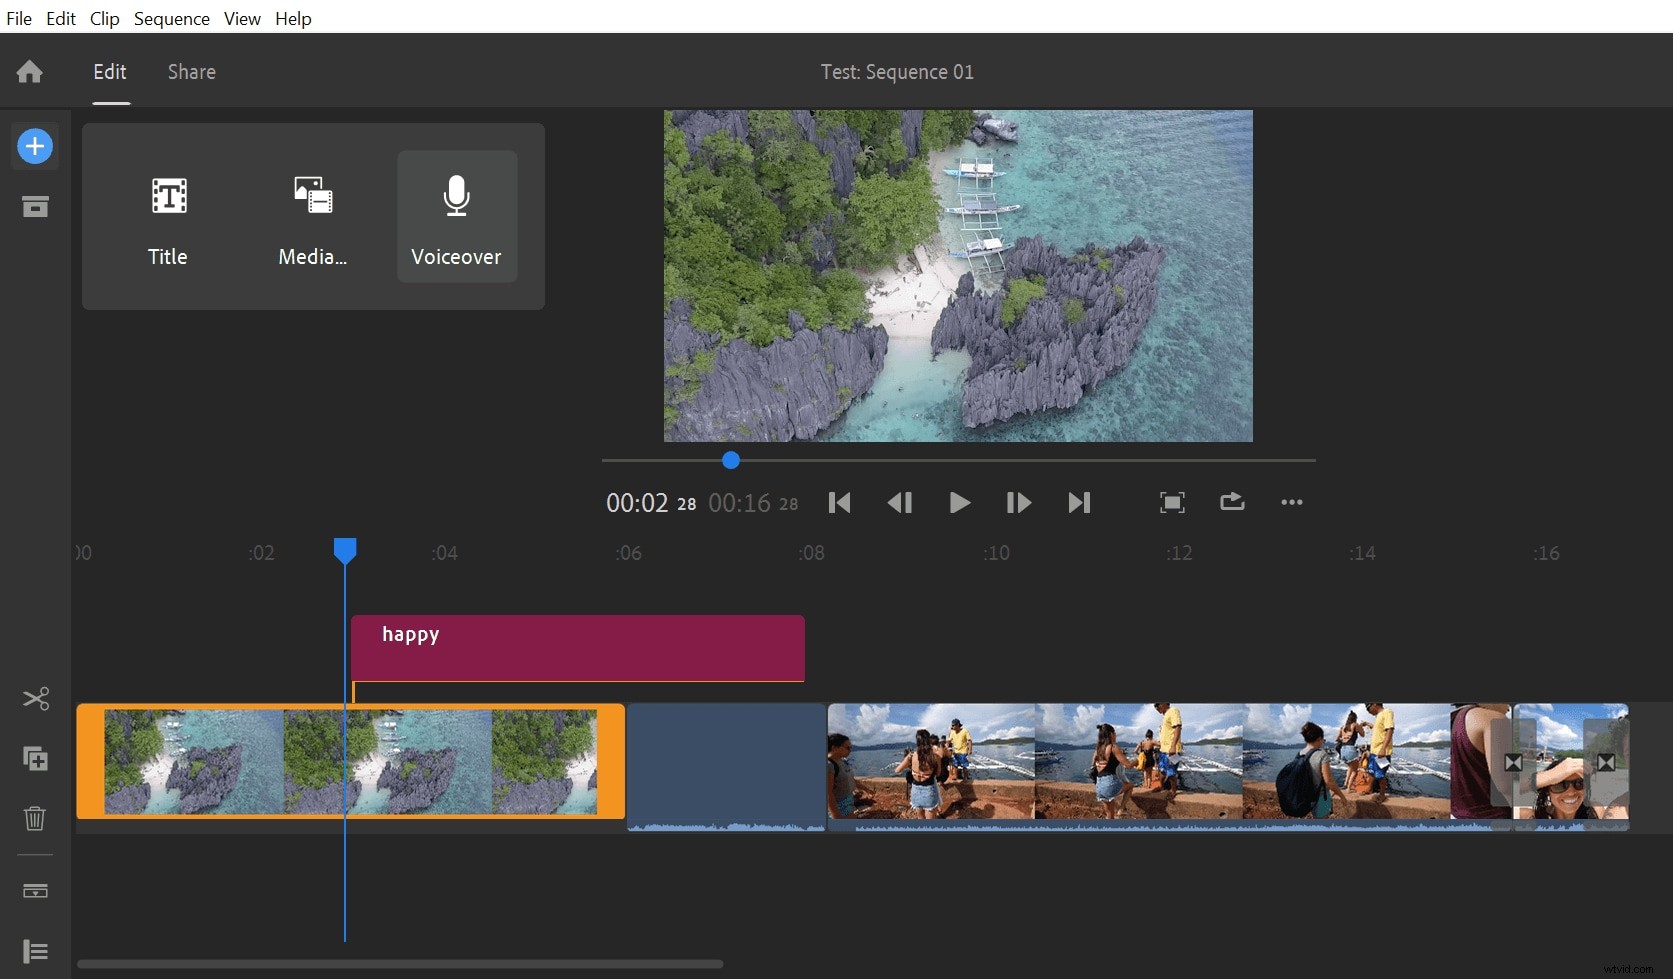
To add a voiceover, start by using the blue plus (+) sign in the top right. This will prompt you to add a title, media or voiceover. Select voiceover and it will add a new track to the timeline for your voiceover recording.
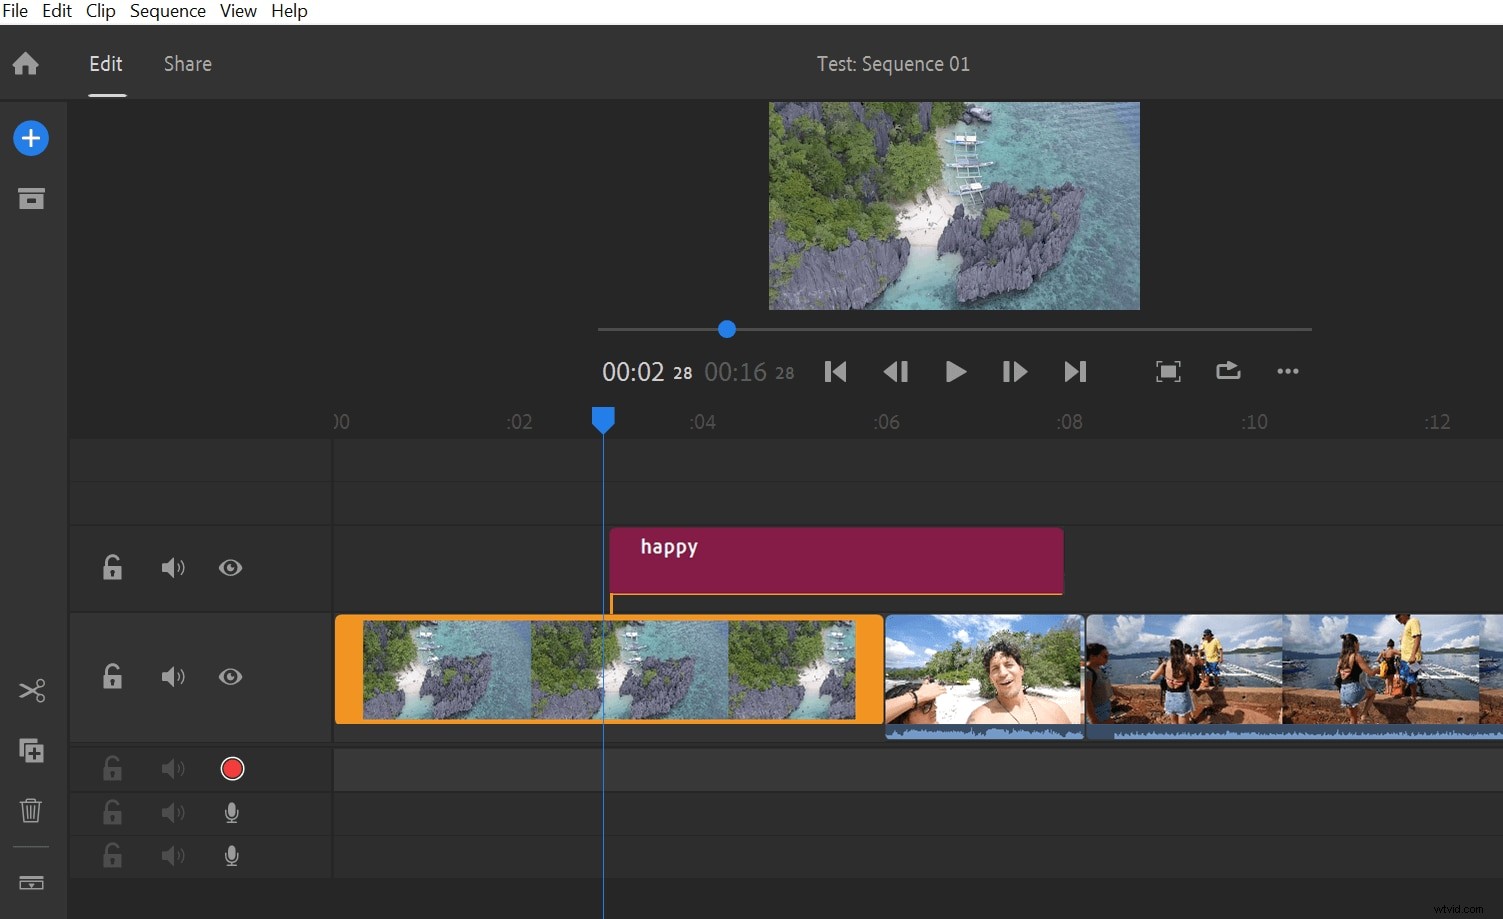
When you're ready to start recording, hit the red record button on the new track to begin the voiceover. You'll get a countdown of three before the recording starts.
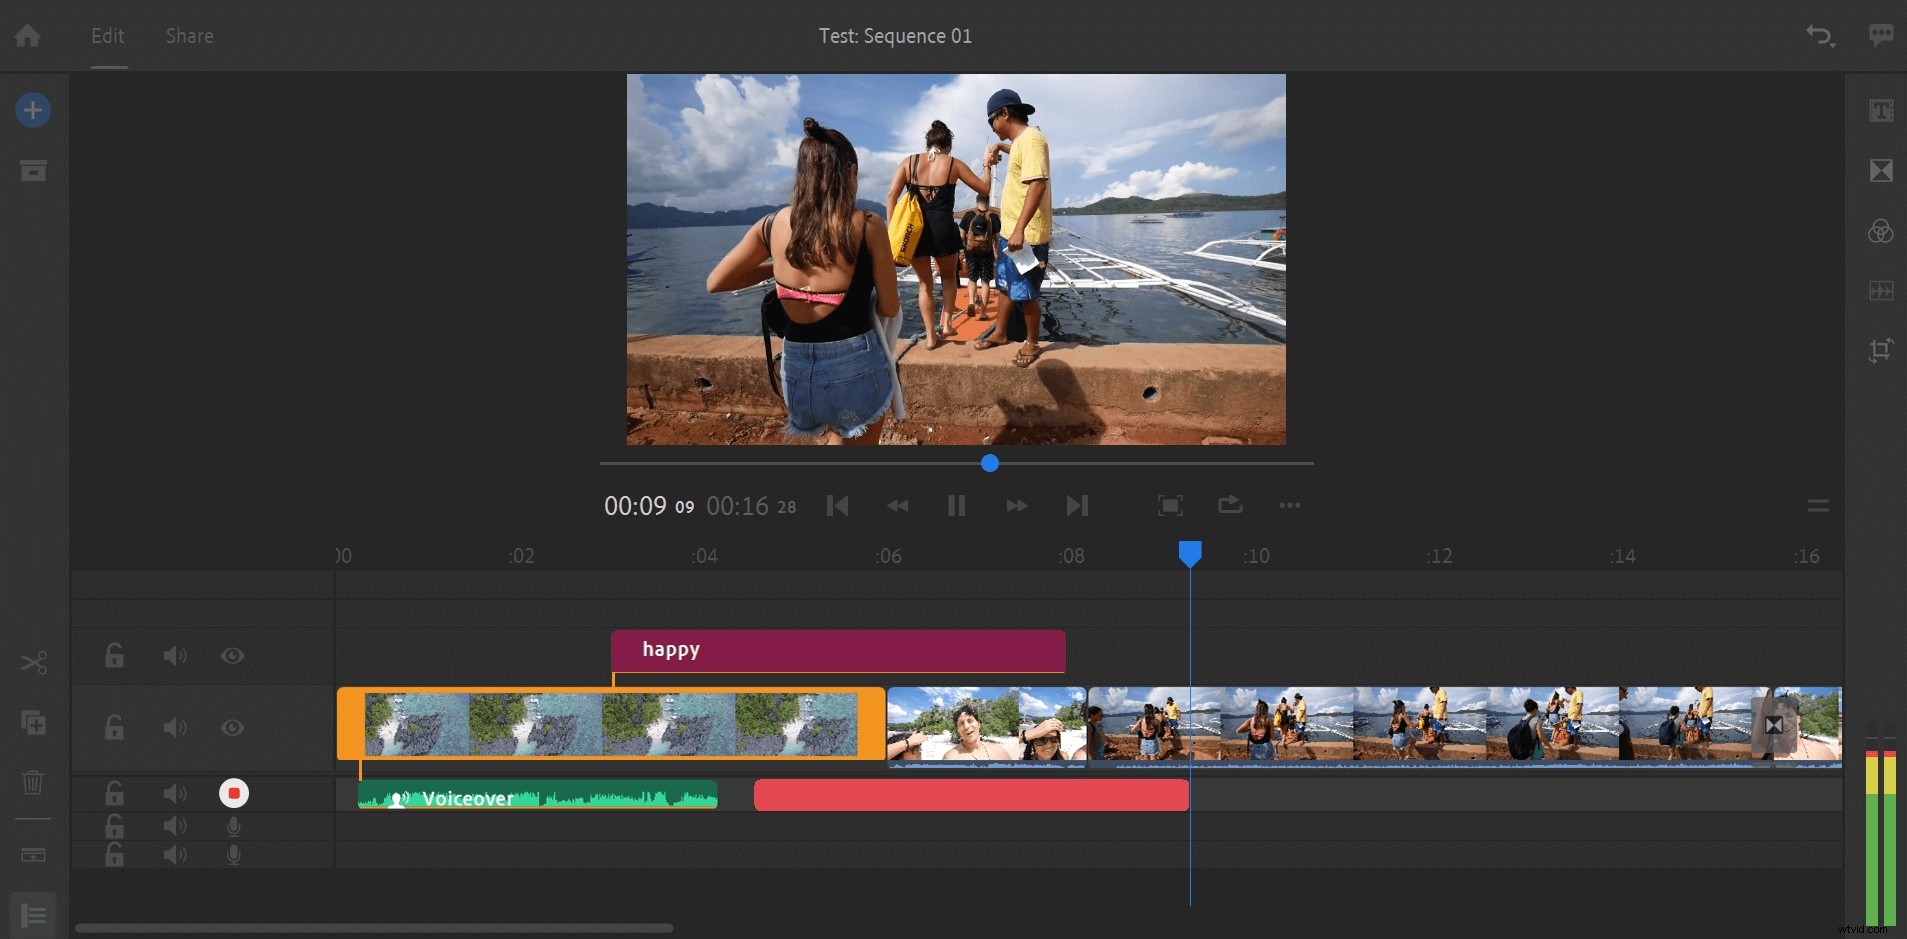
During your recording of the voiceover, the video will play in the window, so you can see what you're commentating on. The two bars on the right show the level of your recording. Don't worry if you get it wrong, as you can stop and start again… the video and recording will start from where you left off.
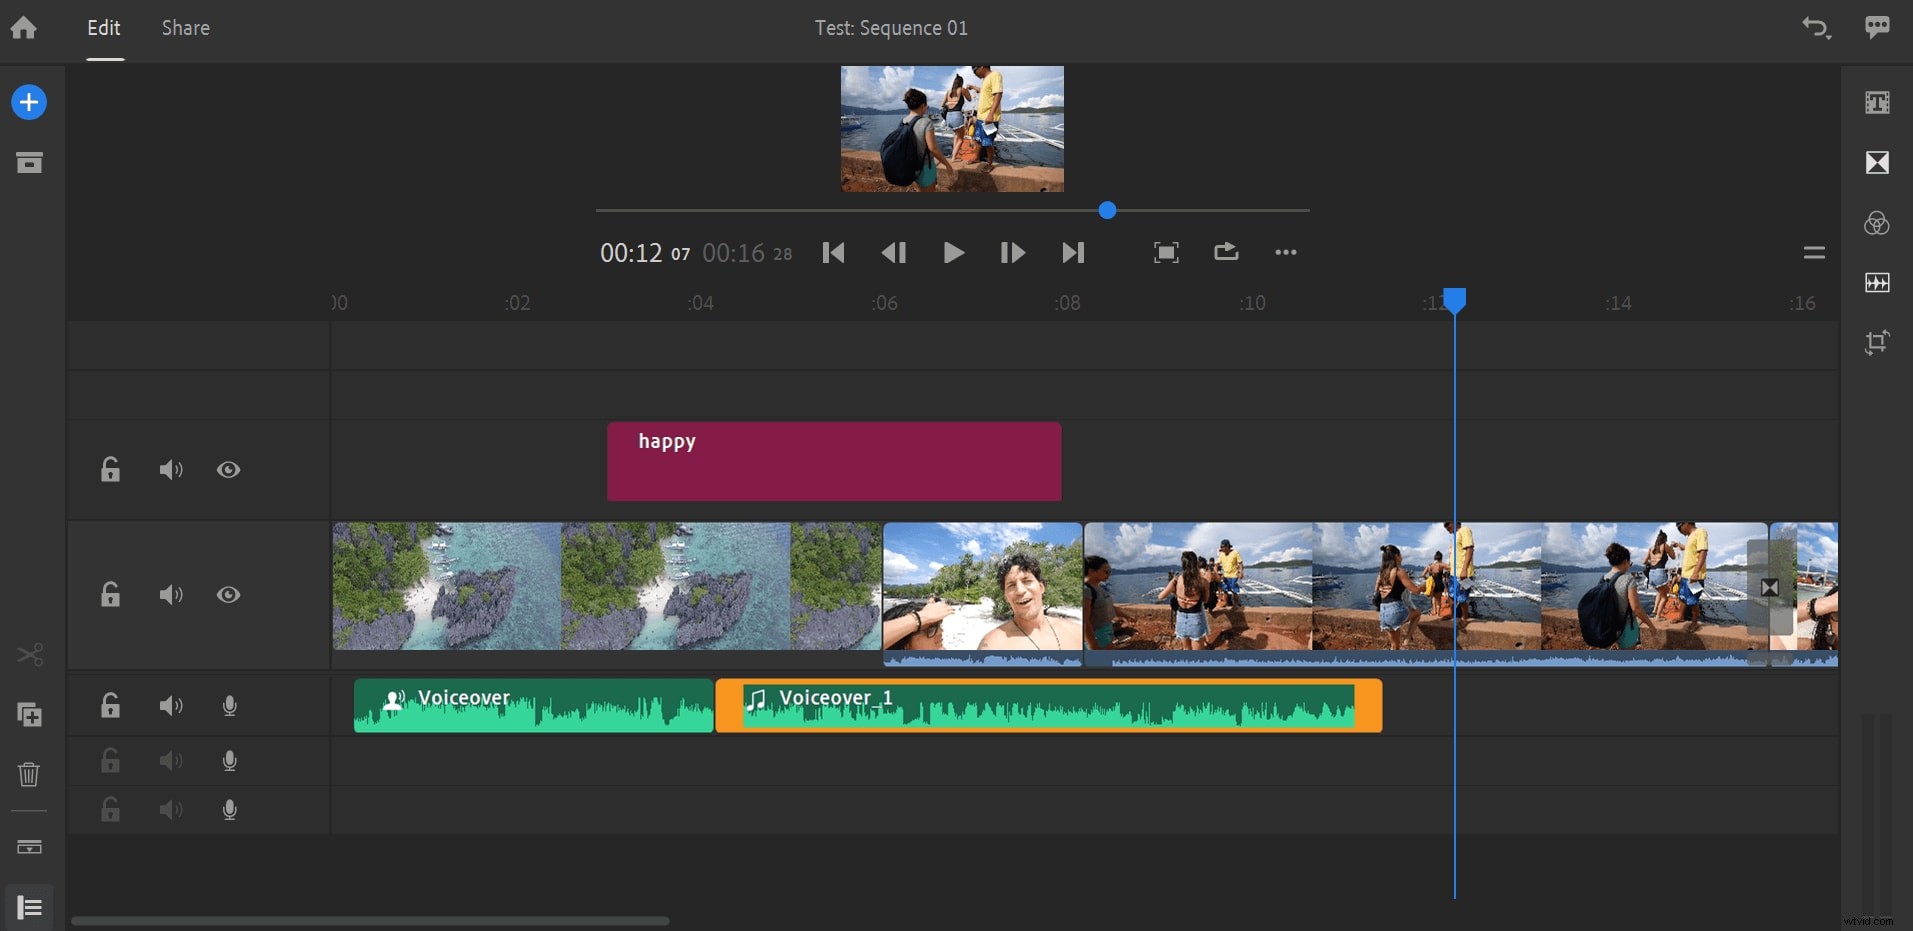
Once the recording is complete, you can cut your audio by dragging the orange bars to trim the clip, just as you would when trimming a video. You can slide the audio around, so it matches better with the video too.
Finally, turn to the advanced editing to finish up. There's not a lot you can do in terms of recording levels and suchlike, but you'll find a few basic editing tools in here such as auto duck.
As you can see, Adobe Rush makes it fairly easy to record a voiceover and add it to your video. However, we prefer the better control offered by Wondershare Filmora and think you will too!
How to add a voiceover with Filmora
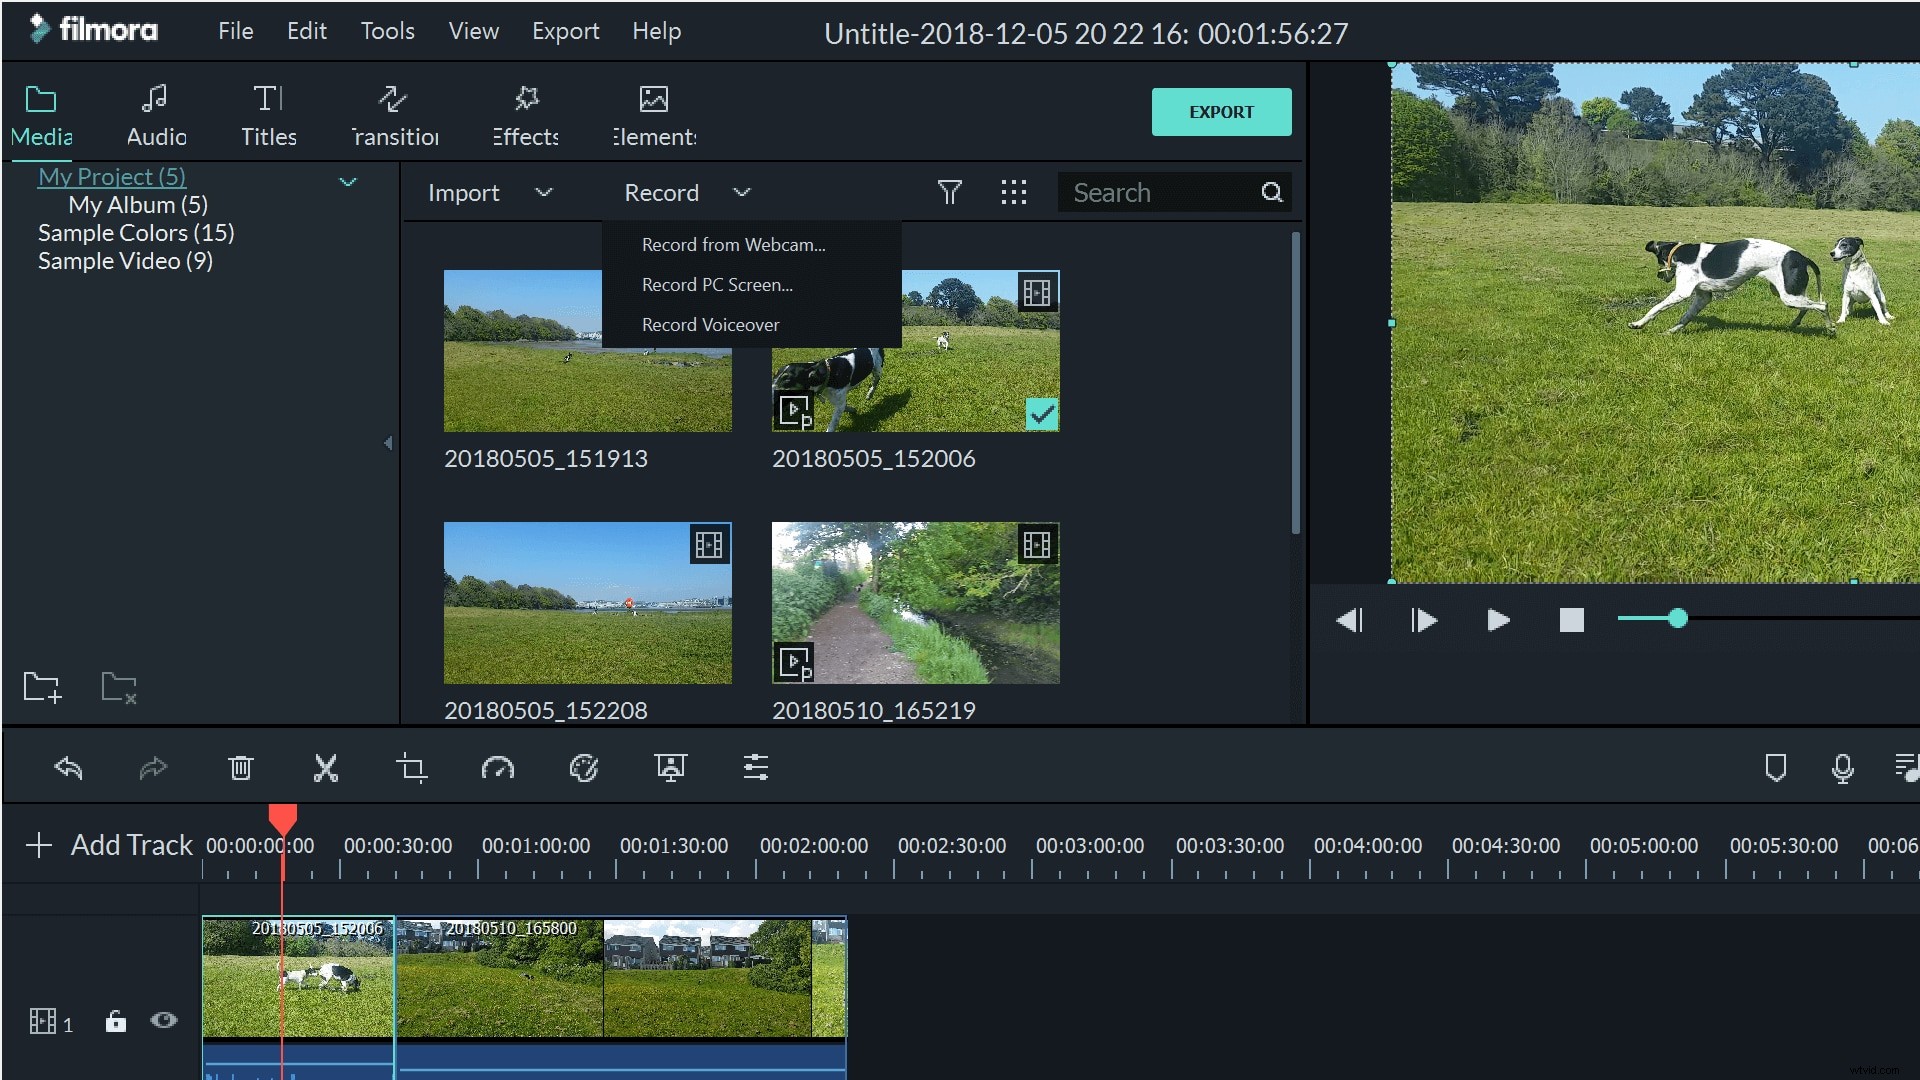
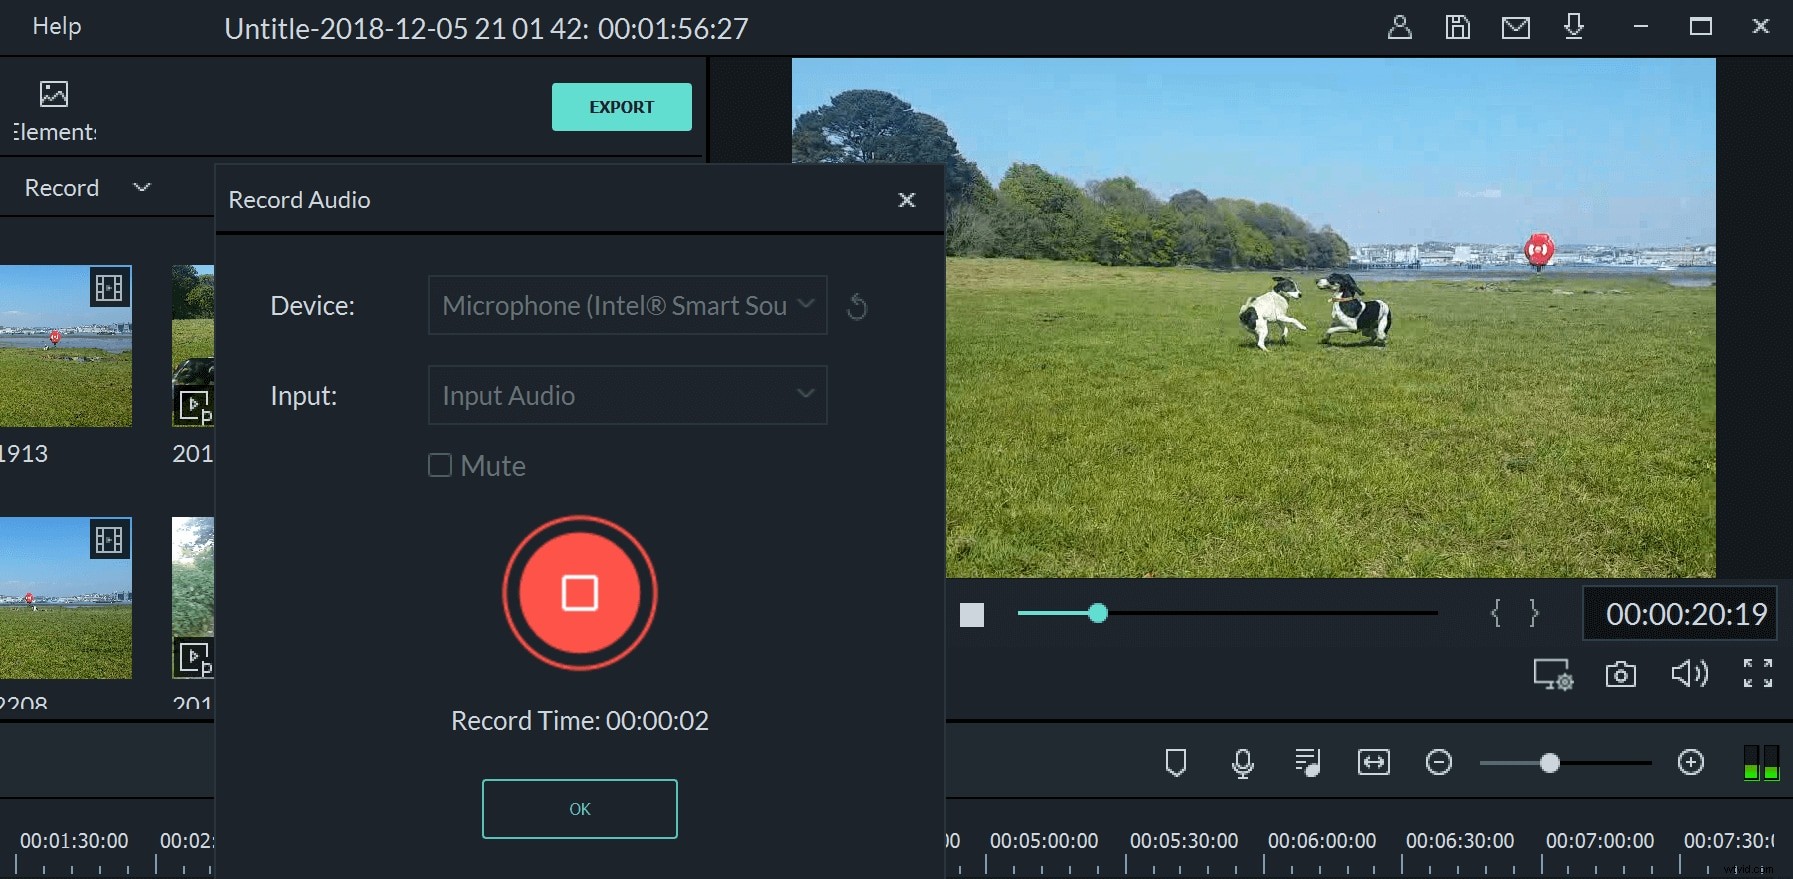
To make a voiceover recording, the easiest way to get started is to open the function from the main screen. Just above your media files, you'll see a button marked 'Record'. If you click this you can choose to record either from your webcam, to record your PC screen, or to make a voiceover. You can also open it, if you prefer, from File>Record Media.
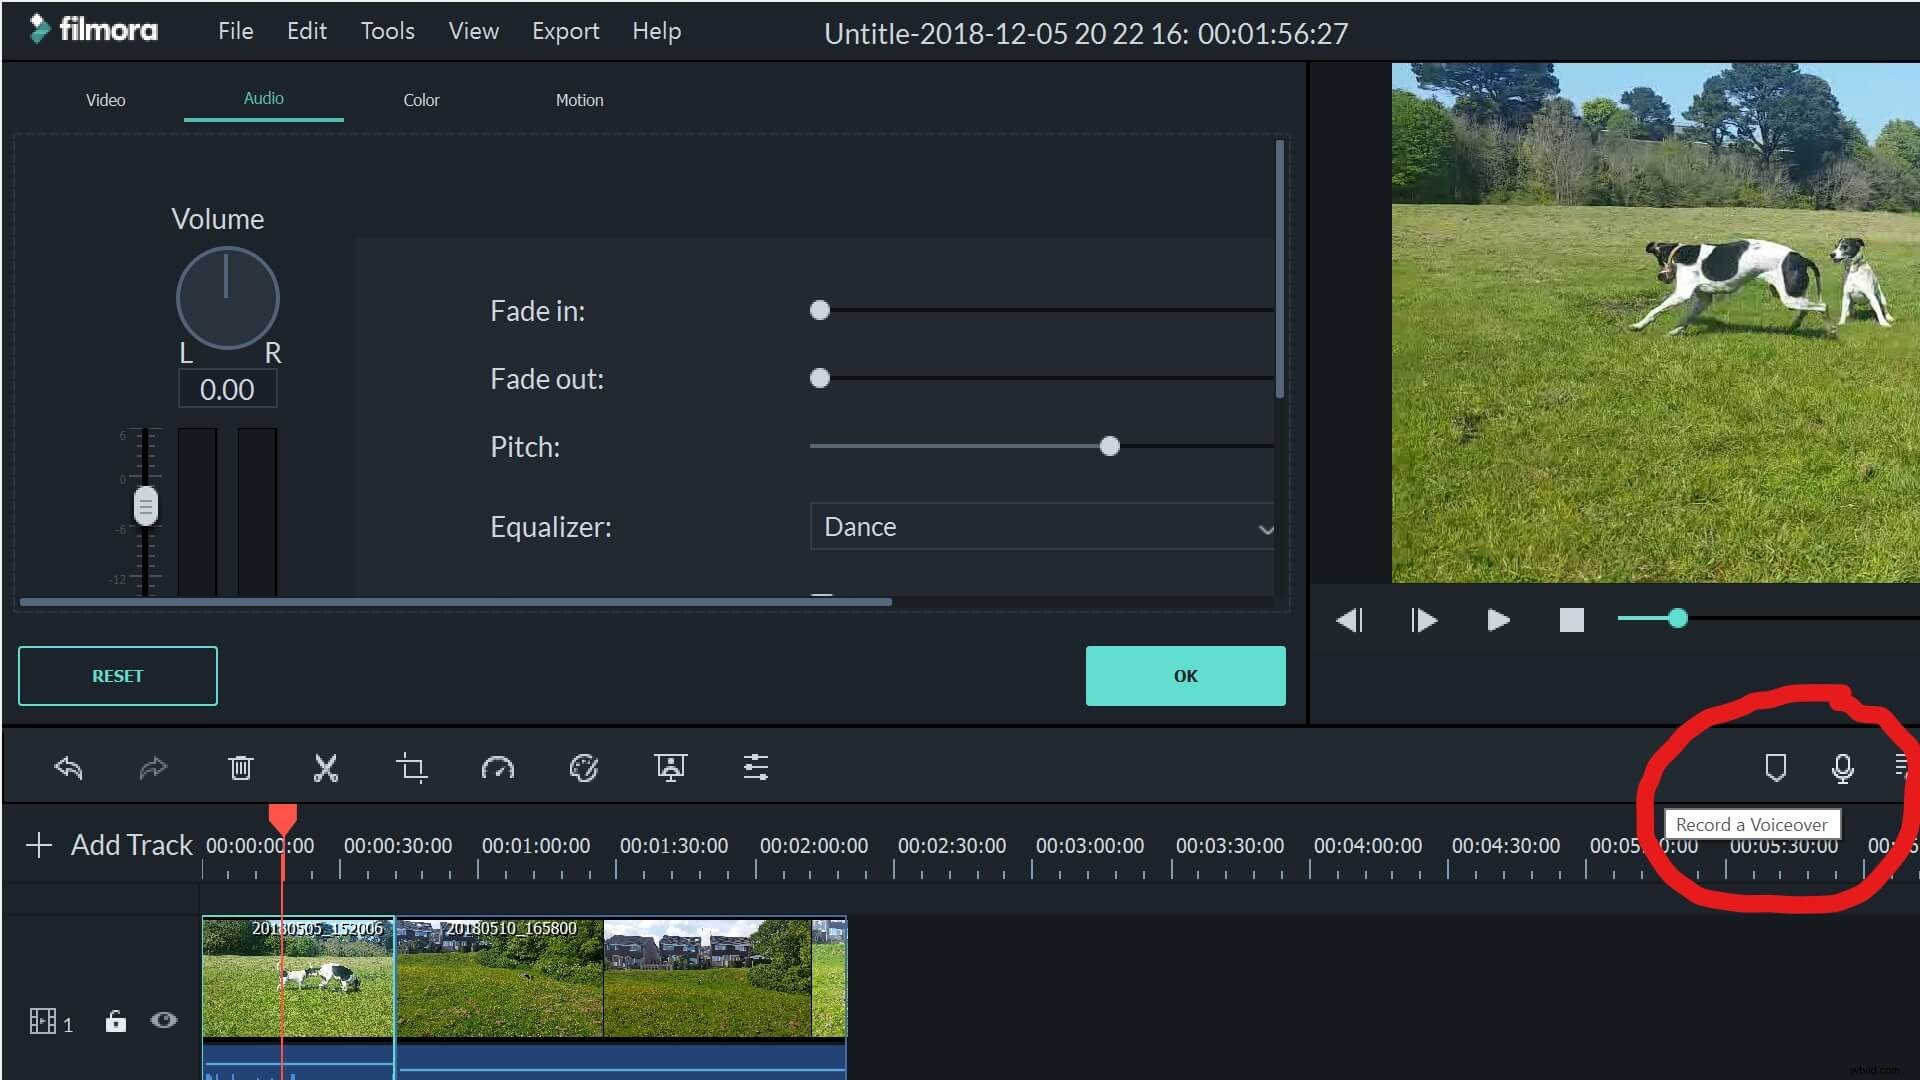
There's also a handy button on the right hand side of the screen which will take you right to the voiceover recording tools.
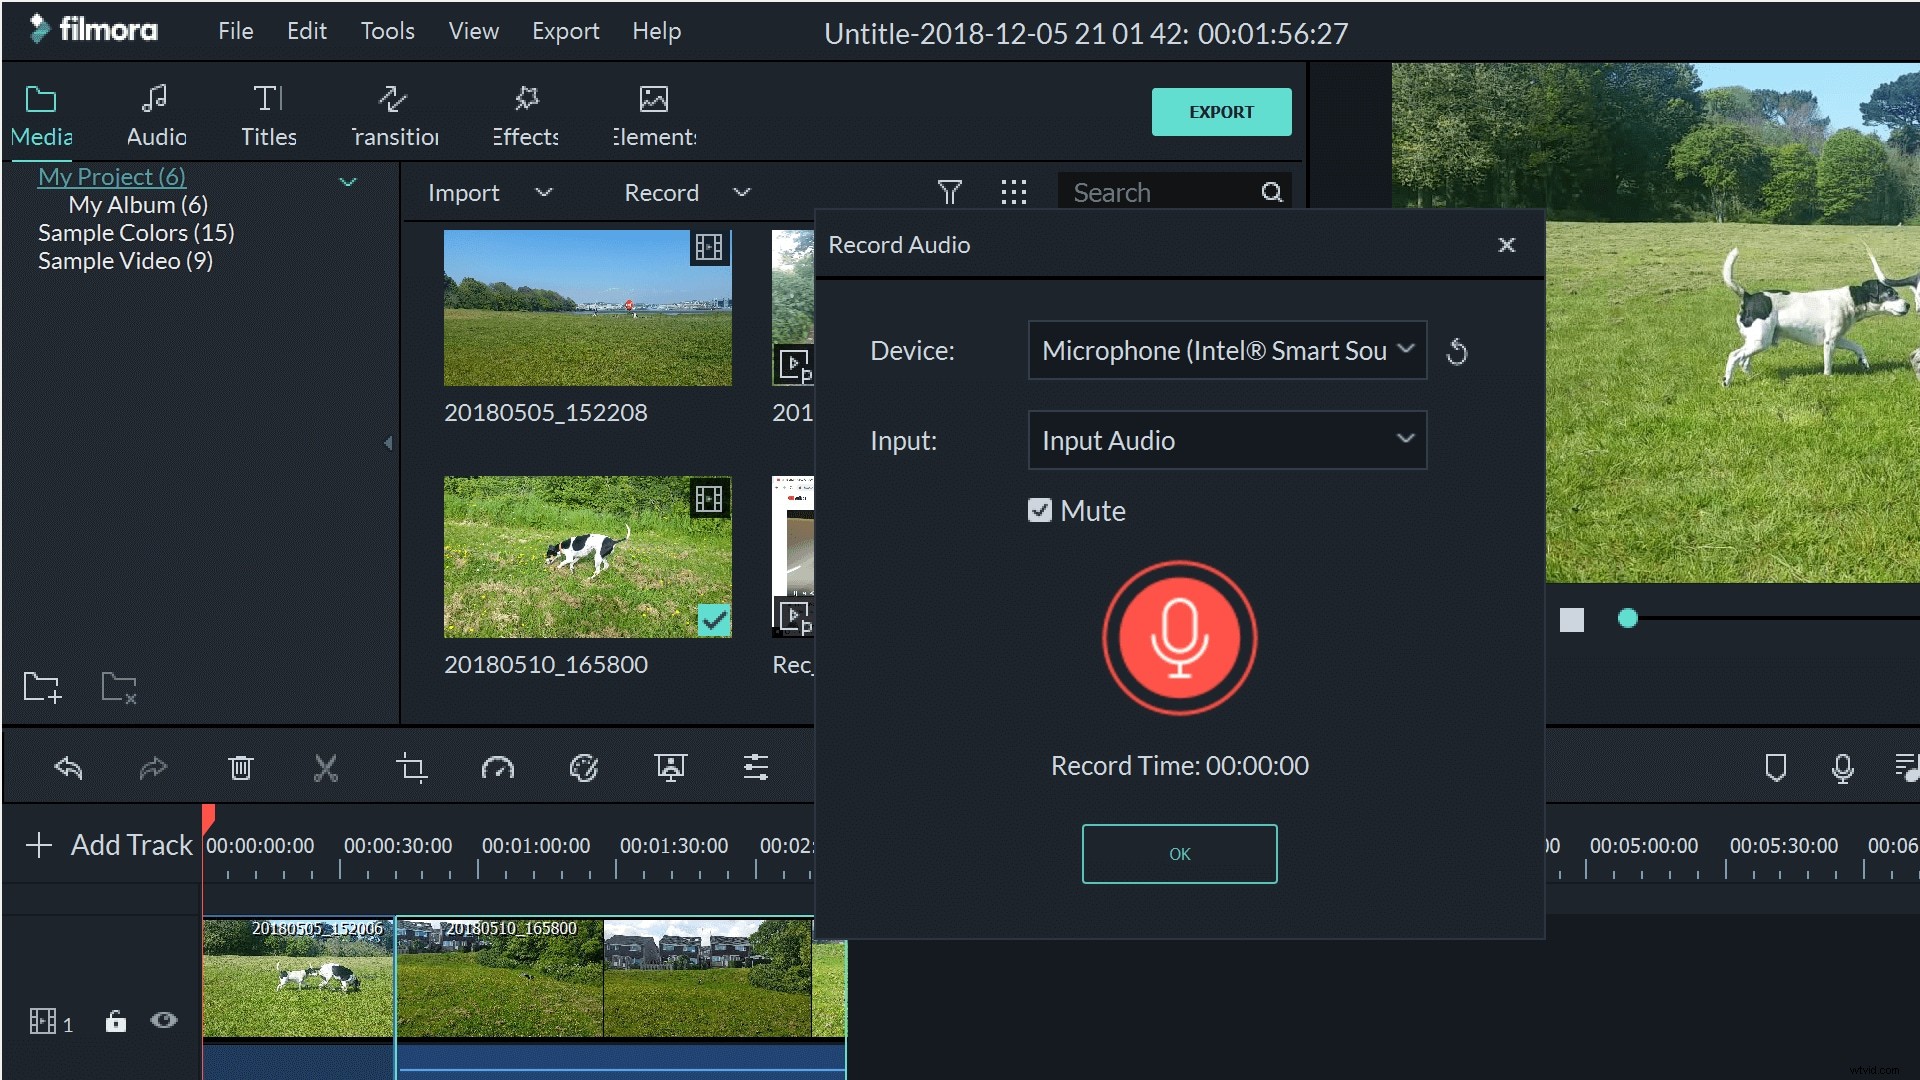
Selecting voiceover will open up the voice recording tool. Here you can choose which device and input you want to use to record your voiceover. To start your recording, simply click the big red microphone.
As soon as the recorder starts, your video will start to play. This is really helpful to keep you on track with your voiceover, allowing you to see exactly what you're commentating on and how it will all fit together.
The voiceover player will start wherever you are in your film, so if you want to start it at the beginning, make sure to navigate here first. You don't have to do all your voiceover in one go either. If you need a break or want to get your thoughts together, you can simply stop the recorder. When it starts again, you'll be at the same point in your movie.
Once you've finished your voiceover, it will appear as a file in your media collection. You can simply add it to the project, then trim it, enhance it, adjust the pitch or change the speed just as you would with any other media resource.
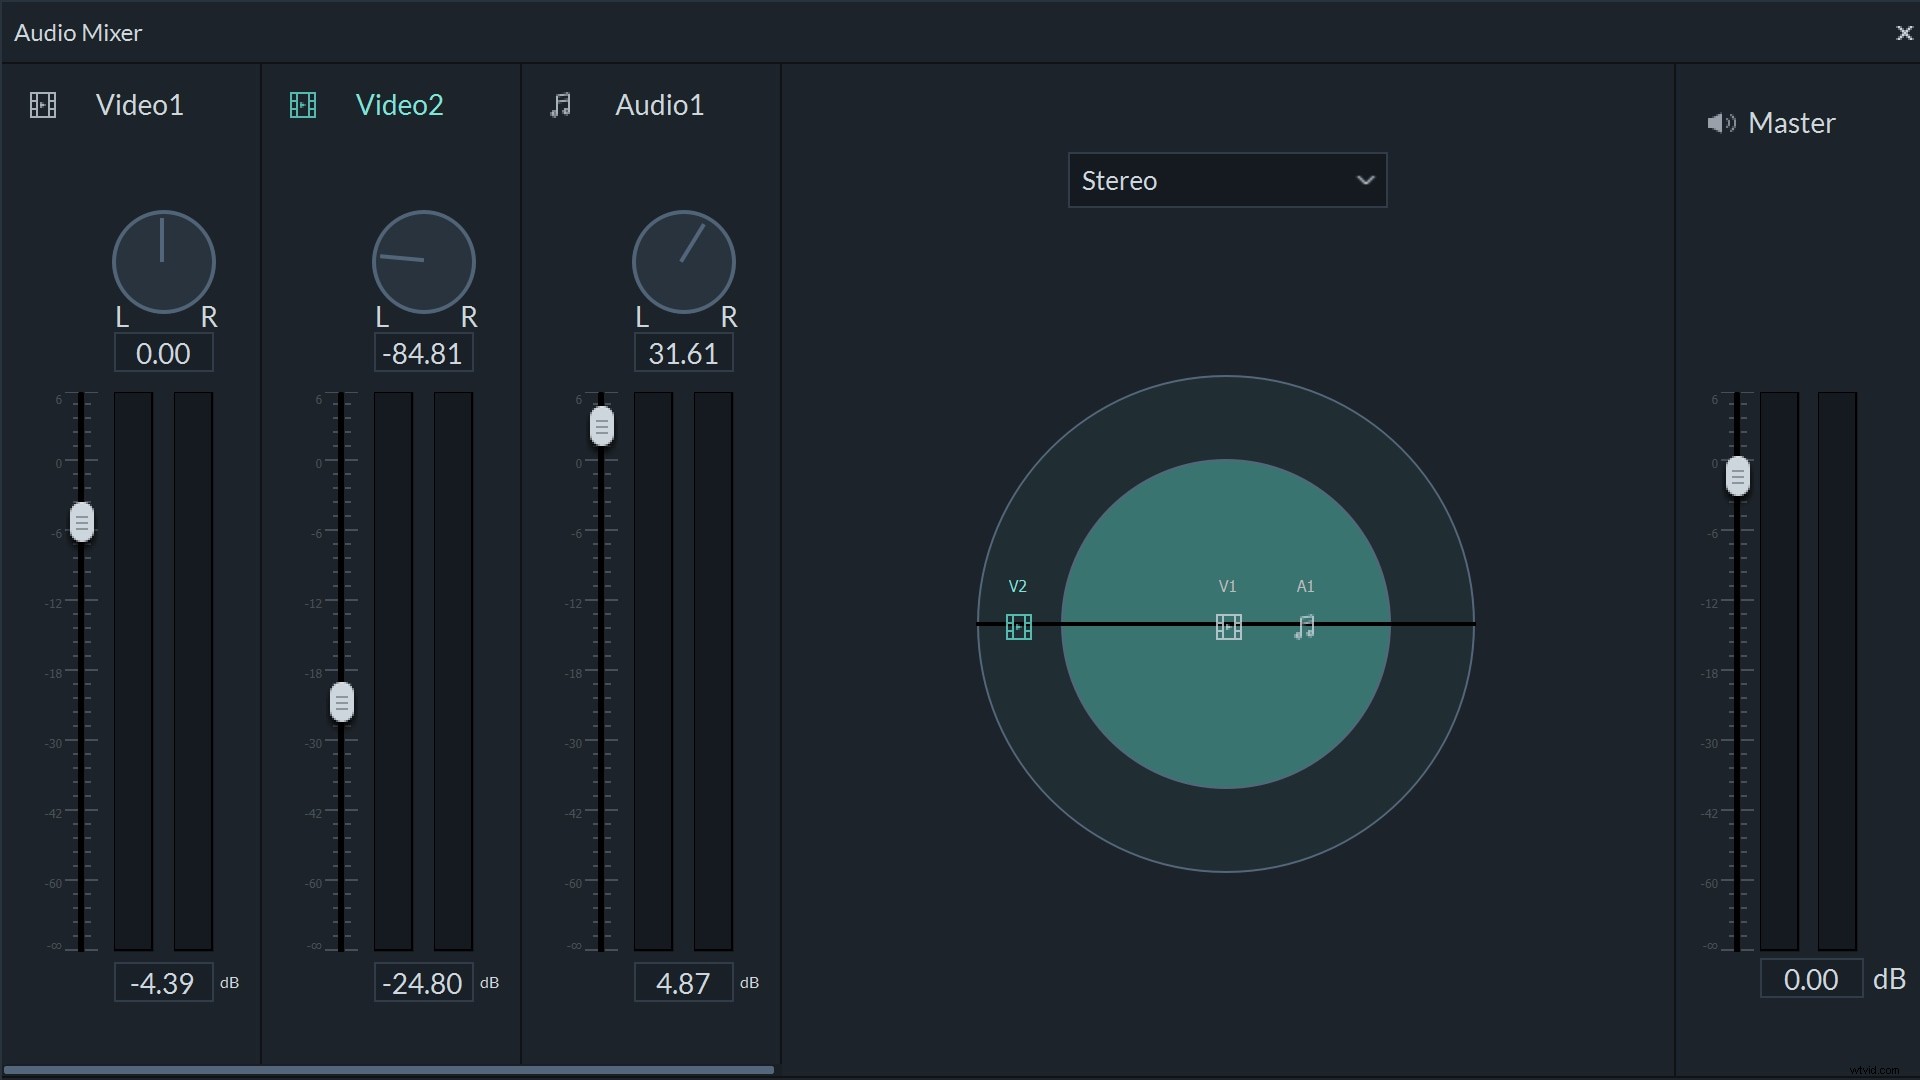
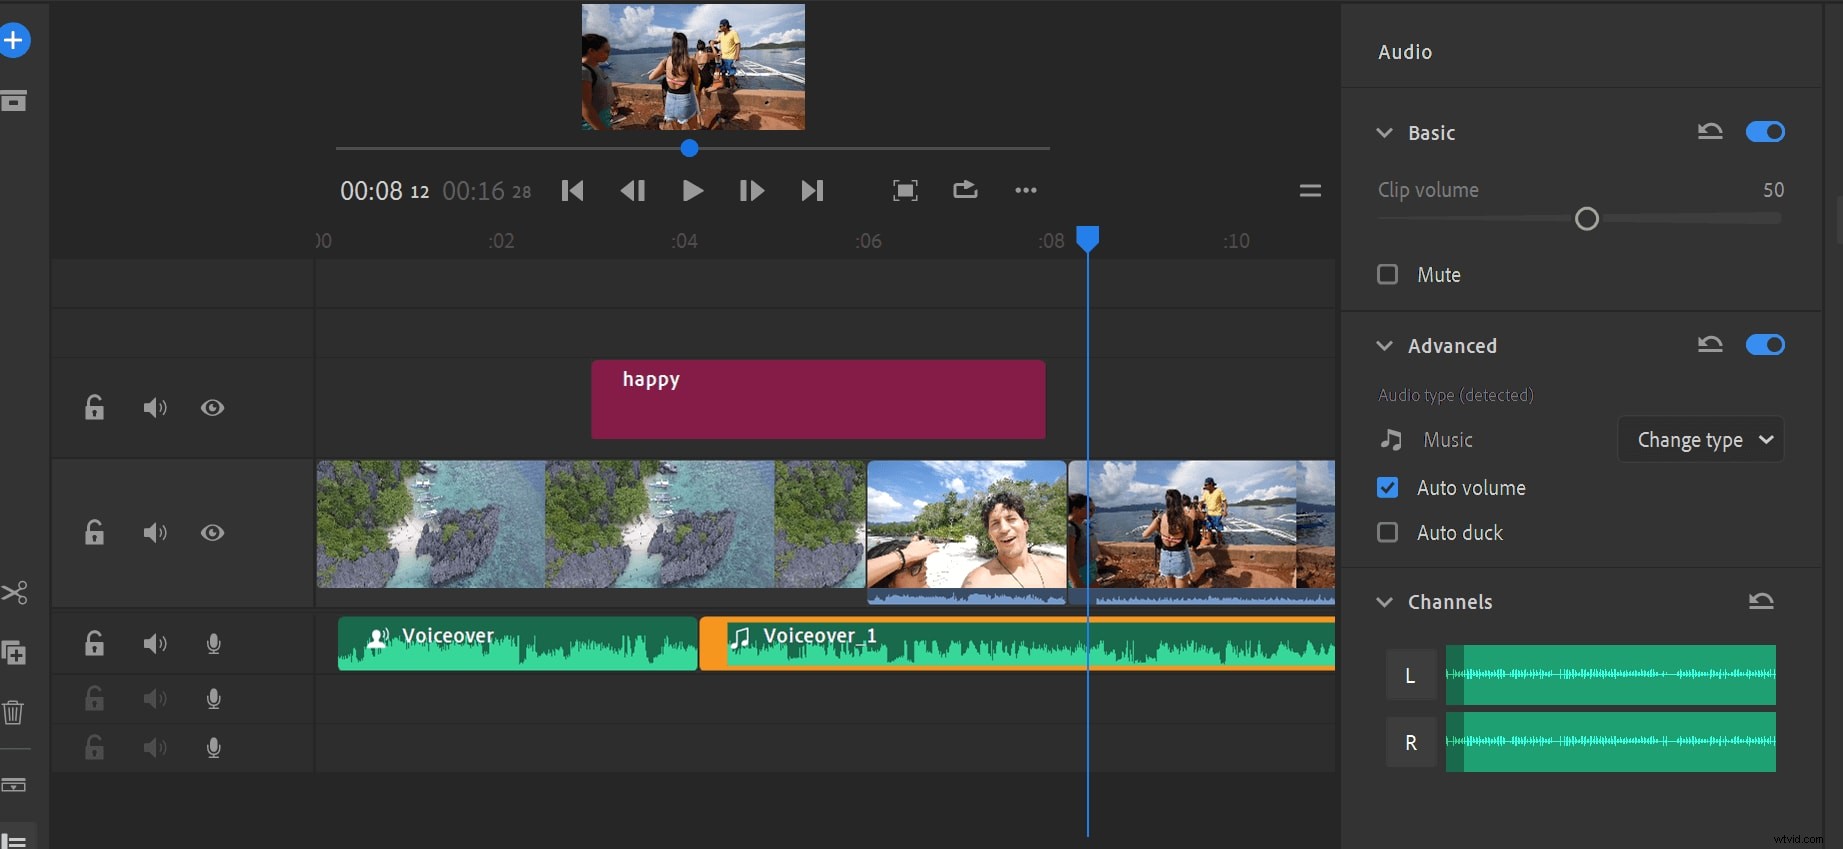
When you've recorded your voiceover, it will appear as a new audio track and is available to be mixed in via the Filmora mixer. This allows you to tailor the stereo settings as well as the levels of different tracks in your movie.
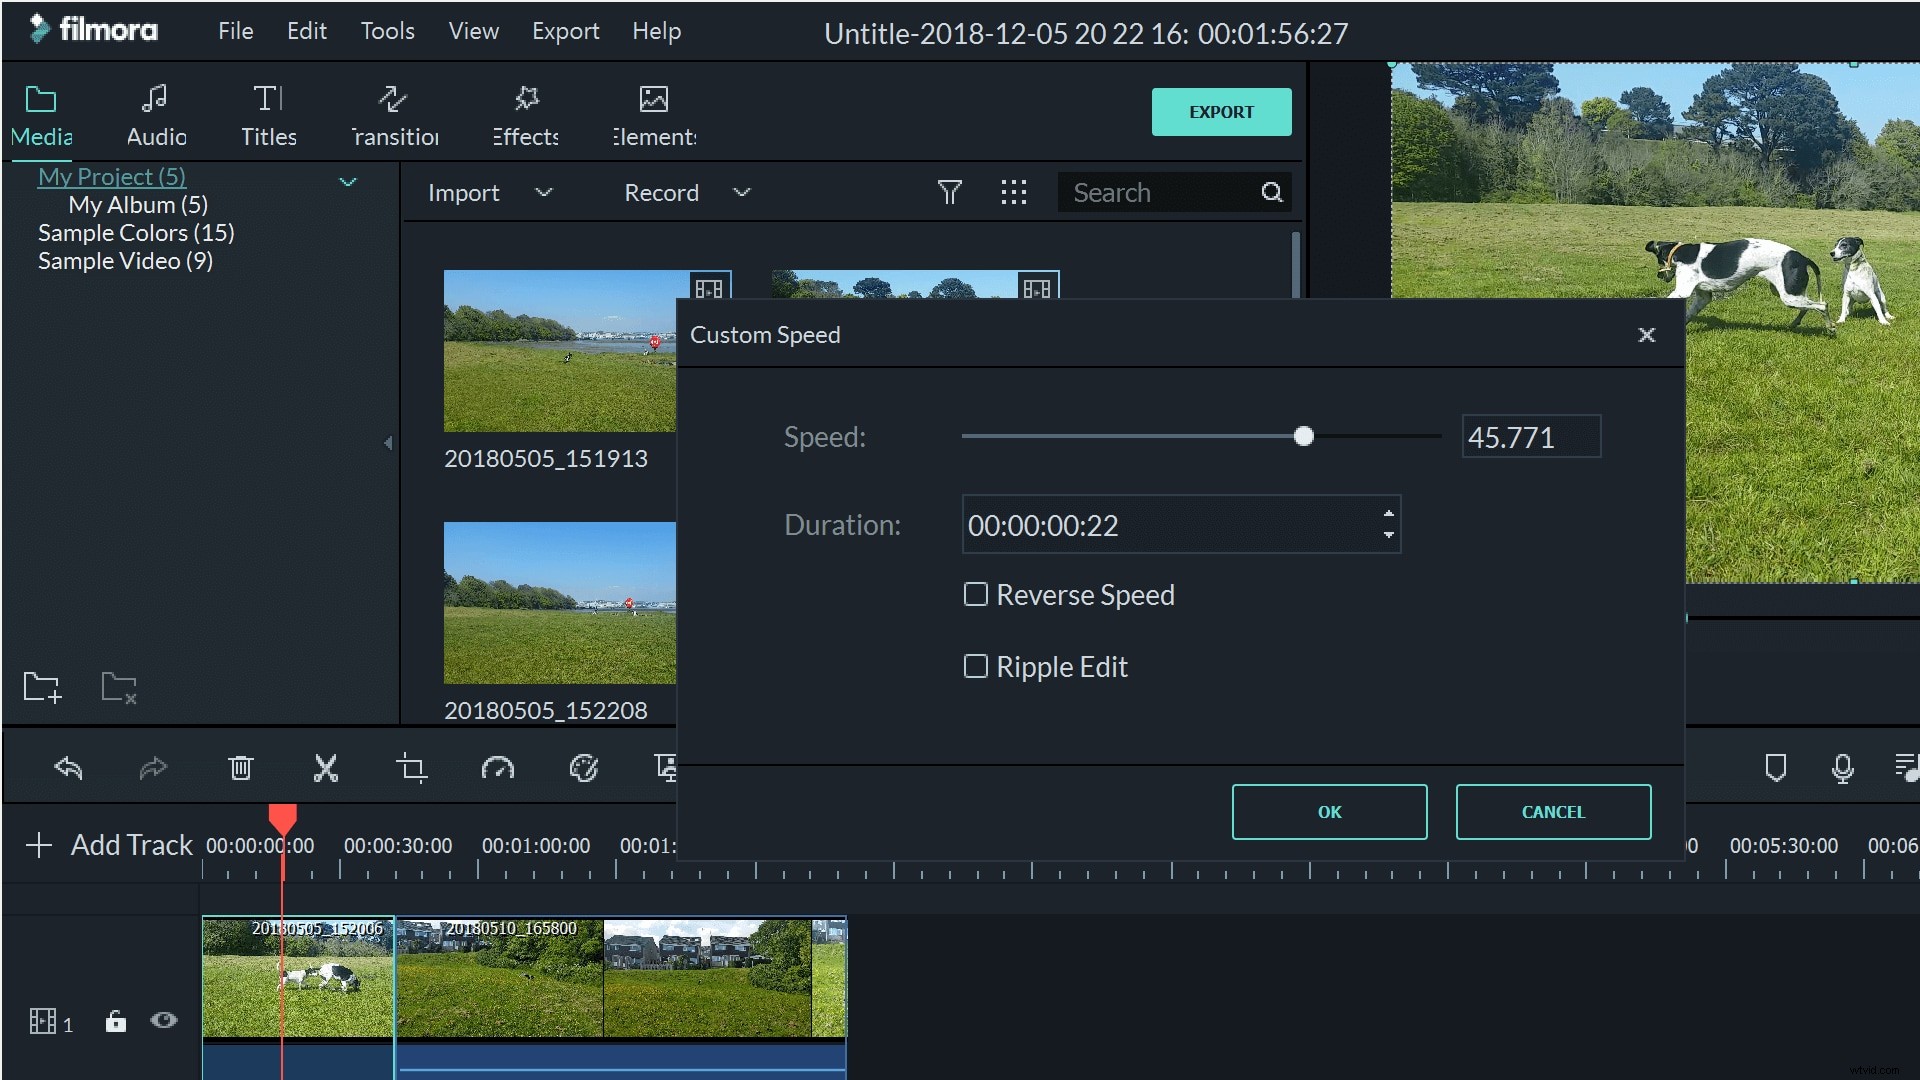
You can also use the custom speed settings to slow down or speed up your voice, and can even change the pitch using the editing tools to make your voiceover more professional.
Both of these software resources offer functional voiceover recording facilities, but the best one for you will depend on the amount of editing you'd like to be able to do. For a one off, hassle free recording, there's nothing wrong with the Adobe Rush option. However, if you want to be able to do anything at all with that audio clip, Filmora is going to be your better option.