Have you ever felt you were about to join a great webinar and wished your whole team was with you?
Whether you want to learn how to record a webinar for your own reference later, or to share the content with others, this tutorial will show you how it’s done.
Step 1. Download a screen recorder
Snagit is my favorite screen recorder because of its versatility as an image and video capture software.
If you’re looking for more video editing power, you can also use Camtasia. Then you can record and enhance your video after you’re done recording.
Step 2. Set up your recording
I’ll walk through this process in Snagit, but the workflow is very similar in Camtasia. First, open a browser and navigate to your webinar. Then, in Snagit, select the Video tab.
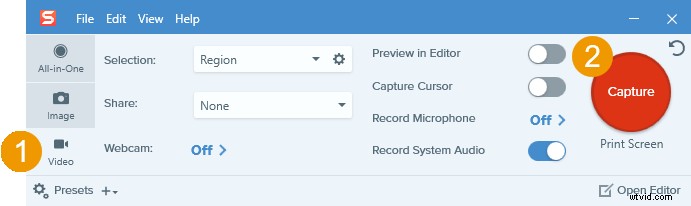
Next, press the red Capture button and use the crosshairs to select the area of your screen you want to record. You can adjust the capture area after drawing your selection using the handles on the edge of the selected area.
If you’re going to launch the webinar full screen, select your entire screen.
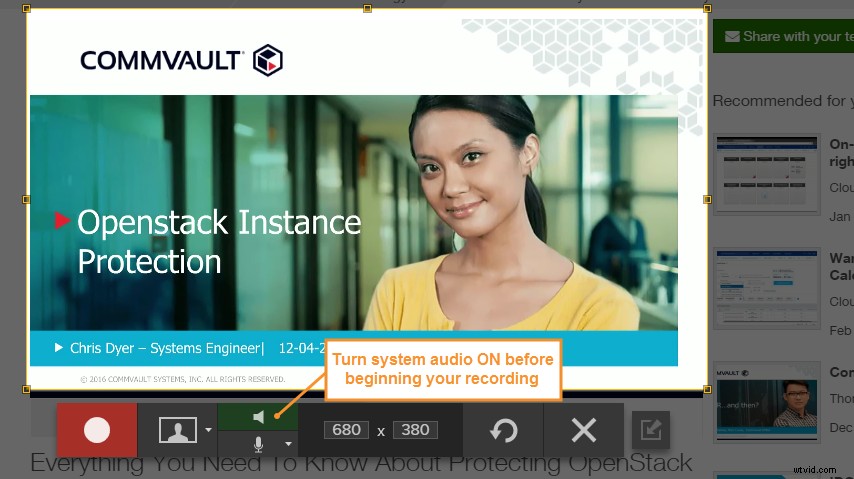
In the video toolbar, make sure that the system audio icon is green, as this means the video will capture the sound from your computer. If it is not green, click the icon to turn system audio on. (You can also hover your cursor over the button and the tooltip will tell you if system audio is on or off.)
In the rare case that you also want to record your voice, make sure the microphone icon is green (enabled) as well.
Step 3. Record your webinar

When the webinar starts, click the Record button and Snagit will start recording after a three- second countdown. While the webinar is running, be careful not to move your browser window or tab between applications. Snagit is recording everything that happens inside the selected area.
To finish recording when the webinar ends, hit Stop. You can also use hotkeys to control the recorder.
- If you’re a Windows user, press Shift + F10 to stop the recording, and Shift + F9 to pause/resume.
- If you’re a Mac user, press Control-Shift-V to stop the recording and Control-Shift-space to pause/resume.
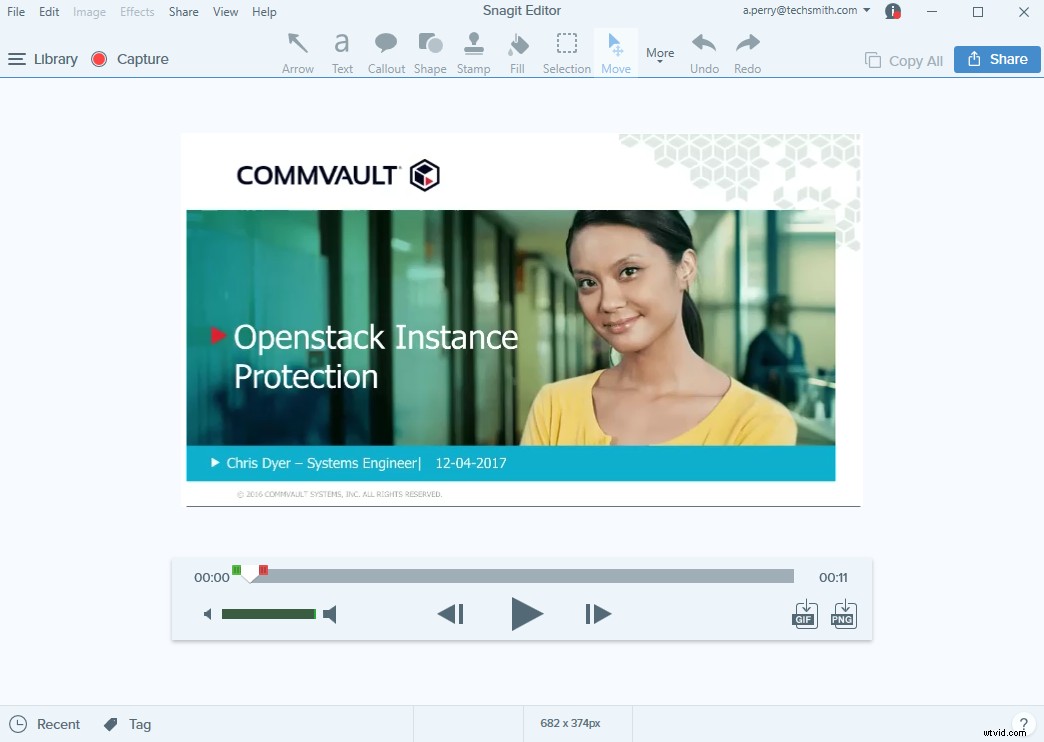
When you end your recording, it will open in Snagit Editor.
Step 4. Edit and Save
From Snagit Editor, you can preview your entire video recording, cut out unwanted sections, and pull screenshots from the recording.
- To cut out unwanted sections, move the playhead to the beginning of section you want to remove, then move the red handle to the end of the unwanted section and click Cut.

- To save a frame from your video recording, move the playhead to the frame you want to capture, and then click the PNG button. The image will appear in your Recent Captures Tray.

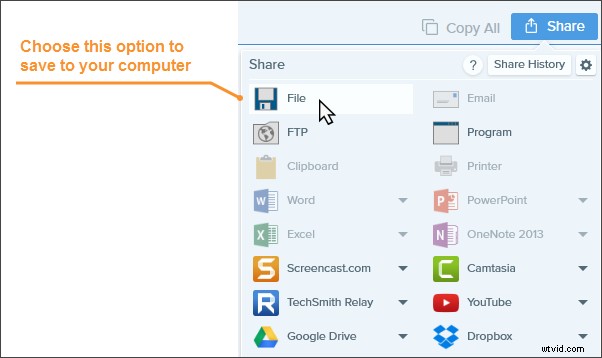
To save your webinar recording, click Share and then choose from popular social media and sharing destinations like YouTube, Dropbox, and Google Drive. To save your video files as MP4s to your computer, choose the Share to File option.
Final Tip
Recording your screen can reduce the performance of your computer. To reduce the possibility of screen lag or jumpy video, close applications you’re not using and consider lowering the resolution of your computer screen temporarily.
Recording webinars is just one helpful way to capture content from your screen. Here are some other ways to use screen capture and screen recording software as well.
- How to Capture Screen Images in Under a Minute
- 4 Kinds of Screenshots You Need to Start Using Immediately
- How to Record Live Streaming Video
- 3 Webinar Best Practices That Will Skyrocket Your ROI
Editor’s Note: This post was originally published in April 2017 and has since been updated for accuracy and comprehensiveness.