Let’s explore the pros and cons of creating the split diopter look in post and how to add imperfections to our shot for a more authentic look.
In this tutorial, we’re going to create the look of a split diopter entirely in post-production. This tutorial includes a free project file, so download it below, follow along, and try it yourself!
DOWNLOAD PROJECT FILES
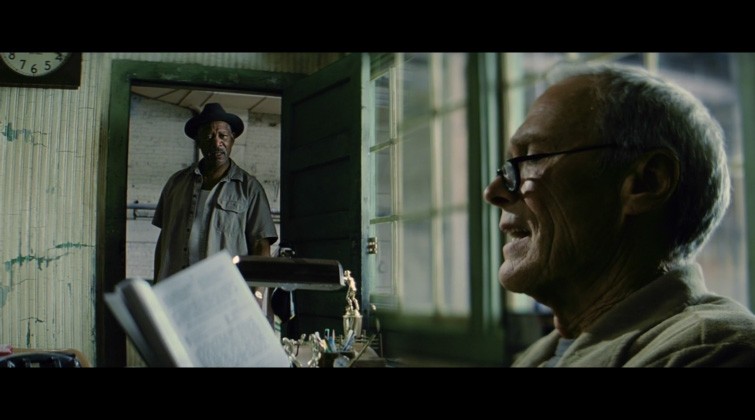
What Is a Split Diopter?
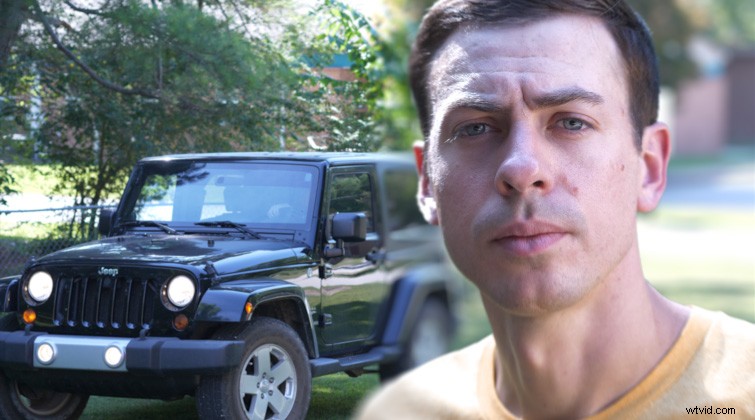
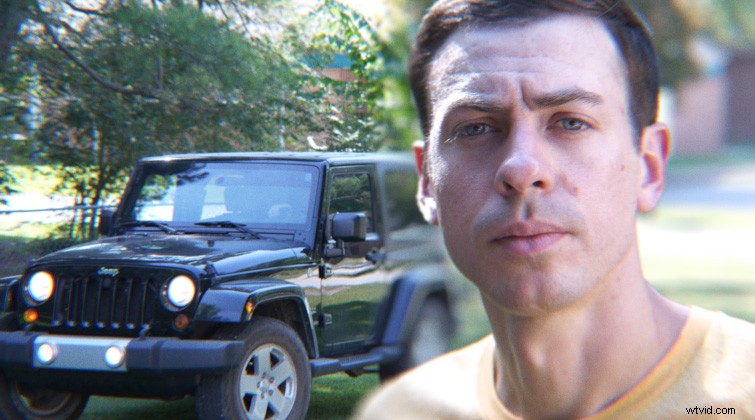
A split diopter (also referred to as a split-field diopter) is a glass element that attaches to the front of a camera lens and allows you to have two different areas of your frame — foreground and background, for example — in focus at the same time.
Pros and Cons of Creating the Look in Post
The premise of this tutorial is to recreate the look of a split diopter as authentically as possible. If you have the ability to film with a split diopter on location, that will certainly be a faster option. However, by doing the effect in post, we’re going to give ourselves more leeway and options with the final edit. We’re approaching the shot in a similar way that a director like David Fincher might, with techniques often deemed “invisible VFX.”
How the Technique Works
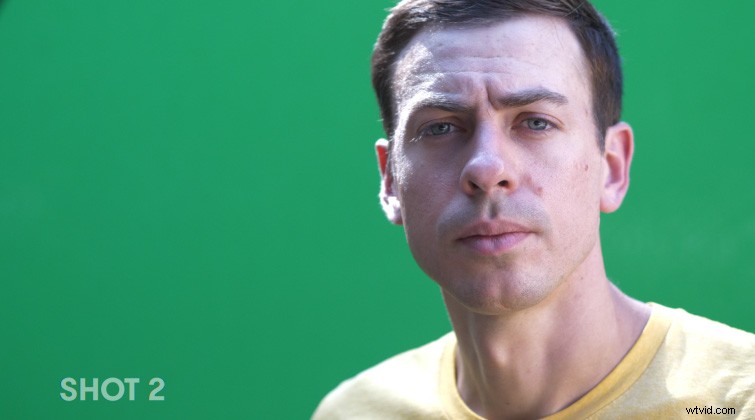
Because we aren’t using a real split diopter, we’ll need to film two different shots — one of each subject in focus. We’ll also need to film the closer subject on a green screen. This is what will allow us to isolate them in post-production. (I highly recommend using a pop-up green screen.) If you want the lighting to match better, film the subject on the green screen at the same location you film the background subject.
Combining the Two Shots Together
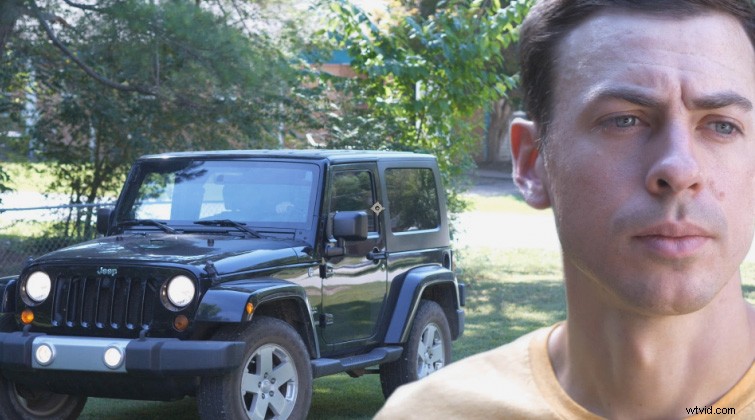
Now, in After Effects, key your green screen footage and add both shots into the same composition, with the closer subject above the background footage. This gives the impression of a deep focus shot. We’ll need to add some shallow depth of field to better emulate the look of a split diopter. (Check out this article for tips for keying green screen footage in After Effects.)
Adding Shallow Depth of Field
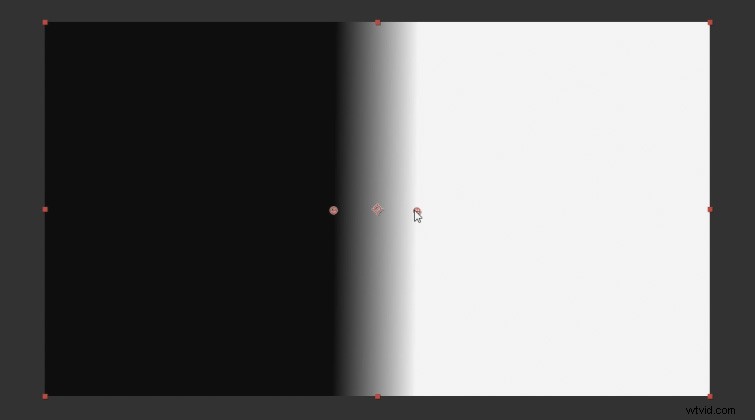
Next, we need to create a new Solid layer and apply the effect Gradient Ramp. Set one side to black and one side to white. This effectively acts like our lens split.
Now, apply the effect Camera Lens Blur to the background shot and set the Blur Radius to an amount that looks good. Then, set the Blur Map layer to the Solid with the Gradient Ramp effect applied to it. (Make sure you also set the Layer Source to Effects & Masks.)
Check on Repeat Edge Pixels to ensure there isn’t any unwanted fringing at the edges. Then, copy the Camera Lens Blur effect from the background shot and paste it on the close subject shot. Check on Invert Blur Map for the closer subject footage.
Adding Imperfections to the Look
Some subtle imperfections on our shot will continue to help sell an authentic look. I recommend adding a little bit of chromatic aberration to the footage. I used a free plugin from Plugin Everything called Quick Chromatic Aberration 2. Apply the effect to an Adjustment layer, then set the scale to 100.3 percent.
I also recommend applying some film grain. This will make the background bokeh look realistic. You can download some free film grain overlays from Shuttertstock. Add the film grain above everything in your composition and set the blending mode to Overlay.
Interested in the royalty-free tracks we used to make this video? Give them another listen:
- “True Encounters” by Cymatix
- “Lo Fi Waves” by Origami Pigeon
- “Rainy Days” by Cymatix
- “Summer Leaves” by Mattijs Muller