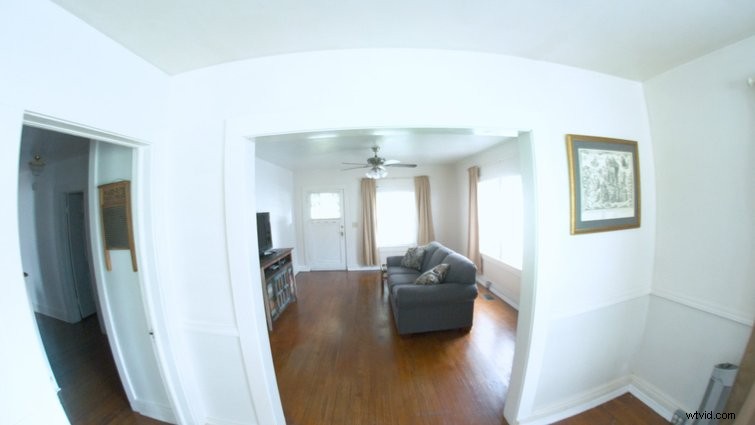
Get cleaner wide-angle footage! In this video tutorial, we take a look at Red Giant’s new Lens Distortion plugin for After Effects.
There are a few ways to correct lens distortion on wide-angle footage in After Effects, and Red Giant just introduced one more — the new Lens Distortion plugin.
In this tutorial, we’ll look at a couple of ways you can quickly and easily correct lens distortion in After Effects — both with and without Red Giant’s new plugin.
Let’s start by looking at the lens corrections we can do with features that come built into After Effects. This will help us break down the process of what’s actually happening with our footage. After that, we’ll compare the results to Red Giant’s Lens Distortion plugin. Let’s get started!
Miss anything? Keep reading to see everything we covered in the video.
Optics Compensation
The best built-in After Effects feature for correcting lens distortion is the Optics Compensation effect. (I use it all the time, as it’s also great for accenting motion graphics.) Optics Compensation is a simple “one-size-fits-all” effect that allows you to add or remove optical distortion from your footage.

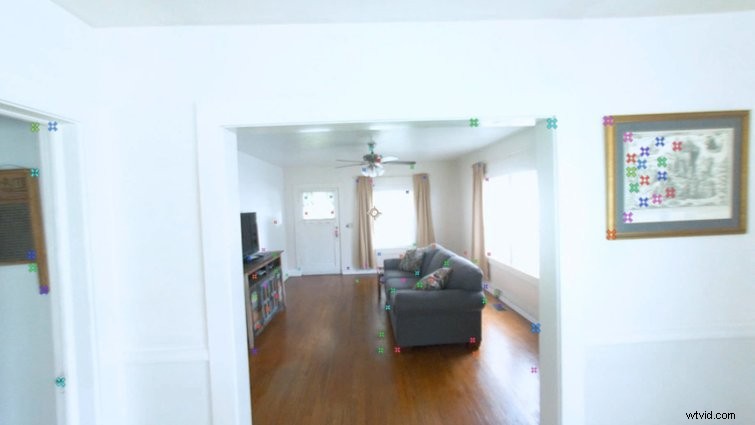
When you’re ready to begin removing distortion from your footage, start by checking the box next to Reverse Lens Distortion. After you remove the distortion, you can also camera track your footage, which will give you a better result than if you track the original distorted footage. To do this, pre-compose your footage with the Optics Compensation effect applied to it, then open the Tracker window panel and select Track Camera.
Reapplying distortion (and any other added scene elements) back onto you footage isn’t as intuitive with the Optics Compensation effect. For that, I highly recommend using Red Giant’s Lens Distortion plugin.
Red Giant Lens Distortion Plugin

Red Giant’s Lens Distortion plugin is designed to quickly fix distorted footage (from any lens type). This makes compositing elements into a scene much easier — and you can also revert everything back to its original distorted state.
When you apply the Lens Distortion effect to your footage, you’ll first trace out areas in the video that should be straight lines. (See the warped lines in the screenshot above.) After you’ve done this, click the Remove Distortion option.
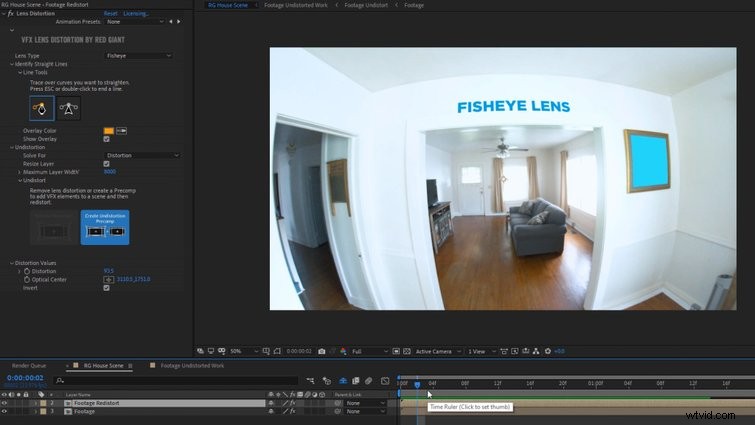
You also have the option to select Create Undistortion Precomp. This creates a precomp with a corrected guide-layer of your footage. This is ideal for compositing and camera tracking — any elements you add to the scene will automatically be distorted correctly and added on top of your original footage.
Conclusion
Ultimately, there are benefits to both Optics Compensation and the Lens Distortion plugin. You can’t go wrong with either one.
Optics Compensation is a built-in effect that’s been a staple for years. If you just need to correct distorted footage, it’s more than adequate. However, if you need to camera track and composite VFX onto wide-angle footage, Red Giant’s Lens Distortion plugin is the way to go.
Here are a few more handy resources (and awesome freebies) related to After Effects and plugins.
- Top 10 Paid and Free Scripts and Plugins for After Effects
- Hardware Accelerated Encoding Coming to Premiere and After Effects
- 10 After Effects Plugins Every Motion Designer Should Have
- Take a Look at gridRig, a Plugin from Ordinary Folk
- 9 FREE After Effects Templates
Interested in the royalty-free tracks we used to make this video? Give them another listen:
- “Lo-Fi Dreams” by Trending Music
- “Lo Fi Abstract Chillhop” by Trending Music
- “Rain Rain Go Away” by Cosmo
- “Bushido Belief” by Tonemassif
- “Ocean Tranquility” by Cymatix