
July 14, 2025 • Proven solutions
If you want to rip and burn CDs using Windows Media Player, follow these clear, step‑by‑step instructions.
1. Rip a CD with Windows Media Player
Quick Rip vs. Normal Rip
For first‑time users, Quick Rip is the fastest option. It automatically starts when you insert a CD and creates a WMA file that saves directly to your Music folder. Normal Rip lets you customize format, bit rate, and destination.
Step 1 – Quick Rip
Insert the CD. In the AutoPlay menu, select Rip Music from CD – using Windows Media Player. Uncheck Always do this for audio CDs if you want to be prompted next time. Click Start Rip. The file will be saved as WMA.
Step 2 – Normal Rip
Launch Windows Media Player manually and insert the CD (do not use AutoPlay). Go to the Rip tab, choose Formats, and select either WAV or MP3. Both are lossless; higher bit rates yield better quality but larger files.
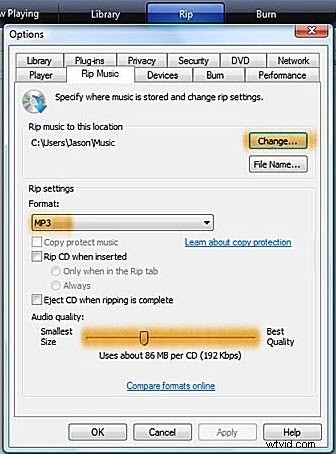
Step 3 – Advanced Options
Click More Options to choose a custom destination, format, and bit rate. After setting your preferences, press OK.
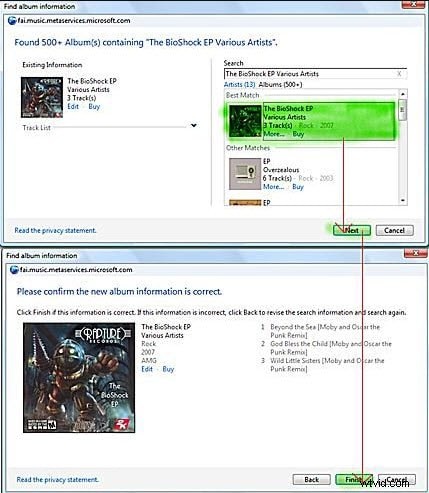
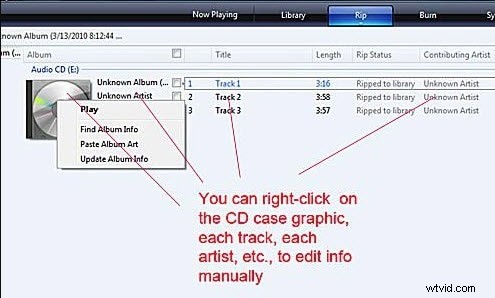
Step 4 – Update Album and Track Information
Right‑click the CD icon and select Find Album Info. Follow the wizard to download metadata and cover art.
Step 5 – After Ripping
Once the CD is ripped, Windows Media Player will display “Ripped to Library” next to each track. You can now play, edit, or transfer the files to other devices.
2. Burn a CD with Windows Media Player
Step 1 – Prepare Your Tracks
- Insert the CD you wish to rip, then click Rip CD in the top left. The CD’s content will be copied to your computer.
- To mix tracks from multiple CDs, create a playlist: click Create Playlist, name it, and drag the desired songs into the list.
- For online sources, download MP3s (e.g., from YouTube via a converter) and add them to your playlist.
Step 2 – Insert a Blank CD
Place a blank CD into the drive. Windows Media Player will recognize it as empty and ready for burning.
Step 3 – Locate the Burn Tab
Click the Burn tab in the top right corner. No tracks are shown yet; the CD appears empty.
Step 4 – Add Tracks to Burn
Drag your playlist or selected album onto the Burn tab. The list of songs will populate.
Step 5 – Configure Burn Settings
Click the burn options button on the right. Here you can set track gaps, burn speed, and audio quality.
Step 6 – Start Burning
Press the Start button. A progress window will appear, and the CD will be written.
Step 7 – Completion
When the process finishes, Windows Media Player will eject the CD automatically.
Ollie Mattison
Ollie Mattison is a writer and a lover of all things video.
Follow @Ollie Mattison