OBS Studio is open-source video recording and streaming software with users worldwide. It lets users capture real-time videos, record audio, and encode and broadcast content. It can record your screen, specific windows, apps, and games or capture your webcam footage.
Besides recording various sources and allowing different input customization options, OBS Studio lets users change how they record their footage. In other words, you can modify OBS camera background settings to get more professional videos.
Many professionals want to make themselves the focal point of the videos and want to blur, change, or remove the background. Let's see how to do it in OBS Studio.
Table of Content
-
- Remove and Change OBS Webcam Video Background in Filmora
- Blur the OBS Webcam Video Background in Filmora
How To Remove the Camera Background in OBS Studio
OBS has many plugins and configurations. Even though it can remove the background without plugins, the process is more complicated and doesn't deliver the best results. That's why we'll show you the method with the background removal plugin.
Here are the steps:
- Go to the OBS Studio forum and click Download for all OSs.

- Scroll down until you see the Assets section. Find and click the required plugin for your OS to download it to your computer.

- Extract the downloaded ZIP file and copy all the contents to your OBS Studio folder.

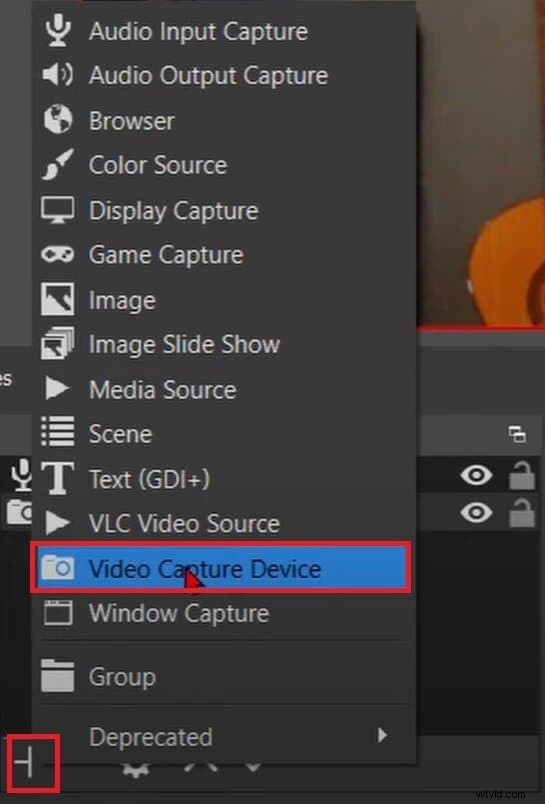
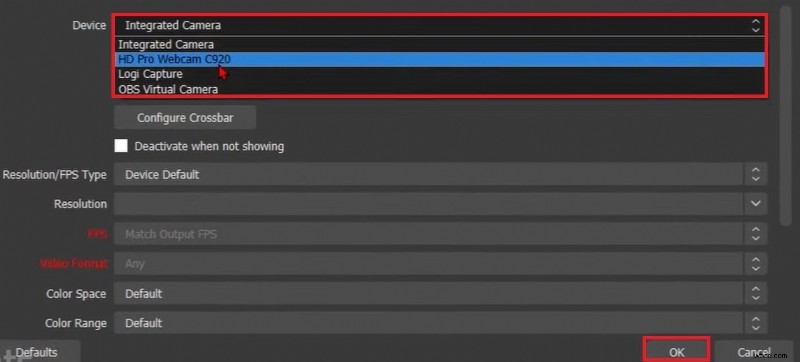
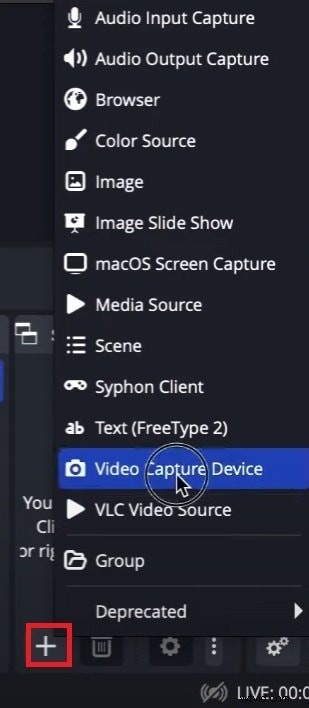
- Open OBS Studio. Click the Plus button in the Sources section and select Video Capture Device.
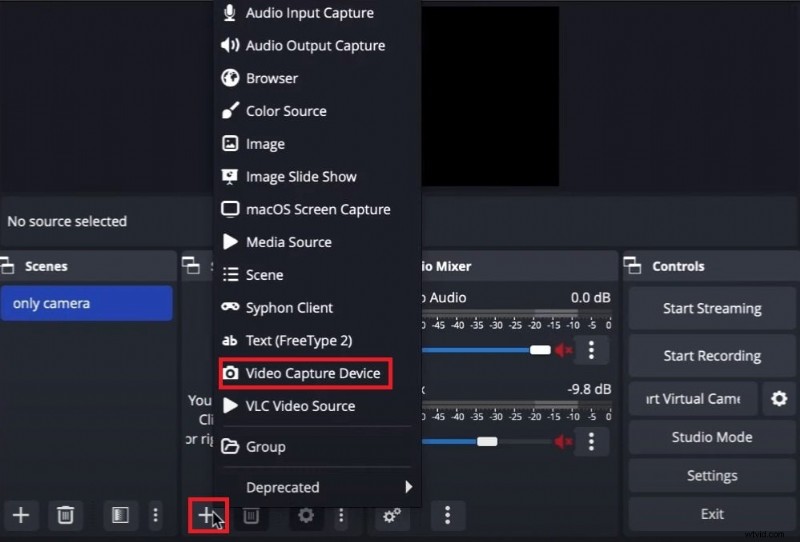
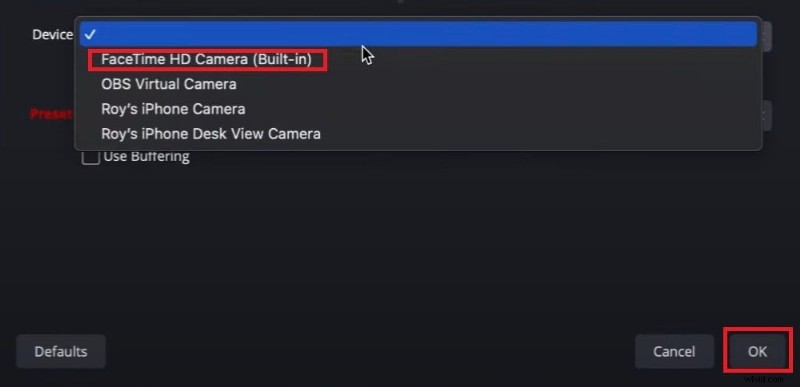
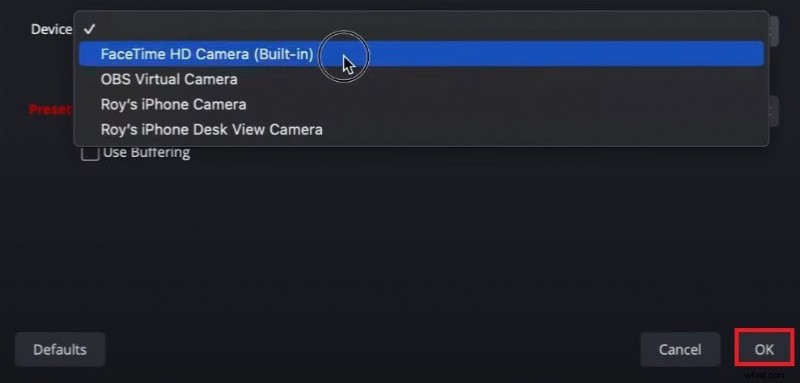
- Click the Device drop-down list, select your webcam, and click OK.
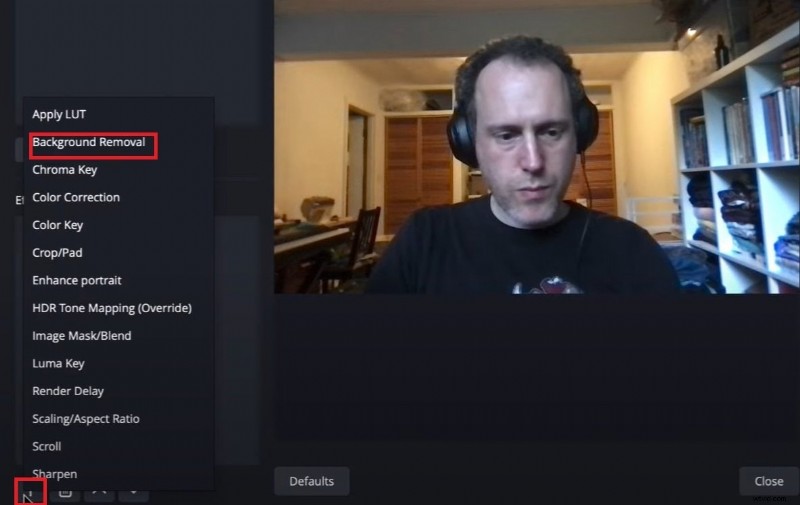
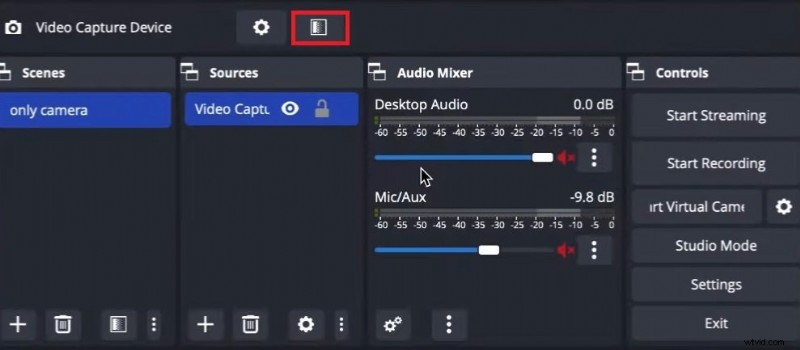
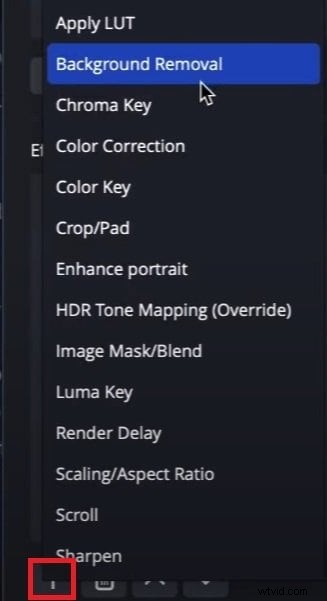
- Click the Effect Filters icon.

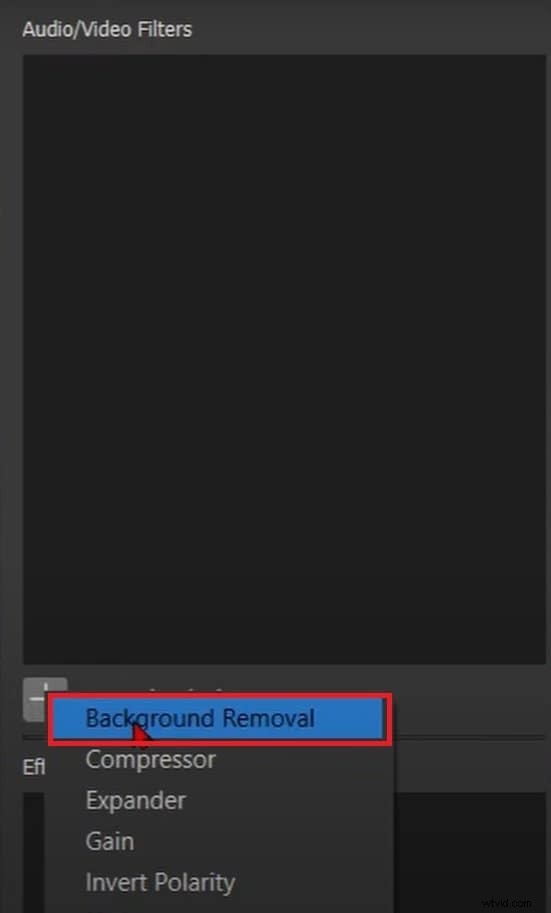
- Click the Plus button and select Background Removal.
How To Change the OBS Camera Background
This method also requires a plugin to remove the background in OBS Studio. Follow the steps above to install the plugin, then do the following to change the OBS camera background:
- Start OBS Studio after installing the plugin.
- Hit the Plus button under Sources and click Video Capture Device.
- Select your webcam in the Device drop-down list and click OK.
- Right-click your camera in the Sources dock and click Filters.
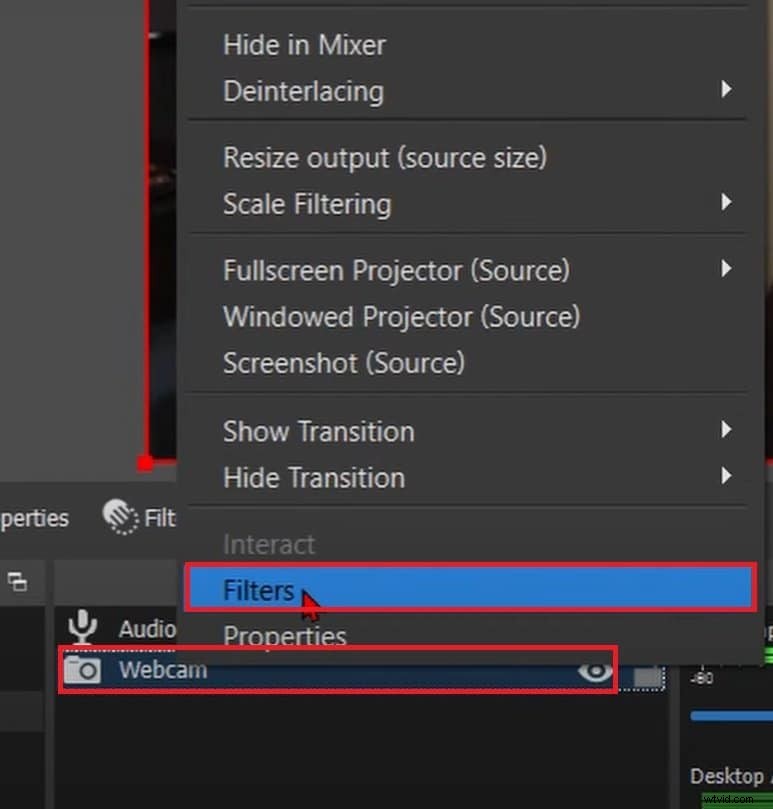
- Click the Plus button under Audio/Video Filters and select Background Removal.
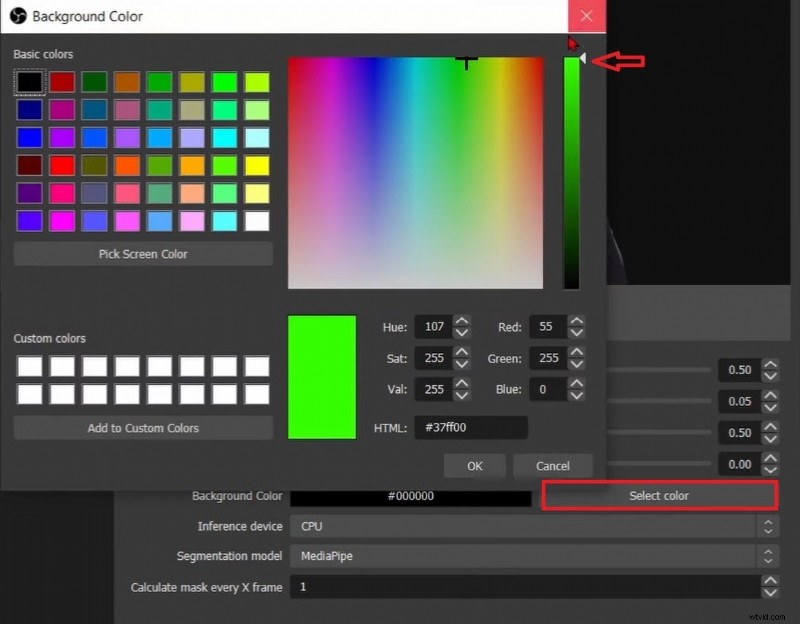
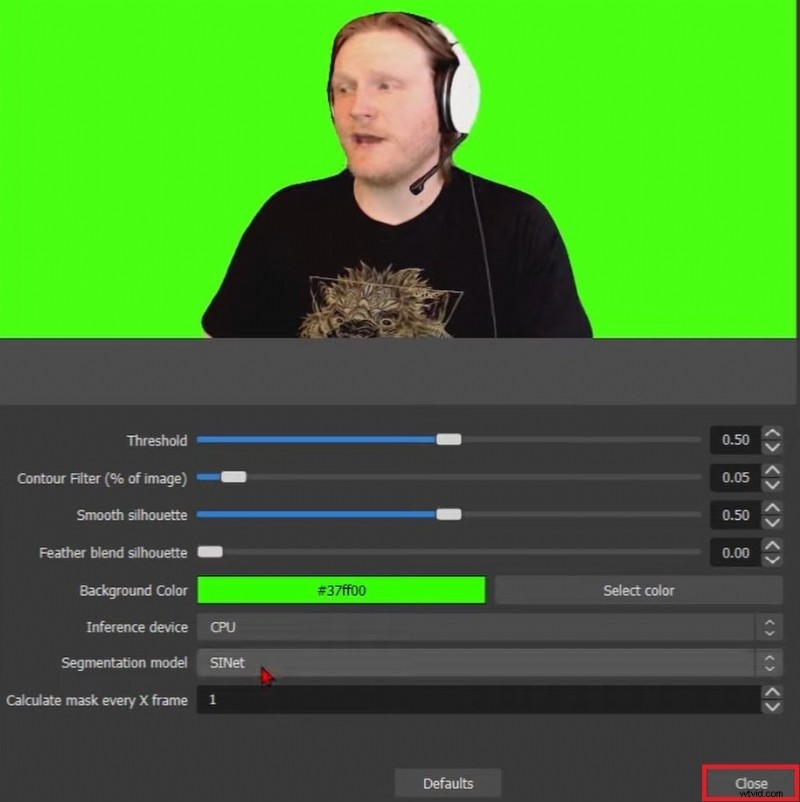
- Click Select Color, choose a bright green hue, and click OK.
- Click Close to return to the main interface.
- Hit the Plus button under Sources and click Image.
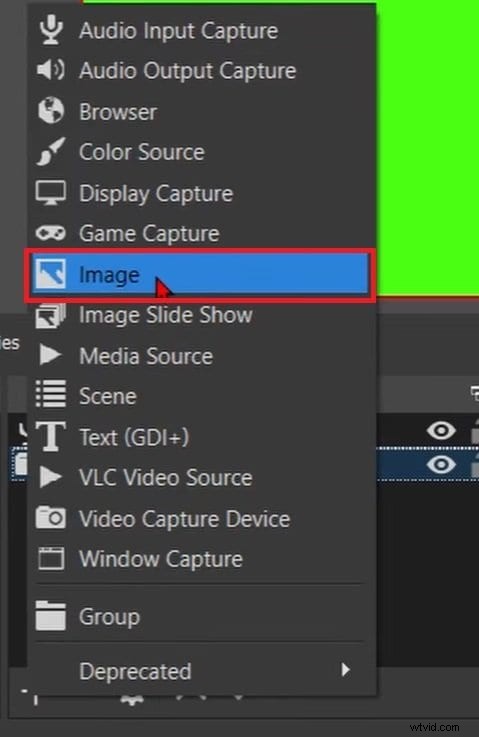
- Click Browse and select a picture to use as a background.
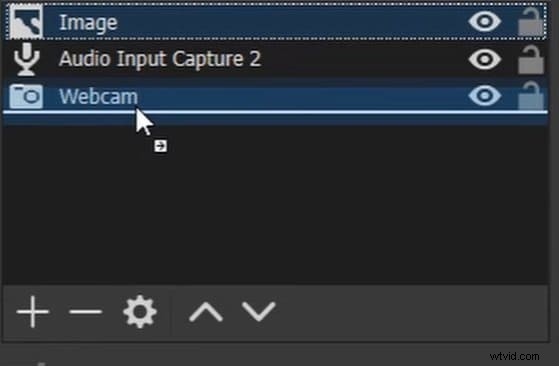
- Click the image under Sources and drag it to the bottom of the list.
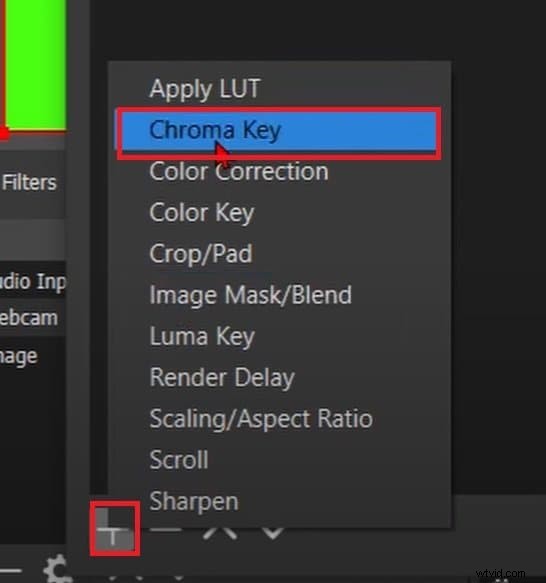
- Right-click your webcam under Sources and click Filters.
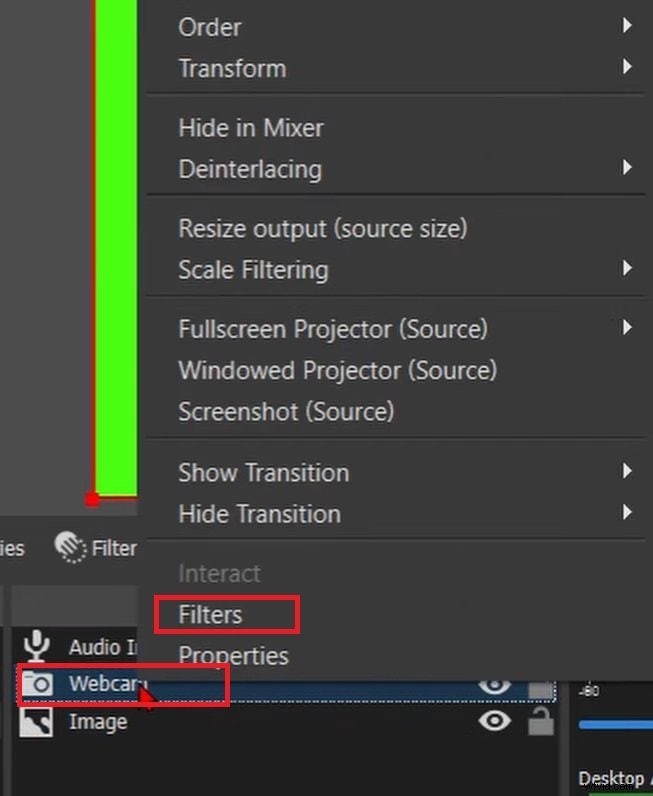
- Click the Plus button under Effect Filters and click the Chroma Key.
How To Blur the OBS Camera Background
You can change your background in OBS Studio without plugins, but that requires much time and effort. You can also use the background removal plugin we've covered in the first step to simplify the process. Before changing your background, follow the download and installation steps.
Once you do, follow these steps to change the OBS camera background:
- Launch your OBS Studio.
- Hit the Plus button underneath the Sources dock and click Video Capture Device.
- Expand the Device drop-down list, select your webcam, and click OK.
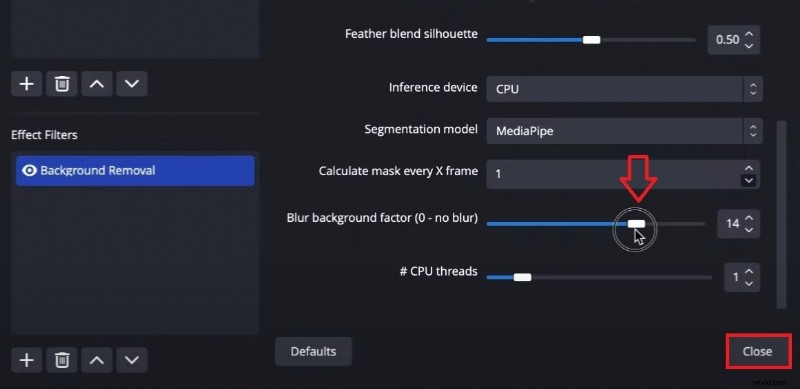
- Click the Effect Filters icon.
- Click the Plus button and then Background Removal.
- Scroll through the parameters and models section, locate the Blur Background Factor, and move the slider to the right to adjust the amount. Click Close.
OBS Background Camera Settings: Advantages and Limitations
OBS Studio isn't a perfect recording and editing tool for your videos. Here are some upsides and downsides to consider.
Pros- OBS Studio is efficient and lightweight and provides quality real-time video capture with audio with excellent performance.
- It offers advanced features like transitions, filters, and scene composition, letting you capture multiple sources.
- It also has various plugins that extend its functionalities for improved recording and streaming.
- OBS Studio has many recording and streaming capabilities and integrates with platforms like Facebook, YouTube, and Twitch.
- OBS Studio can be overwhelming for beginners. It has a complex interface and many features that require knowledge and experience.
- When using multiple recording settings and plugins, OBS Studio can cause performance issues and become resource-intensive.
- It lacks built-in features for configuring camera recording settings, so users must find different versions and plugins for advanced configuration.
An OBS Alternative to Consider - Wondershare Filmora
Wondershare Filmora is a modern video editing platform with recording capabilities. It lets you quickly edit and record videos with fantastic results while enjoying a simple, automated workflow. It has many AI editing capabilities, including video enhancement, green screen, AI Portrait Cutout, blur effects, etc.
Even though Filmora isn't free, it's affordable software with the best possible technologies, and you can rely on consistent results. It is ideal if you want an out-of-the-box solution that gives exceptional results.
Here's how to use it to remove, change, and blur the background of a camera video.
How To Remove and Change OBS Webcam Video Background in Filmora
Here's how to remove a video background in the OBS Studio alternative:
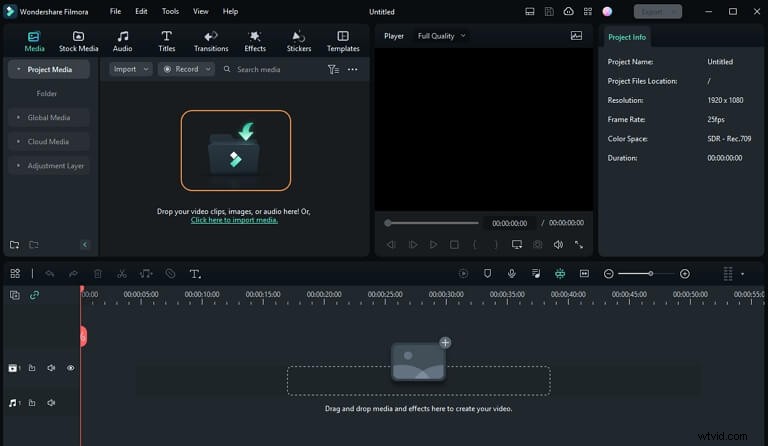
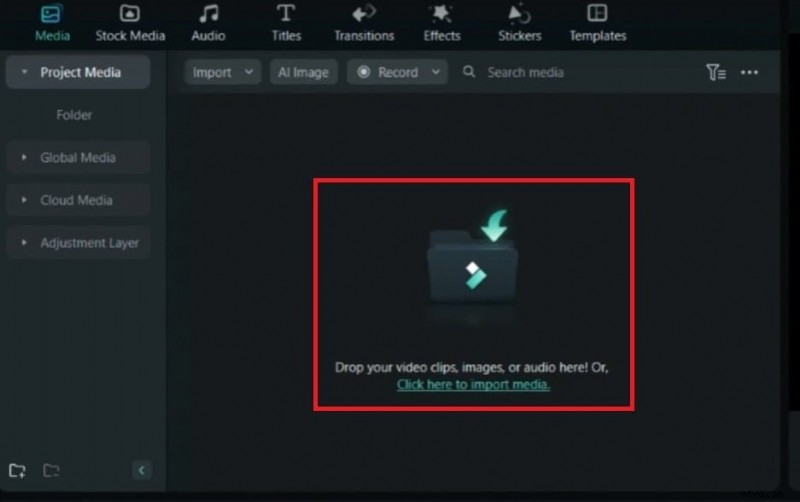
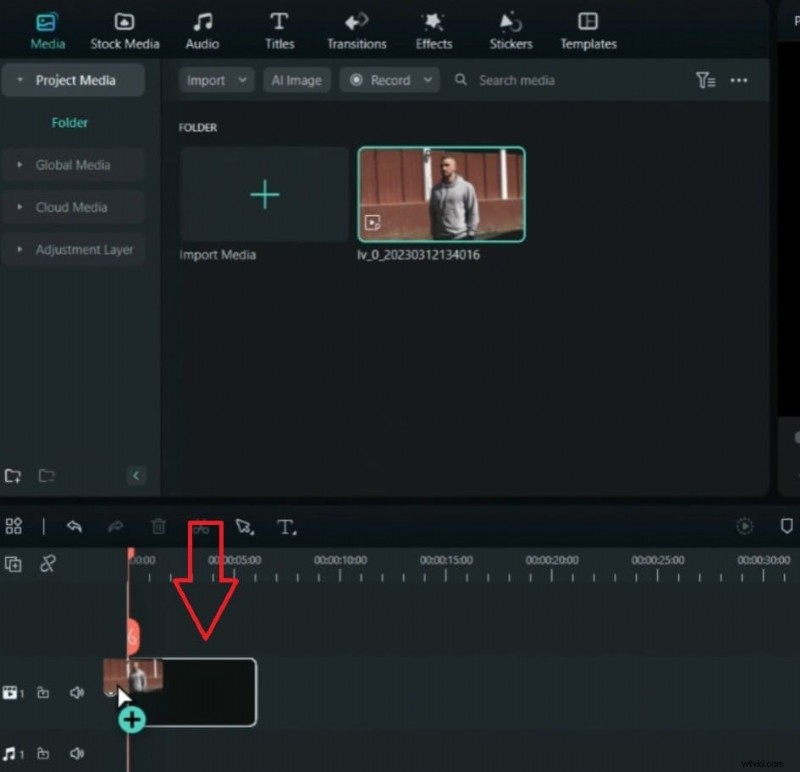
- Launch Wondershare Filmora and click New Project. Choose a video from your computer or the cloud. After adding the video, drag and drop it onto the timeline.
- Double-click the video on the timeline and click AI Portrait Cutout under AI Matting in the Properties panel. It will automatically remove the video background and let you add a new one.

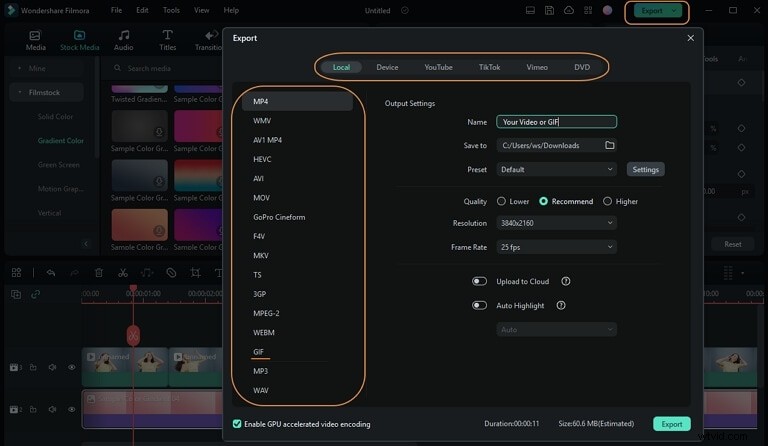
- Click Export in the upper-right corner, select the format and other configurations, and click Export in the bottom-right corner.
How To Blur the OBS Webcam Video Background in Filmora
Here's how to blur an OBS camera video background in Filmora:
- Launch Filmora and click New Project.
- Click the Upload icon and import the video you want to edit.
- Drag and drop the video onto the timeline.
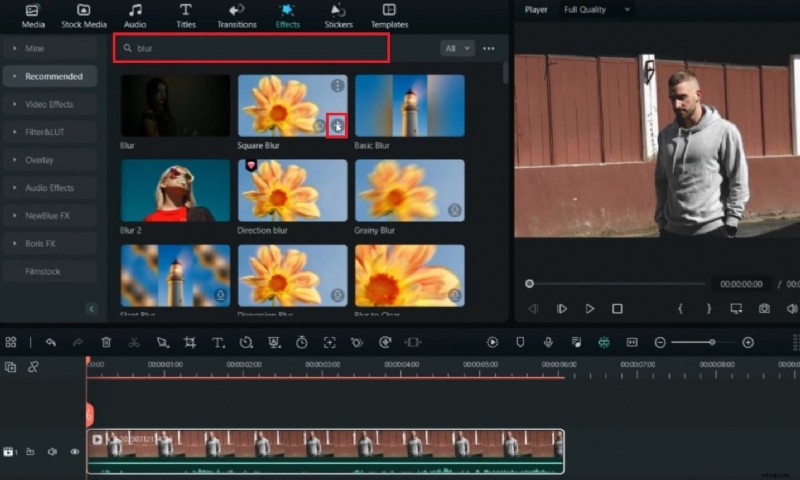
- Click to select the video on the timeline, go to Effects, search for "blur," and click the Plus button on the desired option.
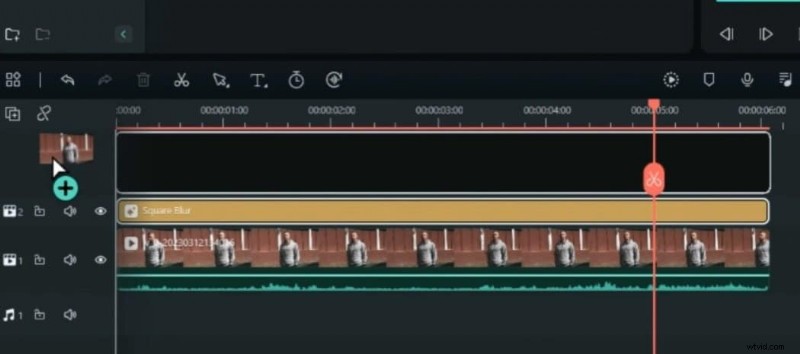
- Click and drag the effect to extend it over the entire video length.

- Drag and drop the same video on the timeline again.
- Click the video on the timeline to select it, go to Video > AI Tools in the Properties panel, enable the Smart Cutout, and click the icon below.
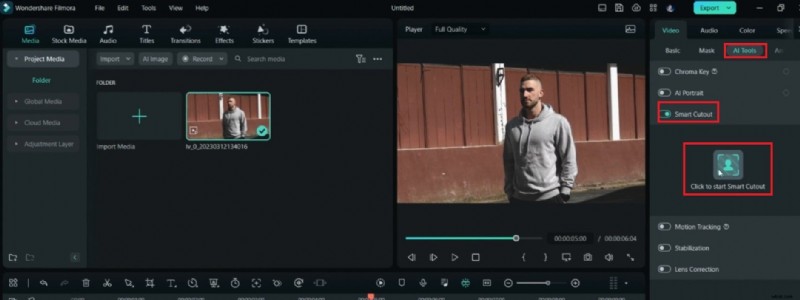
- Draw a line over the person in the video, click the Forward Arrow on the right, adjust the cutout settings, and click Save.

- Now, you will see the video with a blurred background and clear human subject.
OBS vs. Filmora: Quick Comparison for Background Effects
Choosing the right tool for webcam background effects can significantly impact your workflow and video quality. Here's a focused look at how OBS Studio and Filmora compare:
| Feature | OBS Studio | Wondershare Filmora |
|---|---|---|
| Ease of Use (Background Effects) | Complex setup, often plugin-dependent, steeper learning curve. | User-friendly, AI-powered for quick, automated results. |
| Green Screen Needed? | Often required; virtual green screen relies on specific plugins. | Not required for AI Portrait Cutout/Smart Cutout features. |
| Performance & Resources | Can be resource-intensive, potential for slowdowns with plugins. | Optimized, generally smooth performance even with AI effects. |
| Core Functionality | Primarily a robust streaming/recording tool; background effects are add-ons. | Comprehensive video editor with integrated AI background features. |
Conclusion
We hope this post has helped you learn to adjust OBS camera background settings to record more professional videos. However, although OBS Studio is an excellent open-source solution, it isn't user-friendly. Therefore, consider alternatives like Wondershare Filmora if you want something simple that delivers fantastic results. Follow the steps we've shared because they guarantee success.