Did you know that your iPhone and iPad can read Safari content displayed on the screen out loud? This is a feature that could prove to be quite useful if you’re busy focusing on something else, you want an article or webpage read to you, or for accessibility purposes.
Speak Screen is one of the many accessibility features that iOS and iPadOS has to offer. Unlike VoiceOver, a feature primarily used by people with visual impairment, Speak Screen gives iPhone and iPad users complete control over when it is activated. You could get Speak Screen to speak content anywhere on your iOS or iPadOS device. As a result, this could be used to listen to emails, web content, notes, ebooks, and more. Of course we’re going to be focusing on webpages here, but
Interested in taking advantage of this accessibility feature on your device? Let’s learn how to use Speak Screen on both the iPhone and iPad.
How to Use Speak Screen with Safari on iPhone & iPad
Speak Screen has been available on iOS and iPadOS devices for quite some time now, so your device doesn’t need to be on the latest version of the operating system. Enabling this feature is a pretty straightforward procedure. Simply follow the steps below to get started.
- Head over to “Settings” on your iPhone or iPad.

- In the Settings menu, scroll down and tap on “Accessibility”.

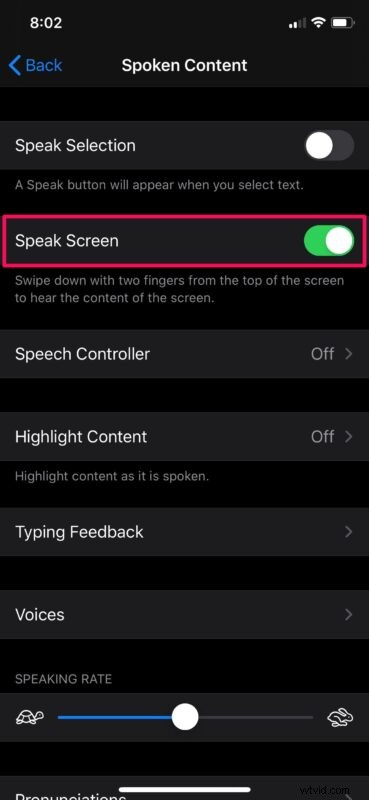
- Here, under the “Vision” category, tap on “Spoken Content” as shown in the screenshot below.

- Now, use the toggle to enable “Speak Screen” on your device.
- Next, open the content that you want your device to read out loud.
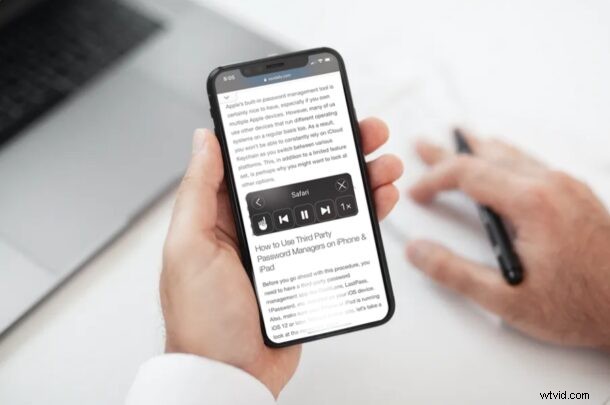
- Head over to Safari and load a webpage or article, like the one you’re reading right now for example
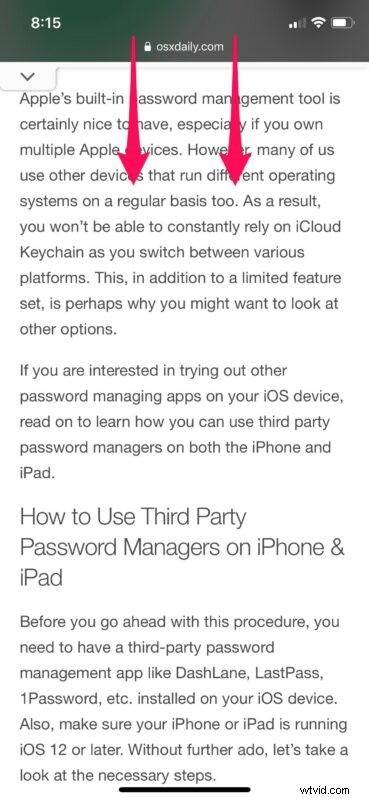
- Now, swipe down from the top of the screen with two fingers to start using Speak Screen.
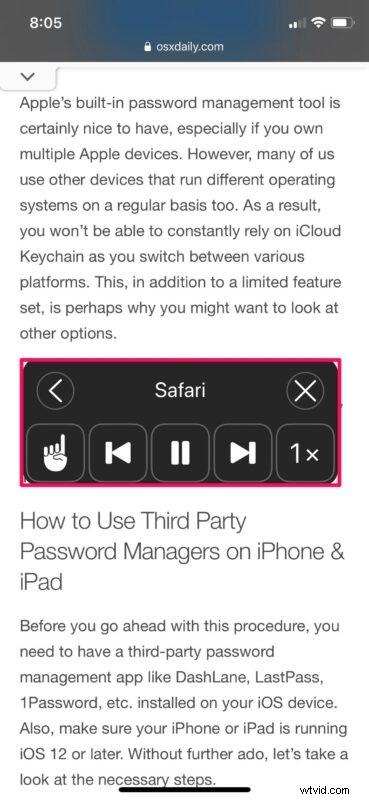
- You should be able to view the “Speech Controller” as soon as your device starts speaking. You can use this controller to pause, fast forward, rewind, or even adjust the playback speed of the speech.
There you, Safari on iPhone or iPad will speak aloud the content on the screen.
It’s worth keeping in mind that exiting the app or the content that’s displayed on the screen will automatically end the speech. Therefore, you won’t be able to access any other apps while your device is speaking content on a specific screen.
This feature could prove to be extremely useful not only if you have less than perfect eyesight, but also if you’re a multitasker. Let’s say you’re busy doing something on your computer, but you want to listen to an ebook or maybe even read one of our articles. You could simply open a page and use Speak Screen to read it out loud while you’re at it.
Once you have this feature enabled, you can make it even easier to access and implement by asking Siri to read the screen for you anytime you’re on a webpage, or doing anything else.
If you liked using Speak Screen on your iPhone or iPad, you might be interested in trying out Speak Selection too. It works in a pretty similar way, except for the fact that it just reads the text content you select. This could be used to check the pronunciation of certain words that you’re not familiar with, without having to look it up on YouTube.
In addition to this, iOS and iPadOS has several other accessibility features that can help people with visual or hearing impairment like VoiceOver, Display Accommodations, closed captioning, Live Listen, etc. For example, with the Live Listen feature, you can sort of use your AirPods as hearing aids.
We hope you were able to take advantage of Speak Screen to read content out loud while you’re multitasking. What content do you mostly read using this feature? Have you tried asking Siri to read the screen for you? Make sure to drop your valuable opinions and experience in the comments section down below.